Last updated on September 1, 2025
Overview of MFA for Fortinet FortiMail
Supported Authentication Methods
Before You Start Configuring MFA for Fortinet FortiMail using RADIUS
Required Components
Create an Application in the Rublon Admin Console
Install Rublon Authenticator
Configuring Multi-Factor Authentication (MFA) for Fortinet FortiMail using RADIUS
Rublon Authentication Proxy
Edit the Rublon Auth Proxy configuration file and paste the previously copied values of System Token and Secret Key in system_token and secret_key, respectively.
2. In RADIUS proxy server settings, set force_message_authenticator to false. (This is because Fortinet FortiMail currently does not validate the Message-Authenticator attribute in RADIUS responses.)
3. Config example file in YAML:
log:
  debug: true

rublon:
  api_server: https://core.rublon.net
  system_token: YOURSYSTEMTOKEN
  secret_key: YOURSECRETKEY

proxy_servers:
- name: RADIUS-Proxy
  type: RADIUS
  radius_secret: YOURRADIUSSECRET
  ip: 0.0.0.0
  port: 1812
  mode: standard
  auth_source: RADIUS_SOURCE_1
  auth_method: push, email
  rublon_section: rublon
  force_message_authenticator: false

auth_sources:
- name: RADIUS_SOURCE_1
  type: RADIUS
  ip: 192.0.2.10
  port: 1812
  radius_secret: YOURRADIUSSECRET
  timeout: 10
  retries: 3
FortiMail
Creating a RADIUS Profile
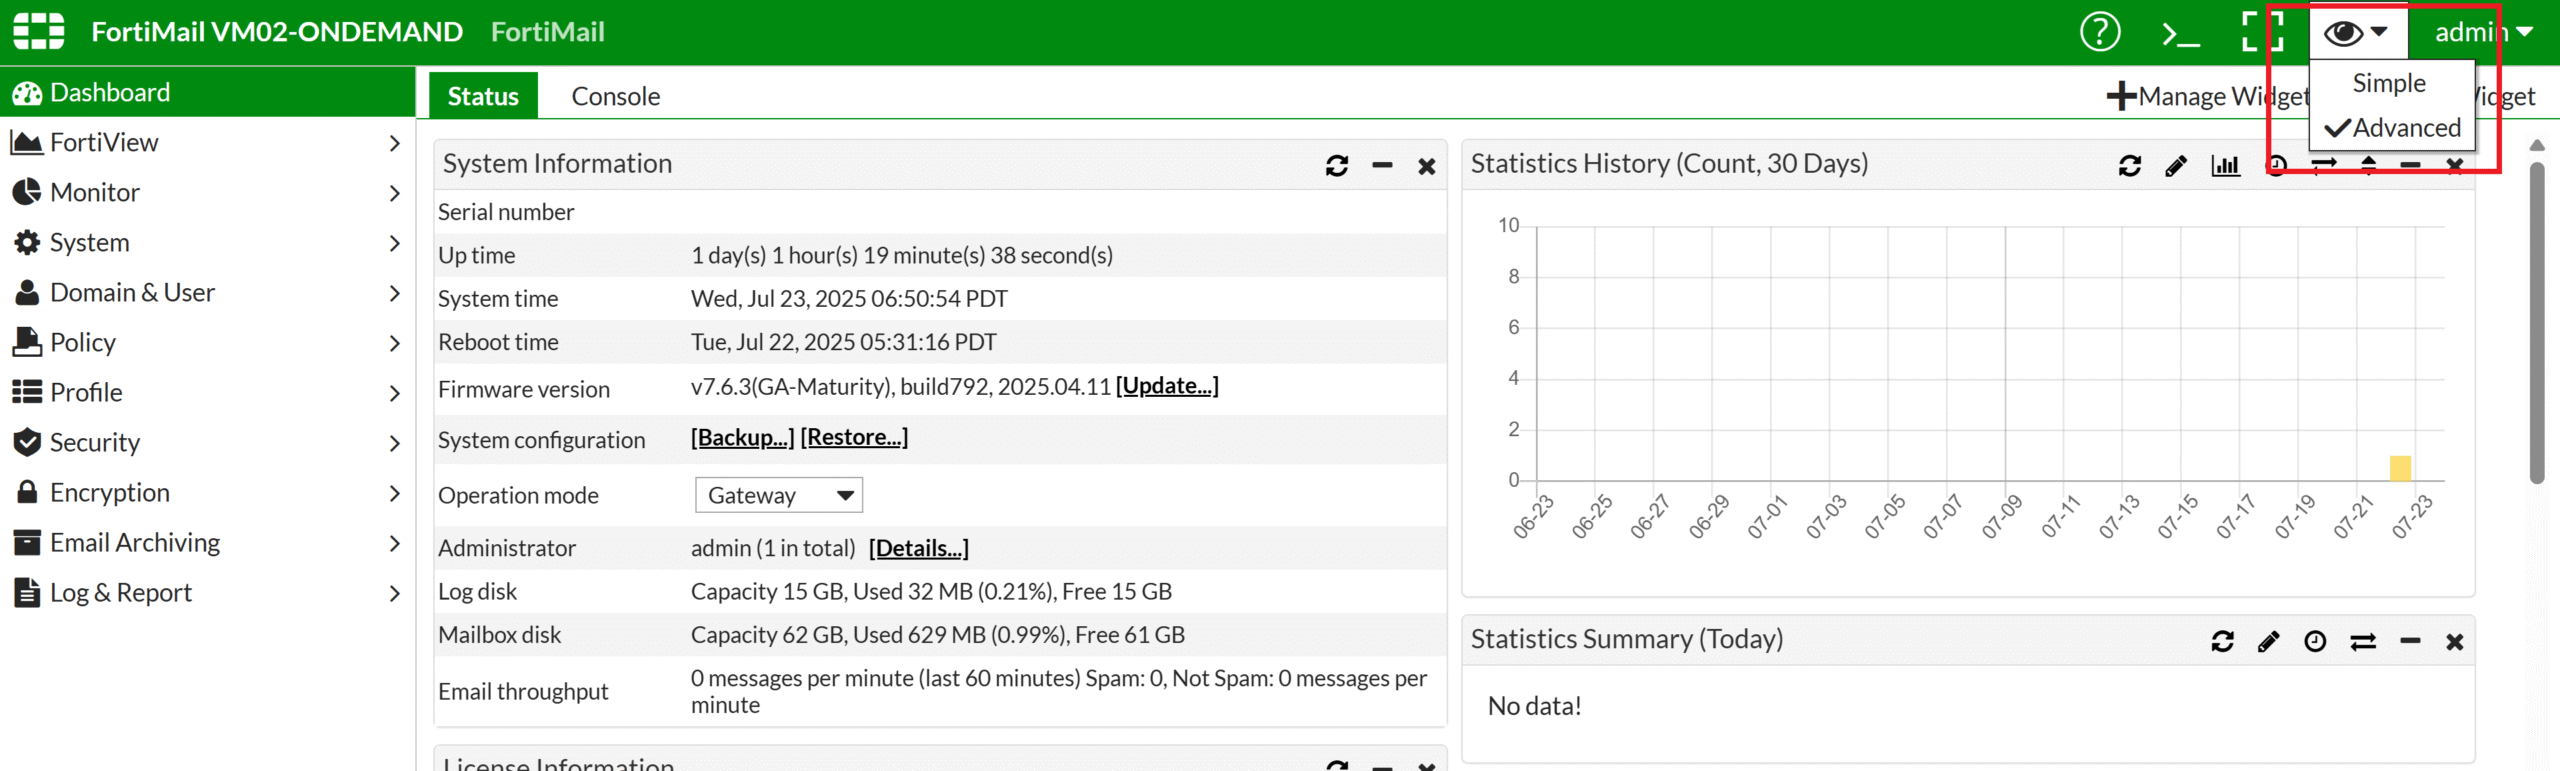
1. Log in to the FortiMail admin panel.
2. Select View (eye icon) in the upper-right corner and change it from Simple to Advanced.
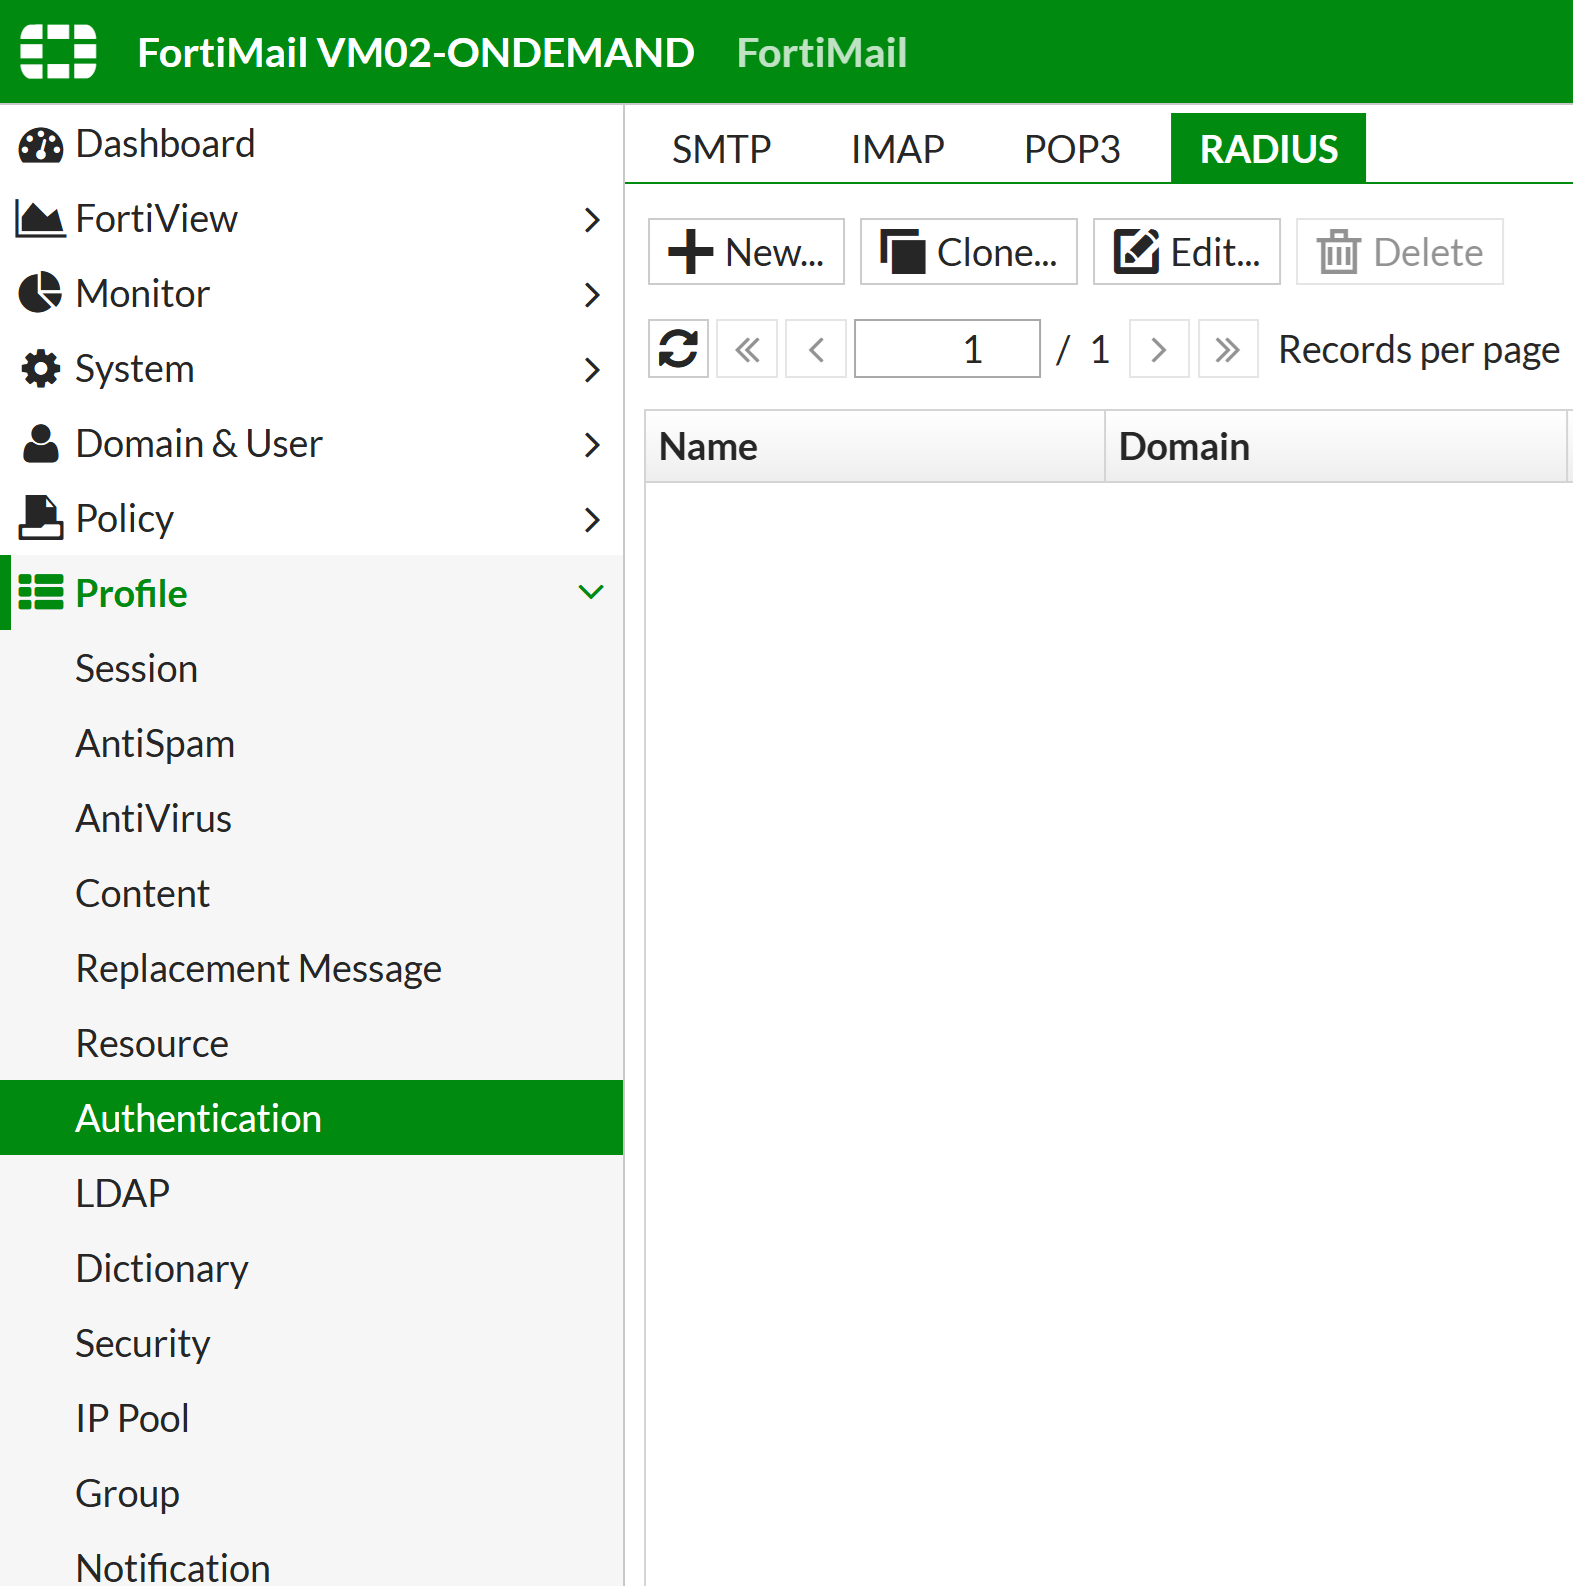
3. Go to Profile → Authentication → RADIUS and select New….
4. Fill in information about a new RADIUS Server and select Create to create the server. Refer to the following image and table. Keep the default values of options not listed in the table.
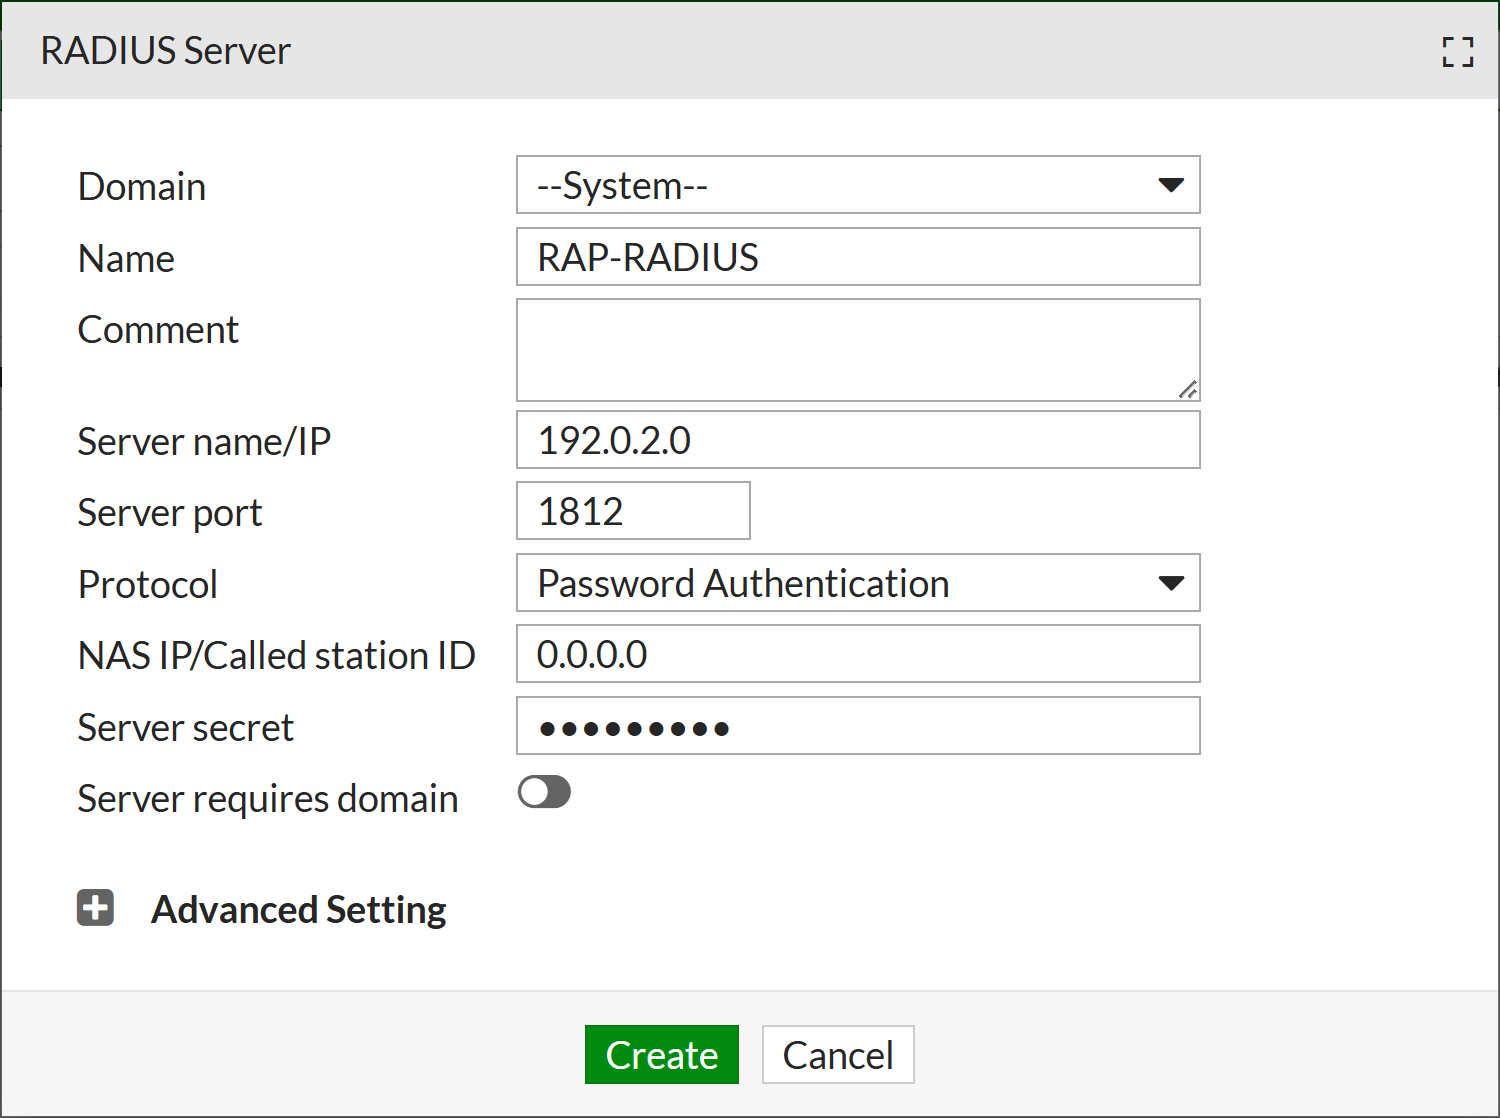
| Name | An easily recognizable name for your RADIUS server. |
| Server name/IP | The IP Address of the Rublon Auth Proxy. |
| Server port | 1812 (Default for RADIUS) |
| Protocol | Password Authentication |
| NAS IP/Called station ID | 0.0.0.0 |
| Server secret | The RADIUS Secret shared between Rublon Auth Proxy and Fortinet FortiMail (the same you set in Rublon Auth Proxy’s config file’s radius_secret) |
Enabling MFA for Administrators
1. Go to System → Administrator → Administrator and select New… (or double-click an existing admin to edit).
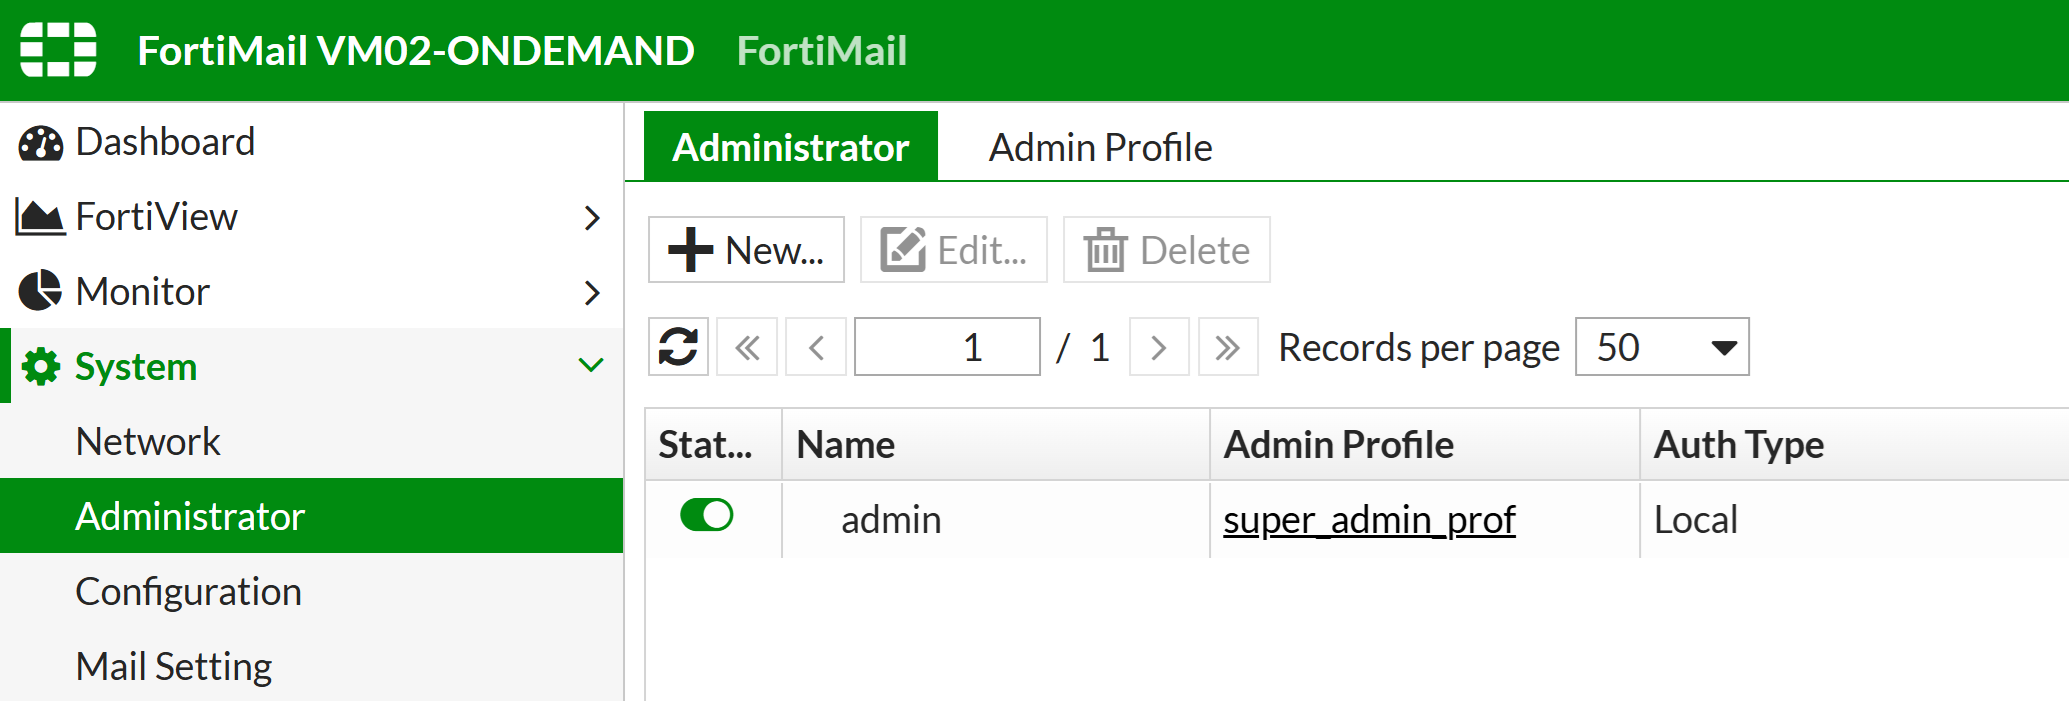
2. Fill in information about a new administrator and select Create to add that admin (or OK to edit an existing admin). Refer to the following image and table. Keep the default values of options not listed in the table.
| Administrator | Enter a name for the administrator. Make sure this name is the same as the name in the Identity Provider (IdP). |
| Authentication type | RADIUS |
| RADIUS profile | The profile you have previously created. |
Enabling MFA for Users
If you are using FortiMail in Server mode, you should also enable multi-factor authentication for users accessing FortiMail.
1. Go to Domain & User → Domain and select New… (or double-click an existing domain to edit).
2. Enter the Domain name if you are creating a domain.
3. In User profile, select the RADIUS profile you have previously created.
4. Select Create or OK to save changes.
Adjusting Timeout
The default authentication timeout is short, so you need to increase it to have more time to confirm the second factor from Rublon. This can be done via CLI Console using the following commands:
config system global
set remote-auth-timeout 60
end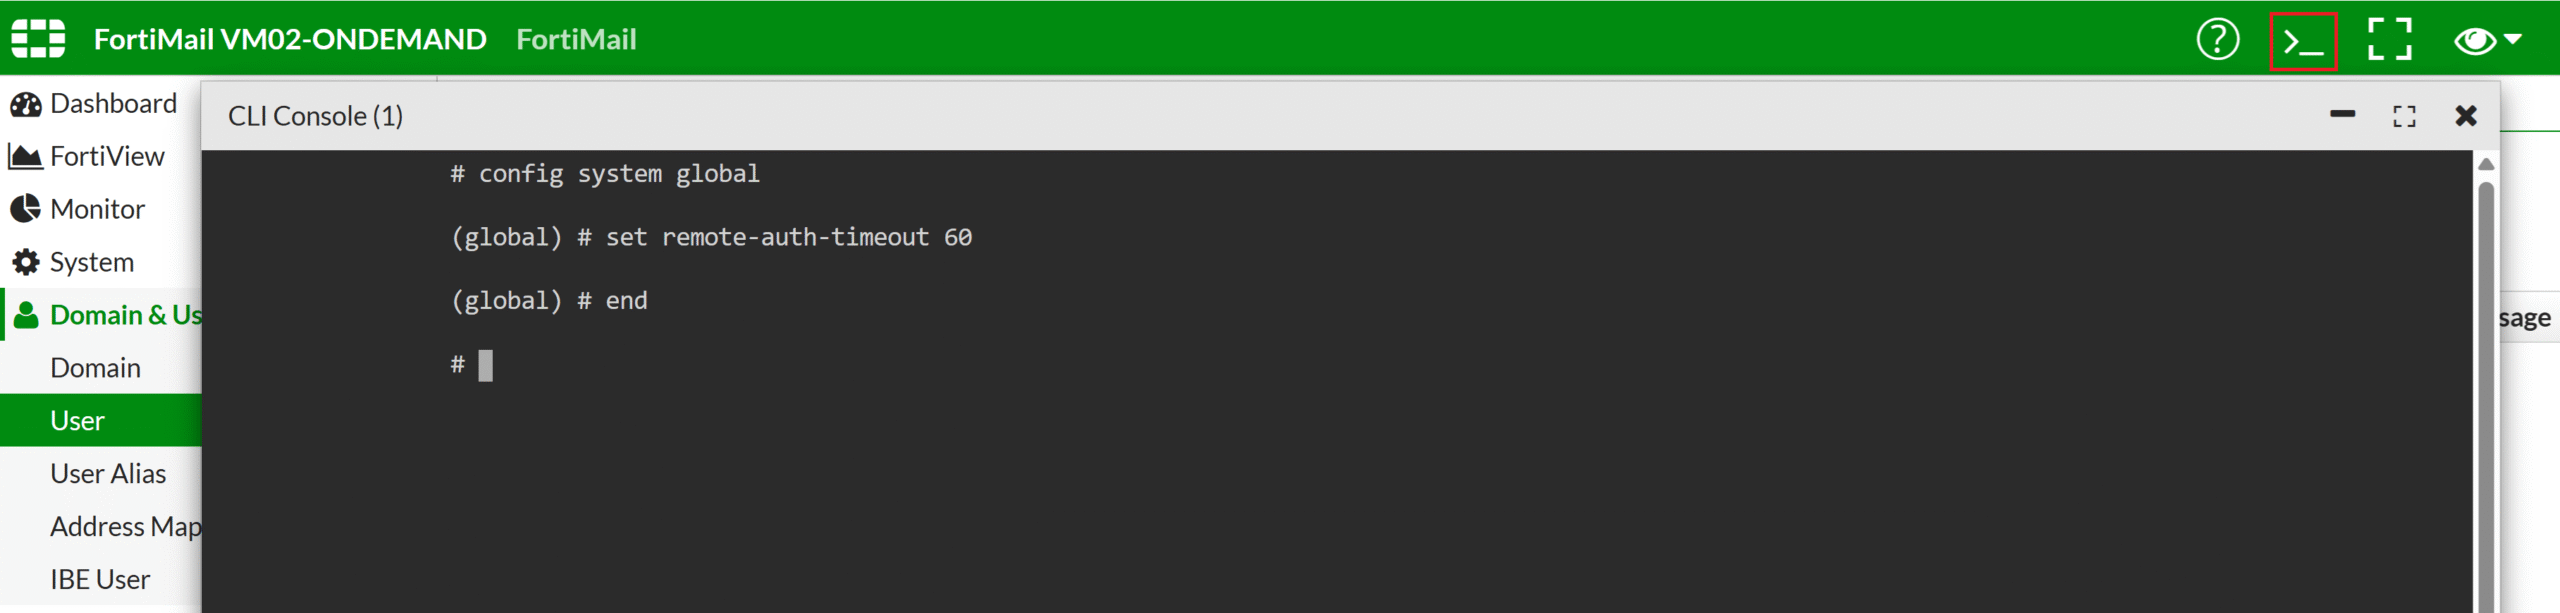
Testing Multi-Factor Authentication (MFA) for Fortinet FortiMail Integrated Via RADIUS