Last updated on April 7, 2026
Overview of MFA for Remote Desktop Web Client
Multi-Factor Authentication (MFA) for Remote Desktop Web Client is an extra layer of security that adds Two-Factor Authentication (2FA) and Multi-Factor Authentication (MFA) to Remote Desktop Web Client logons. The Remote Desktop Web Client allows your users to access your organization’s Remote Desktop infrastructure through a compatible web browser. Users can interact with remote apps and desktops just like they would with a local PC. MFA for Web Client allows you to secure these logins using Multi-Factor Authentication (MFA).
When the user logs in to the RD Web Client with Rublon 2FA enabled, they have to provide their login and password like they always do. Then, the Rublon Prompt appears, and the user can select the authentication method. After the user confirms their identity using one of the available methods, they are logged in to the RD Web Client. Users who do not complete the Two-Factor Authentication process are denied access.
To add Multi-Factor Authentication (MFA) and Two-Factor Authentication (2FA) to your RD Web Client logins, you must install the Rublon MFA for RD Web connector. This document describes all the required steps.
Demo Video

Supported Authentication Methods
| Authentication Method | Supported | Comments |
| Mobile Push | ✔ | N/A |
| FIDO | ✔ | N/A |
| Passcode | ✔ | N/A |
| SMS Passcode | ✔ | N/A |
| SMS Link | ✔ | N/A |
| Phone Call | ✔ | N/A |
| QR Code | ✔ | N/A |
| Email Link | ✔ | N/A |
| YubiKey OTP | ✔ | N/A |
| RFID | – | N/A |
Before you start
To enable MFA for Web Client, use the Rublon MFA for RD Web connector. This connector supports the following operating systems:
- Windows Server 2012
- Windows Server 2012 R2
- Windows Server 2016
- Windows Server 2019
- Windows Server 2022
Note
Rublon MFA for RD Web supports Windows Server Standard, Windows Server Essentials, Windows Server Datacenter, and Windows Server Datacenter: Azure Edition.
Required Components
- .NET Framework, version 4.6
- Installed and well-tested Remote Desktop Web Client version up to 2.1.62.1
- An up-to-date Windows Server
- Open port 443 for https://core.rublon.net on the machine where RD Web Client is installed
Pre-Installation Steps
1. Sign in to the Rublon Admin Console.
2. Click Applications on the left.
3. Click Add.
4. Set a name for your application, e.g., RD Web Client.
5. Set Type to Remote Desktop Web Client.
6. Click Save to create a new application.
7. Copy and save the values of the System Token and Secret Key. You are going to need them later.

8. Ensure that the Mobile Push or Email Link authentication method is enabled in the Policy assigned to the Remote Desktop Web Client application in the Rublon Admin Console.
9. To enable MFA/2FA on your Remote Desktop Web Client, you must download the Rublon MFA for RD Web connector by clicking the following link:
Download the Rublon MFA for RD Web installer
Installation of MFA for Remote Desktop Web Client
1. Run the installer with administrator rights.
2. On the first page of the installer, read about the product you are about to install.
- If this is the first time you are installing the connector, click Next.

- If this is not the first time you are installing the connector on this endpoint, you will be able to either update the current installation or do a clean installation.
- Update current installation: If you choose to update the current installation, you will not be able to change any old options in the installer. However, if a new option has been introduced in this version of the installer, you will be able to change its value before the installation begins. The Update current installation option is recommended for those who want to update the connector to a newer version but want to keep all current settings.
- Clean installation: If you choose to do a clean installation, continue with the steps in this section.

3. Enter the API credentials (System Token and Secret Key) from your application of type Remote Desktop Web Client in the Applications tab of the Rublon Admin Console and click Next.

| Parameter | Description |
| System Token | System Token of your application in the Rublon Admin Console. Paste the value you noted down before. |
| Secret Key | Secret Key of your application in the Rublon Admin Console. Paste the value you noted down before. |
| API Address | Keep the default https://core.rublon.net unless you want to explicitly change the Rublon API Server URL. |
4. Check the configuration options you want and click Next. Refer to the following image and table.

| Option | Description |
| Use proxy | Check this option to enable proxy. When checked, the next page after clicking Next will ask you for more details about the proxy. When unchecked, the page that asks for proxy details will not appear. |
5. If you checked Use proxy on the previous page, you will see an additional page asking you to enter proxy details. After filling in the details, click Next. Refer to the following image and table.

| Option | Description |
| Proxy Host | The address of the proxy server. |
| Proxy Port | The port on which the proxy server is operating. |
| Proxy Username | The username of the HTTP proxy server user. Optional. Fill in if verification by username is required. |
| Proxy Password | The password of the HTTP proxy server user. Optional. Fill in if required for verification. |
6. Check the bypass options you want and click Next. Refer to the following image and table.

| Option | Description |
| Bypass MFA when it cannot be performed | Check to bypass MFA when the Rublon API is reachable but cannot perform MFA (e..g, too many requests). |
7. Rublon MFA for RD Web is ready to install.
Rublon MFA for RD Web performs the following steps during installation:
- Adds configuration settings to Windows Registry.
- Installs the application on the system in a defined location. It is not possible to change this path.
- Starts the installer of the required additional packages: Microsoft Visual C++ 2015-2019 Redistributable (x64). Note that Rublon for RD Web requires the Microsoft Visual C ++ 2015-2019 Redistributable (x64) package to work. The RD Web installer will install this package automatically if it does not exist in the system. If the package exists in the system, the installer will omit this step and will not print info about it on the Ready to install page.

8. Click Install to install Rublon MFA for Remote Desktop Web.

9. After a successful installation, the installer informs you that your installation is complete. Check View log if you want and click Finish.

Note
If you are experiencing problems with the installer, please refer to our FAQ.
Configuration of MFA for Remote Desktop Web Client
You can change the settings of Rublon MFA for Remote Desktop Web in Windows Registry: HKEY_LOCAL_MACHINE\SOFTWARE\Rublon\RDWeb. You do not have to stop the RD Web Client before making any changes. The changes you made will be applied automatically during your next login.
| Value | Description | Default Value |
| RublonApiServer | The server of the Rublon API. | The address that was entered during installation. Always use https://core.rublon.net unless instructed otherwise by Rublon Support. |
| SystemToken | A string value gathered from Rublon Admin Console, for the Remote Desktop Web Client application type. | The value that was entered during installation. |
| SecretKey | A string value gathered from Rublon Admin Console, for the Remote Desktop Web Client application type. | The value that was entered during installation. |
| ProxyHost | The address of the proxy server. Optional. | The value that was entered during installation or none. |
| ProxyMode | You need to set at least two parameters for the proxy to work: ProxyHost and ProxyPort. If you add both of these parameters, then the proxy will be automatically activated (and ProxyMode will be set to 1). If you only specify ProxyHost or only specify ProxyPort, registry changes will be made, but ProxyMode will be set to 0, meaning the proxy will not be active. Set ProxyMode to 0 to disable the proxy. The password of the HTTP proxy server user. Optional. |
1 if the Use proxy checkbox was checked during installation; 0 otherwise. |
| ProxyPassword | The password of the HTTP proxy server user. Optional. | The value that was entered during installation or none. |
| ProxyPort | The port on which the proxy server is operating. Optional. | The value that was entered during installation or none. |
| ProxyUsername | The username of the HTTP proxy server user. Optional. | The value that was entered during installation or none. |
| FailMode | Defines whether the user is to be logged in when the 2FA authorization cannot be performed due to technical reasons. Possible values: bypass – user is logged in when there is invalid configuration or no connection to the Rublon API deny – user is blocked when there is invalid configuration or no connection to the Rublon API safe – an alternative for bypass, user is logged in secure – an alternative for deny, user is blocked |
bypass/safe if the Bypass MFA when it cannot be performed checkbox was checked during installation; deny/secure otherwise. |
| SendUPN | If set to 1, Rublon looks up the Universal Principal Name (UPN) in the Active Directory and sends the UPN to the Rublon API as Rublon username (e.g., user@domain.com). If set to 0, Rublon sends sAMAccountName as Rublon username, e.g., Domain\user. Possible values: 1 – enables sending UPN to Rublon 0 – disables sending UPN to Rublon Suppose you set SendUPN to 1, but Rublon cannot find the User Principal Name (UPN) for a given user in Active Directory. In that case, Rublon denies access and adds appropriate information to the logs. |
0 |
| DebugRequests | When set to 1, enables detailed logging of requests and responses in communication with the Rublon API. Set to 1 only if requested by Rublon’s Customer Support. |
0 |
| AuthCookieLifeDuration | The maximum lifetime of a Rublon session cookie in seconds. This value must be a positive integer. You can enter the value in the key as a String. |
The default maximum lifetime of a Rublon session cookie is 28800 seconds. However, AuthCookieLifeDuration is not added to Windows Registry by default. You must add it yourself if you want to change this value. |
| MaxRublonAuthWaitTime | The maximum waiting time for the completion of Rublon authentication in the RD Web Client application in seconds. This value must have the same value as executionTimeout in the C:\Windows\web\rdweb\web.config file. |
The default maximum waiting time for the completion of Rublon authentication is 600 seconds. However, MaxRublonAuthWaitTime is not added to Windows Registry by default. You must add it yourself if you want to change this value. |
| SecretSessionKey | Rublon cookie signing key. Do not reveal the value of this key to anybody. If the key leaks, generate a new one. |
A random key is automatically generated during installation. |
| SecretStorageKey | Key for signing temporary files created by connector. Do not reveal the value of this key to anybody. If the key leaks, generate a new one. |
A random key is automatically generated during installation. |
| SessionDataDir | Applicable only to High Availability installations, e.g., Load Balancer on the front end and several duplicate RD Web instances on the back end. A path to a shared network folder accessible to all RD Web instances where the connector session files will be stored. Refer to High Availability (HA) Configuration to learn more. Supports both Universal Naming Convention (UNC) paths and local paths. |
SessionDataDir is not added to Windows Registry by default. You must add it yourself if you want to change this value. |
Logging
The log4Net.config file in the installation folder (C:\Rublon\RDWeb\ by default) lets you change the logging settings for Rublon MFA for Remote Desktop Web. The changes take effect right away without restarting the RD Web Client.
Change the log file path
By default, the log file is located in C:\Rublon\RDWeb\RublonRDWebAccess.log. You can change this path by following the steps below.
1. Open the log4Net.config file and look for the following line:<file value=”${SystemDrive}\\Rublon\\RDWeb\\RublonRDWebAccess.log” />
2. Replace ${SystemDrive}\\Rublon\\RDWeb\\RublonRDWebAccess.log with a new path.
3. From now on, any Rublon authentication process information will be logged to a new file.
Note
If you have authenticated via Rublon, but no new file has been created, make sure the access to the path is not restricted.
If you do not see any entries in the log file, make sure the logging level is set to at least info.
Change logging level
The amount of information logged to the log file can be adjusted using the so-called logging levels.
1. Open the log4Net.config file and look for the following entry:
<root>
<level value="DEBUG" />
2. Change the default DEBUG value to one of the following values:
- ALL – logs everything
- DEBUG – logs detailed information about the logging process
- INFO – logs info, warnings, and errors
- WARN – logs warnings and errors
- ERROR – logs errors only
- OFF – turns off logging
High Availability (HA) Installation & Configuration
To perform MFA, the Rublon MFA for RD Web connector relies on the Rublon session files. For a High Availability installation with a Load Balancer and multiple RD Web instances, a network folder that all RD Web instances can access is needed to store the Rublon session files.
Follow these steps:
1. Create a shared network folder accessible to all RD Web instances.
2. On each RD Web instance, map the shared folder to a disk drive, e.g., Z:.
3. The IIS server user must have write permissions to this folder.
4. On every RD Web instance:
- Install the Rublon MFA for the RD Web connector (version 1.5.1 or higher).
- Set a path to the shared folder by adding a new parameter to HKEY_LOCAL_MACHINE\SOFTWARE\Rublon\RDWeb in Windows Registry.
Value Type: String
Value Name: SessionDataDir
Value Data: Z:
5. Set a common SecretStorageKey for all RD Web instances:
- Rublon protects session files using HMAC-SHA256.
- The secret storage key is generated during installation.
- Copy the SecretStorageKey from the Windows Registry from one RD Web instance and paste it as the secretStorageKey of all other instances.
Note
Rublon creates temporary session files during authentication and then deletes them after the user completes authentication. Each file size is only about 400B. But to be extra safe, we recommend you ensure the allowed max size of the shared folder is larger than 1024B multiplied by the number of RD Web users.
Note
If you are getting one of the following errors:Error occurred Access to the path ‘<path>’ is denied. while reading session data, trying next timeBlocking access to the RDWeb since the following error occurred: System.UnauthorizedAccessException: Access to the path '<path>' is denied.
Ensure that the IIS server user has write permissions to the path.
Changing Max Time for Completing Rublon Authentication
Rublon authentication in RD Web Client has a specified maximum completion time. The default maximum completion time is 10 minutes. If the user does not finish the authentication process during this time, they will have to refresh the page and try again.
You can change the maximum time for completing Rublon authentication by setting the following two parameters to the same value:
- in the RD Web application configuration file:
- By default located in C:\windows\web\rdweb\web.config
- Find an entry:
<httpRuntime enableVersionHeader="false" executionTimeout="600" encoderType="System.Web.Security.AntiXss.AntiXssEncoder" /> - And change the value of executionTimeout to the desired timeout value in seconds
- In Windows Registry, find the following node: Computer\HKEY_LOCAL_MACHINE\SOFTWARE\Rublon\RDWeb
- Change the value of maxRublonAuthWaitTime to the desired positive integer value in seconds – this value must be the same as the value you set in web.config!
Example
Let’s say you want to change the maximum time for completing Rublon authentication to 15 minutes.
1. In the web.config file find the executionTimeout value and change it to 900 (15 minutes is 900 seconds).

2. In Windows Registry, go to Computer\HKEY_LOCAL_MACHINE\SOFTWARE\Rublon\RDWeb and set the maxRublonAuthWaitTime key to 900.
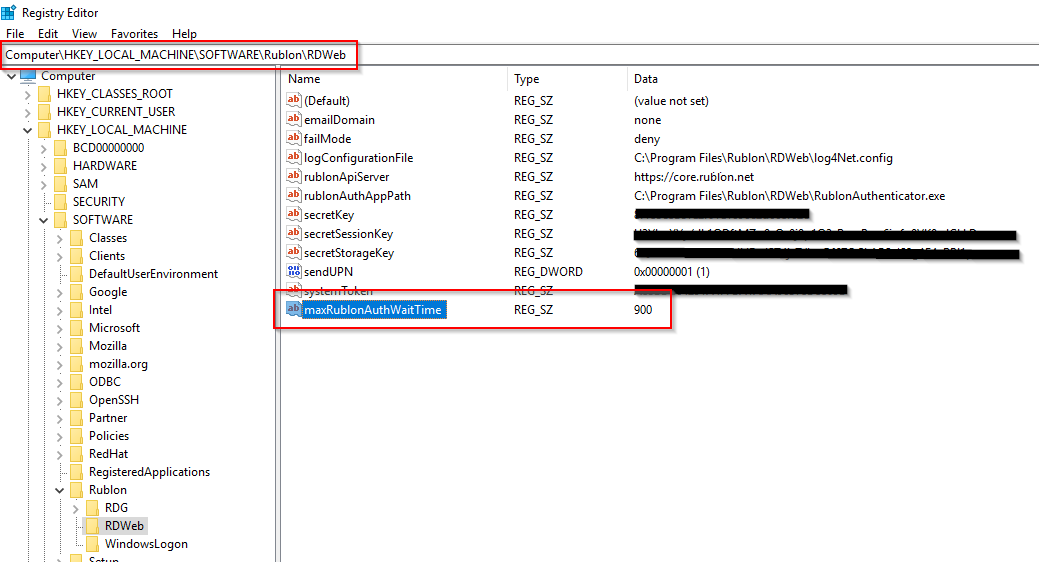
3. With subsequent logins, the maximum authentication completion time will be 15 minutes.
Note that the maximum Rublon authentication completion time is also shown in the logs. For example:
30-07 10:31:29.8006 [59] DEBUG Rublon.RDWeb.WebClientModule "rublon\psz "(0: oqxspupxr0bf4gcqxg3aszh1|Forms)" " "IIS APPPOOL\RDWebAccess" " Starting Rublon auth, Rublon settings: Block when auth fails: True, api Url: https://core.rublon.net,system token A85BBC64291A4FFBA1AAA96378D8809B, debug Rublon requests False, sendUPN: True, maxRequestTimeout: 600000ms"
Updating MFA for Remote Desktop Web Client
If you have already installed the Rublon MFA for RD Web connector and would like to update it to a newer version, open the new installation file and go through the installation process again. Your settings from the previous version will be kept.
You do not have to uninstall the old version before updating it.
You do not have to specify the installation parameters again if you are updating the connector.
Uninstallation of MFA for Remote Desktop Web Client
Run unis000.exe located in C:\Program Files\Rublon\RDWeb\ as administrator to uninstall Rublon MFA for RD Web.
Alternatively, open Apps & features, select Rublon for RD Web, and click Uninstall.
MFA for Remote Desktop Web Client Login Example
The following example depicts a log-in flow to RD Web Client when Rublon 2FA is enabled. The Remote Desktop Web Client URL is https://server_fqdn/RDWeb/webclient/index.html where server_fqdn is a fully qualified domain name of the server you are using.
1. Run the Web Client.
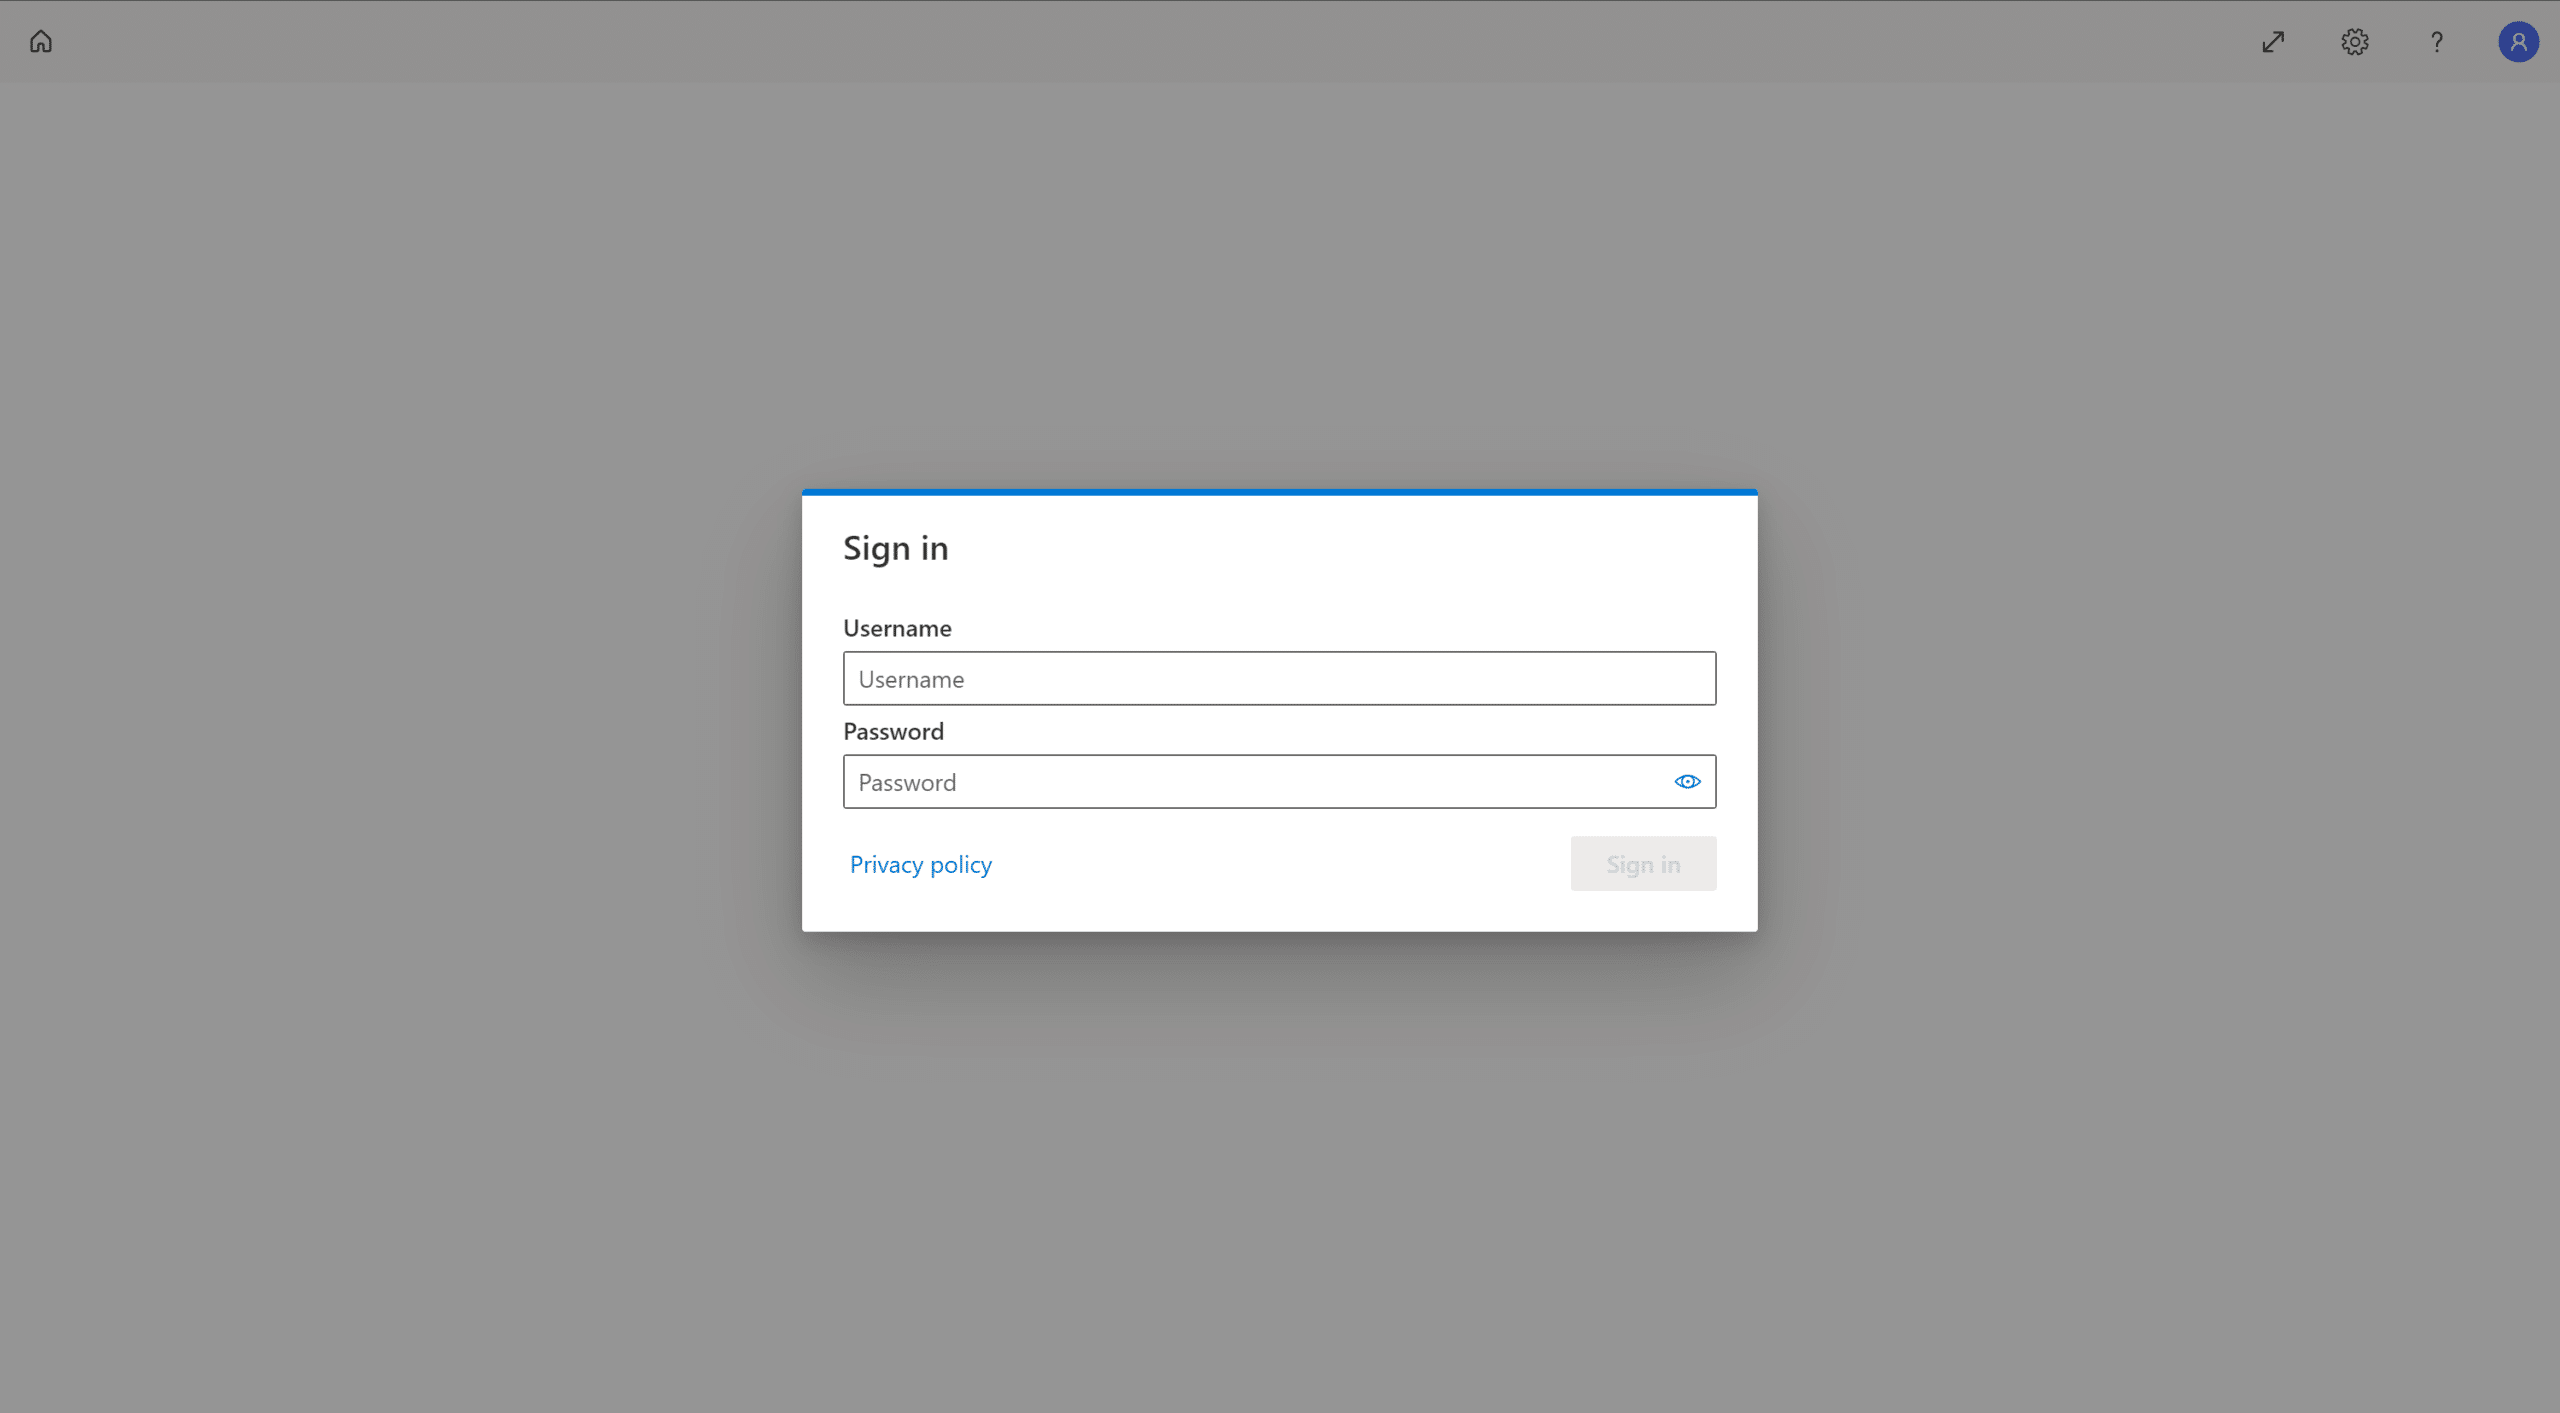
2. Provide your Username and Password, and click Sign in.
3. A window will appear with various 2FA options from Rublon. Let’s choose Mobile Push.

4. You will receive a Mobile Push authentication request. Tap APPROVE.
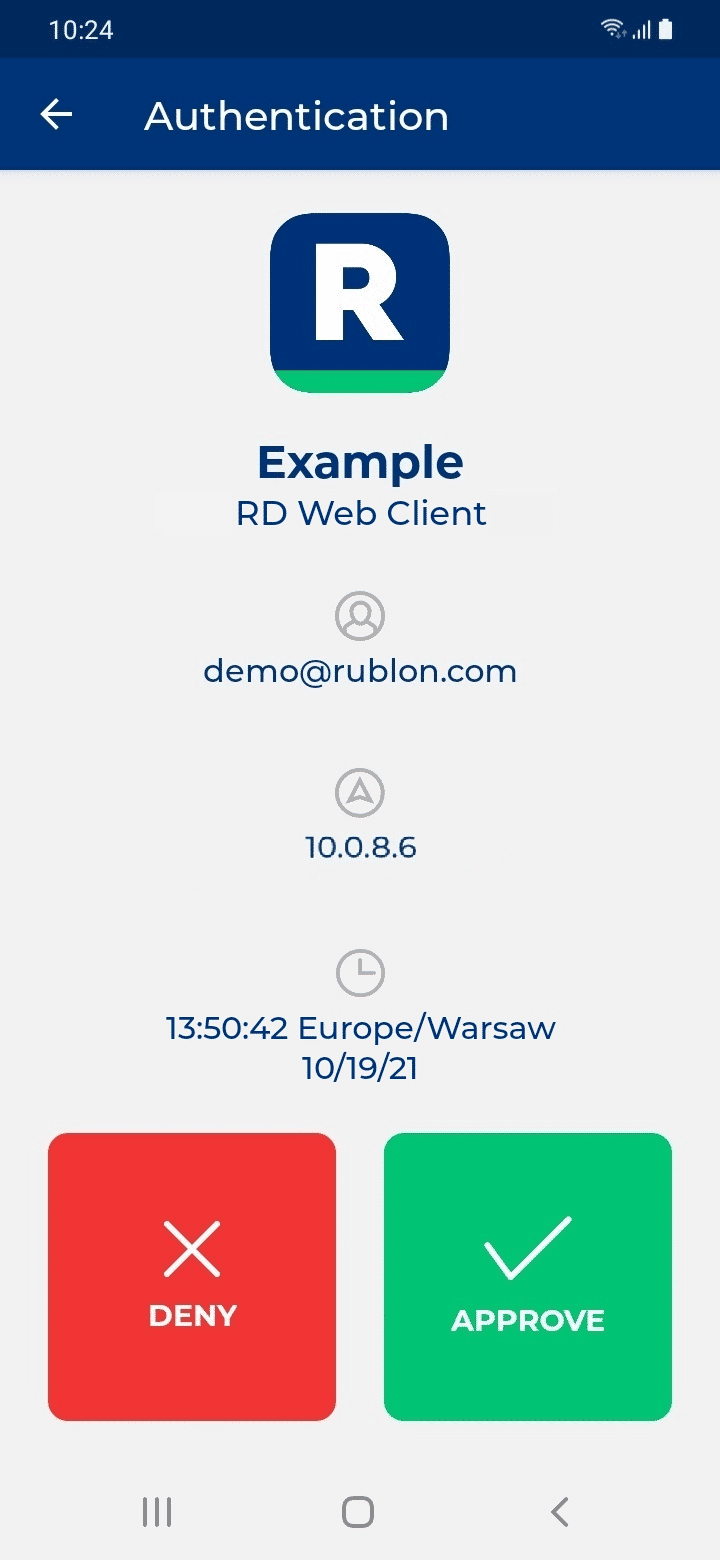
5. You will be successfully logged in.

Solutions to Known Errors
If your authentication via RD Web Client fails, you will see the following warning message:

If you are getting a warning message like this, ensure that the user who tries to log in is enrolled in the Users tab in the Rublon Admin Console. If adding the user in the Admin Console did not fix the issue, look up the log file located in C:\Rublon\RDWeb\RublonRDWebAccess.log by default.
If you find an “Invalid session id” error in your logs, this probably has to do with the cache. Here’s what you can try:
- Hard refresh the RD Web Client login page:
- Chrome, Firefox, or Edge for Windows: Press Ctrl+F5 (If that doesn’t work, try Shift+F5 or Ctrl+Shift+R)
- Try in incognito mode
- Clear the browser cache
- Restart the server
If none of that worked, send the log file to Rublon Support along with a description of your issue.
MFA for Remote Desktop Web Access
The Rublon MFA for Remote Desktop Web connector also adds MFA to Remote Access Web Access logins. To learn more, refer to Rublon MFA for RD Web Access.
MFA for Remote Desktop Web Feed
The Rublon MFA for Remote Desktop Web connector also adds MFA to Remote Access Web Feed logins. To learn more, refer to MFA for RD Web Feed.
Troubleshooting
- If you have a problem or question, refer to Rublon MFA for RD Web – FAQ first.
- Take a look at the Solutions to Known Errors section in this documentation.
- Look up your log file located in C:\Rublon\RDWeb\RublonRDWebAccess.log by default and send the file to Rublon Support along with a description of your issue.
- If you encounter any issues with your Rublon integration, please contact Rublon Support.
Related Posts
Rublon MFA for Remote Desktop Web Access – Documentation
Rublon MFA for Remote Desktop Web – Release Notes