Last updated on July 8, 2025
Overview of MFA for Check Point Mobile Access VPN
Rublon MFA for Check Point Mobile Access VPN enables Multi-Factor Authentication (MFA) / Two-Factor Authentication (2FA) during VPN connections. If a user enters the correct username and password, they proceed to the secondary authentication method. If the user is unable to complete the extra method, Rublon will deny their access, stopping any potential intruder from gaining access.
Supported Authentication Methods
Before You Start Configuring MFA for Check Point Mobile Access VPN
Before configuring Rublon MFA for Check Point Mobile Access VPN:
- Ensure you have prepared all required components.
- Create an application in the Rublon Admin Console.
- Install the Rublon Authenticator mobile app.
Required Components
Create an Application in the Rublon Admin Console
4. Click Save to add the new application in the Rublon Admin Console.
5. Copy and save the values of the System Token and Secret Key. You are going to need these values later.
Install Rublon Authenticator
Some end-users may install the Rublon Authenticator mobile app. So, as a person configuring MFA for Check Point Mobile Access VPN, we highly recommend you install the Rublon Authenticator mobile app, too. Thanks to that, you will be able to test MFA for Check Point Mobile Access via Mobile Push.
Download the Rublon Authenticator for:
Configuring Multi-Factor Authentication (MFA) for Check Point Mobile Access VPN
Follow the following instructions to set up MFA for Check Point Mobile Access.
Configuring Rublon Authentication Proxy as RADIUS Server
1. Log in to Check Point CloudGuard Management using the SmartConsole application.

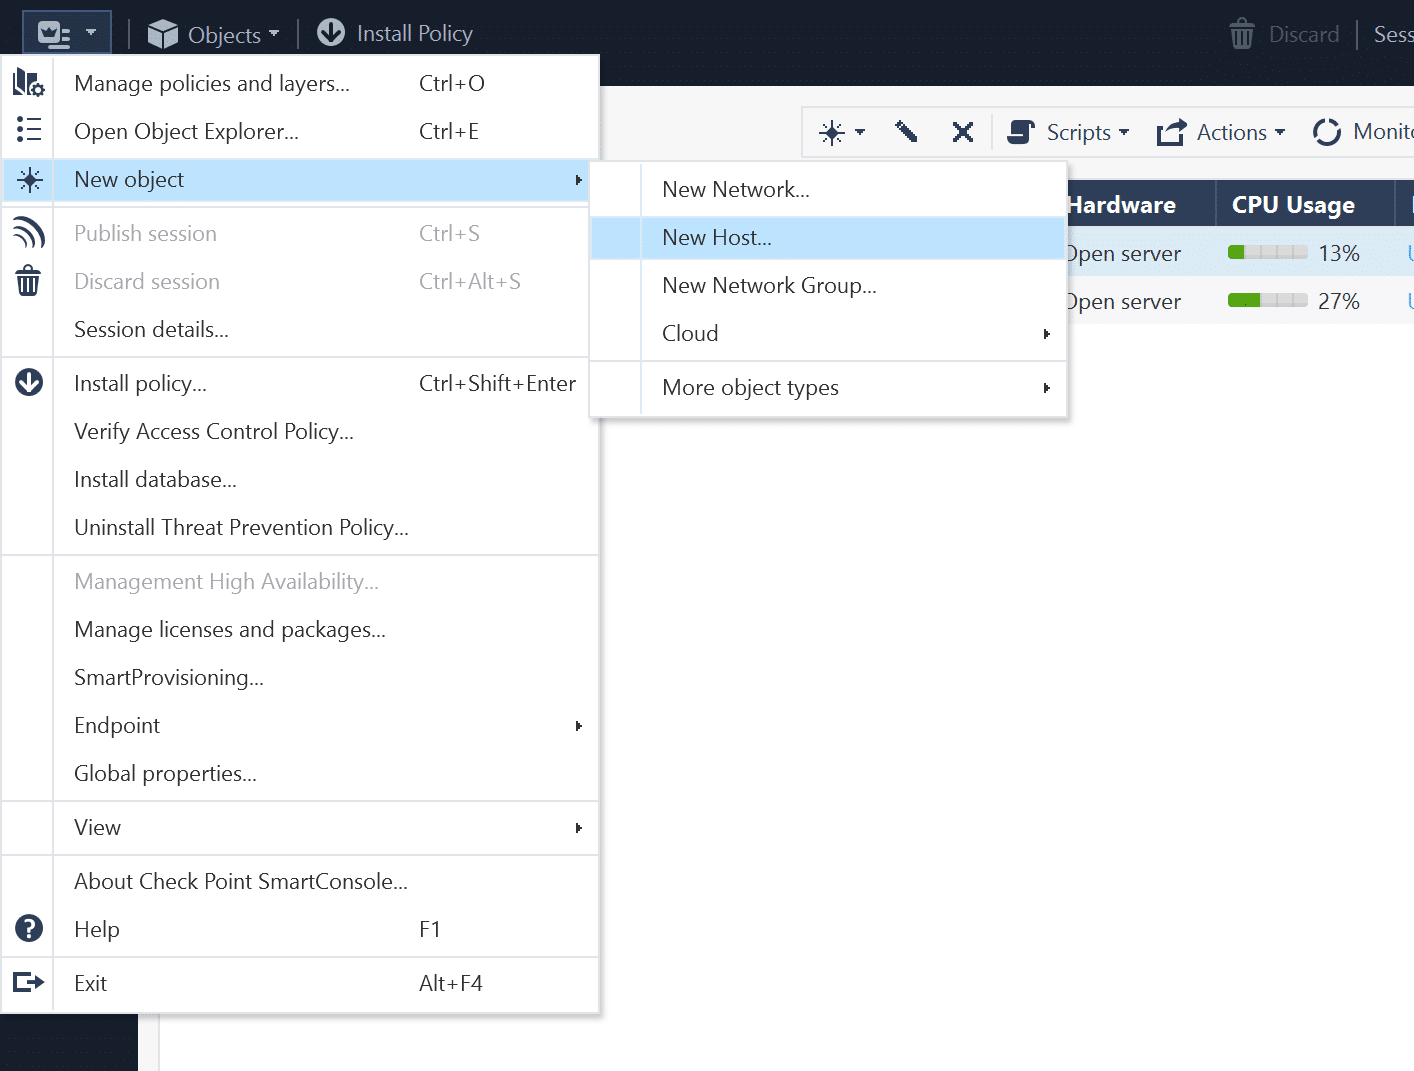
2. You have to create a new object for the Rublon Authentication Proxy server. From the dropdown menu in the top-left corner, select New Object → New Host.
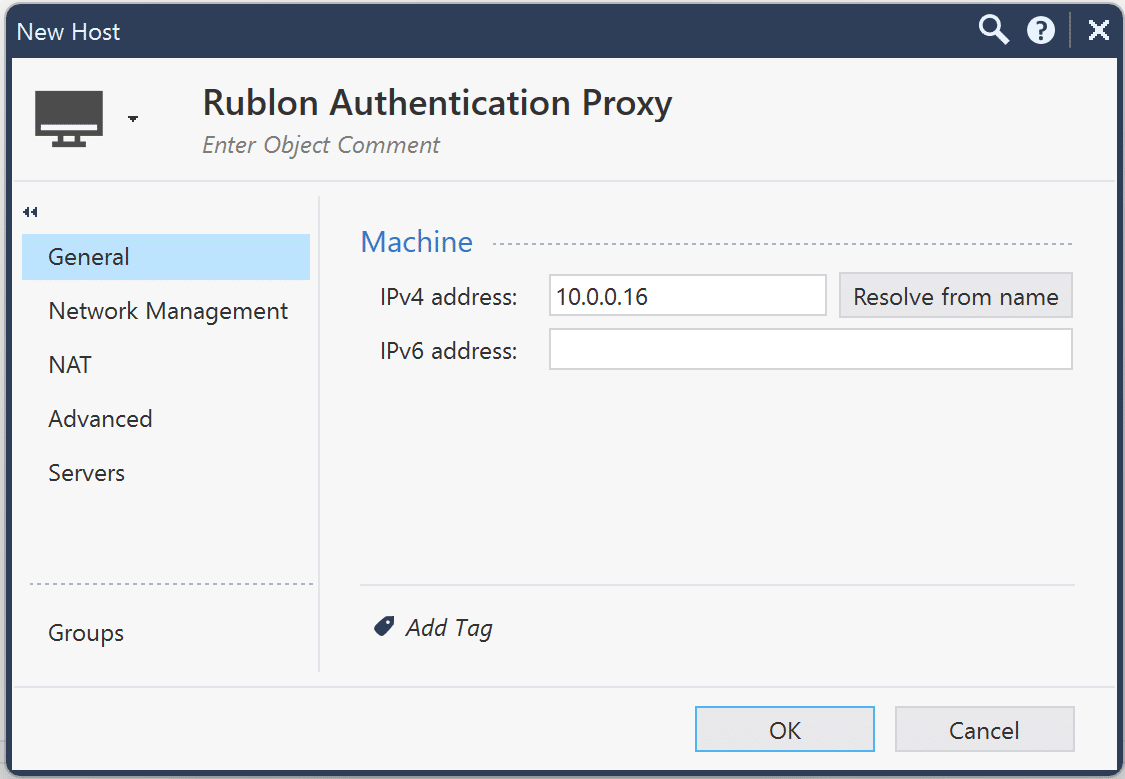
3. In the new window, enter the name of your new host (e.g., Rublon Authentication Proxy) and the IP address of your Rublon Authentication Proxy. Then, confirm by clicking the OK button.
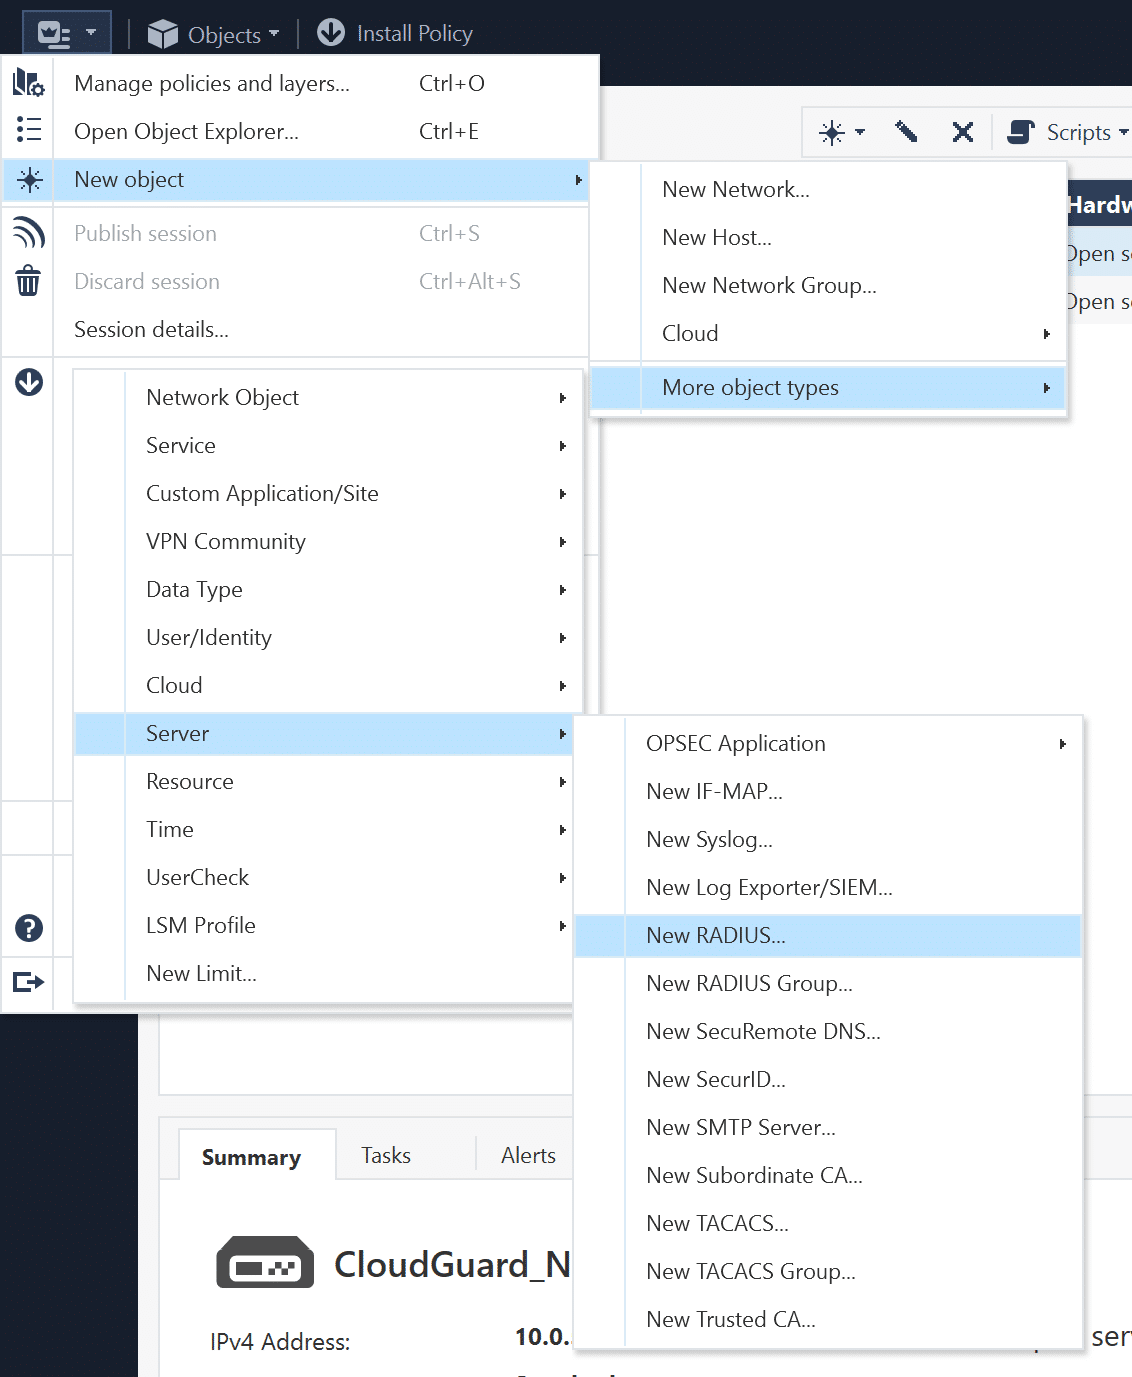
4. Next, create a new RADIUS server object using the host you created earlier. To do this, click the dropdown menu in the top-left corner, and then select New Object → More object types → Server → New RADIUS.
5. In the new window, fill in the form. Refer to the following image and table.
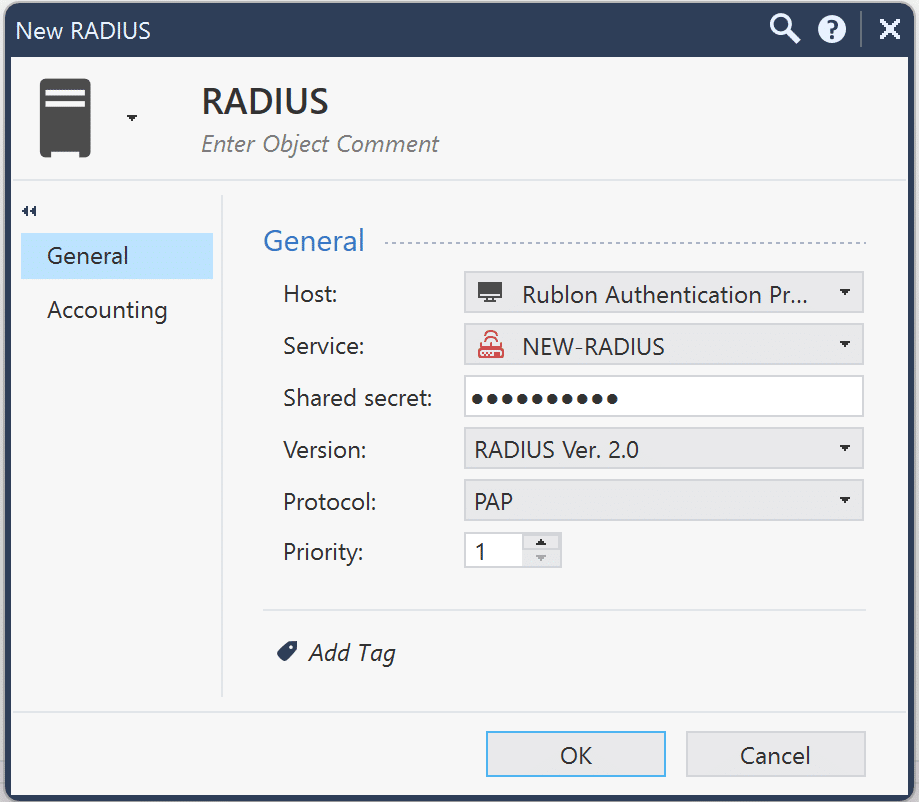
| Name | Enter a name for your RADIUS server, e.g., RADIUS. |
| Host | Select the Rublon Authentication Proxy host you created earlier. |
| Service | NEW-RADIUS |
| Shared secret | Enter the RADIUS_SECRET you set in the Rublon Authentication Proxy’s config file. |
| Version | RADIUS Ver. 2.0 |
| Protocol | PAP |
| Priority | 1 |
6. Click OK to save your changes.
Creating a User Group for Mobile Access
1. Now you need to create a new user group for Mobile Access. In the dropdown menu in the top-left corner, select New object → More object types → User/Identity → New User Group.

2. In the new window, enter the name of your group.
3. Optionally, you can also add previously created groups and users.
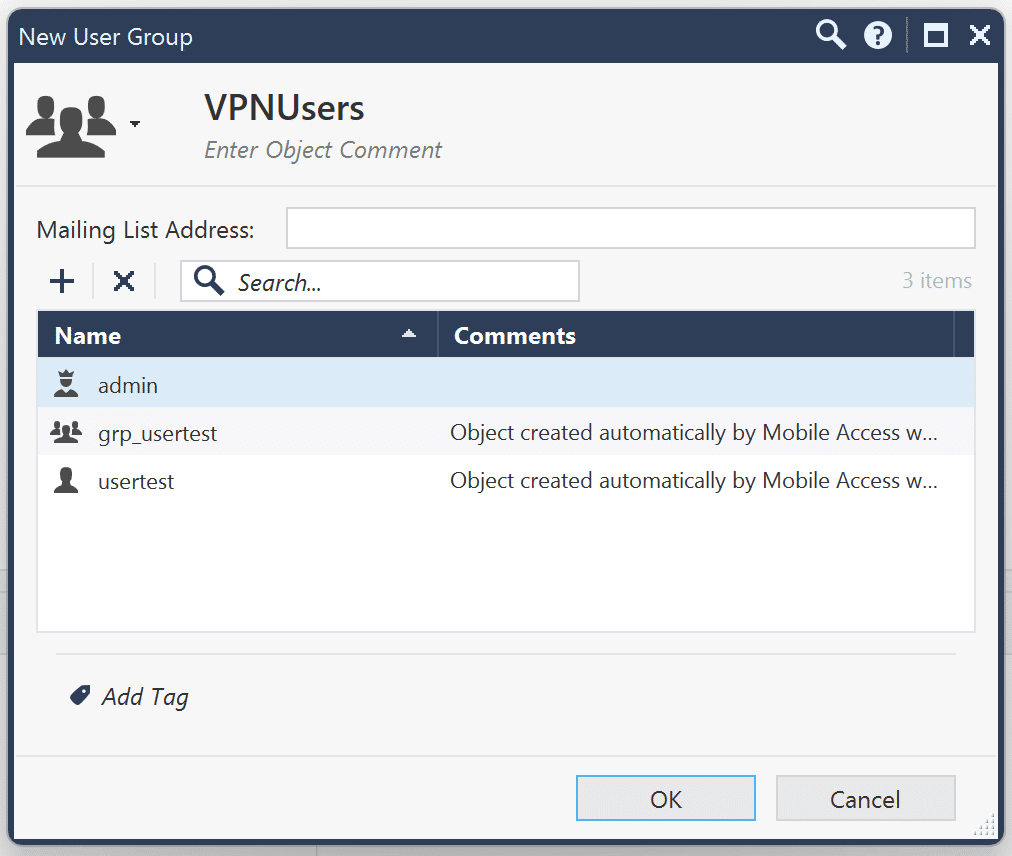
4. Click OK to save your new group.
Configuring RADIUS as the Authentication Source for Mobile Access
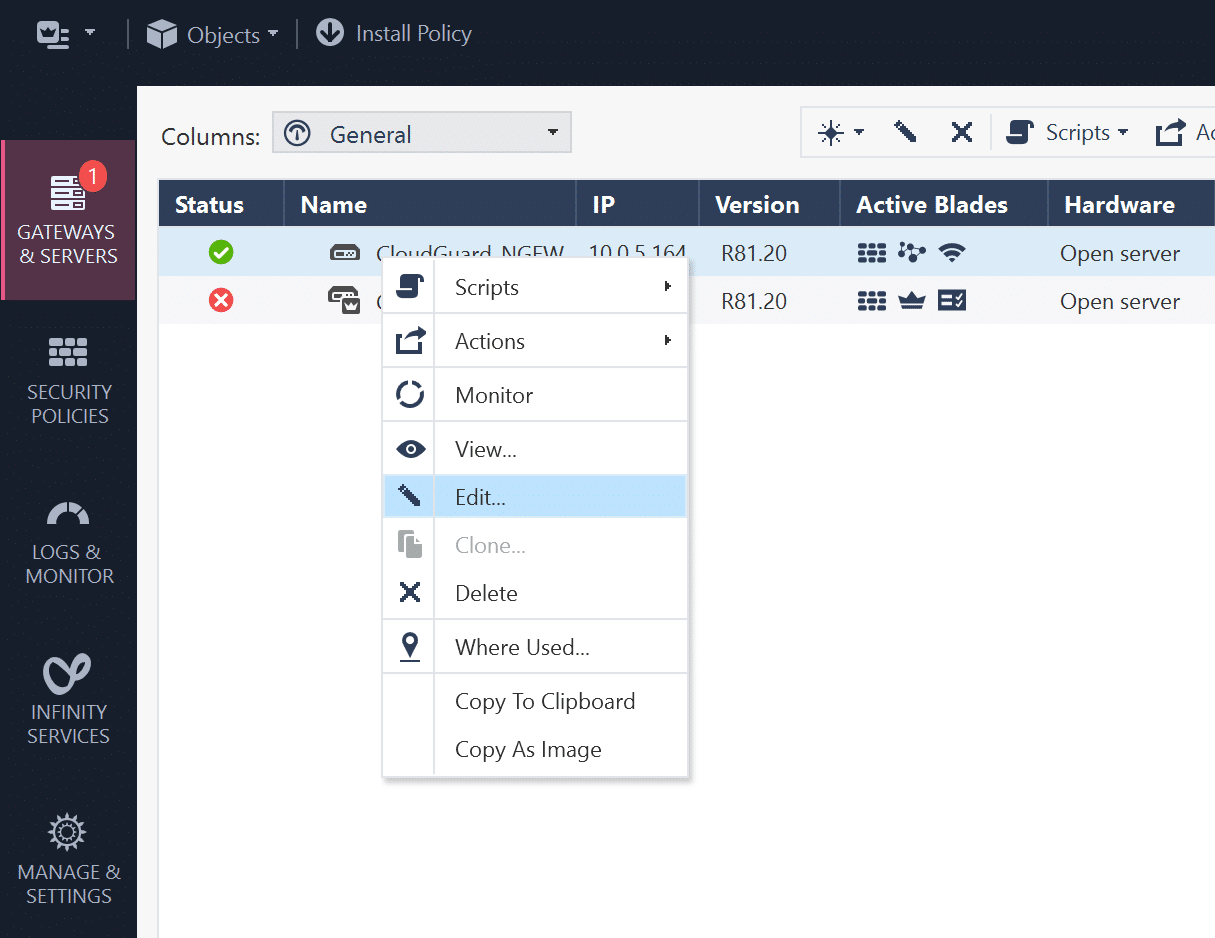
1. In SmartConsole, select the GATEWAYS & SERVERS tab if it is not selected already.
2. Right-click your CloudGuard instance with the Mobile Access module installed (in our case, it’s CloudGuard NGFW) and select Edit.

3. On the left, expand Mobile Access and select Authentication.
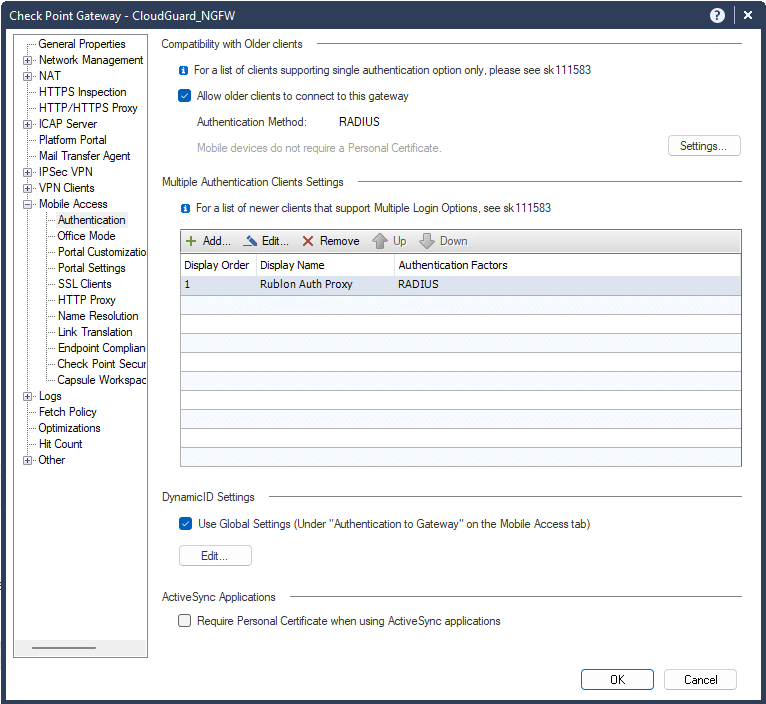
4. You need to add your RADIUS server in two places because Check Point’s login options for older and newer Mobile Access clients are configured in two different places.
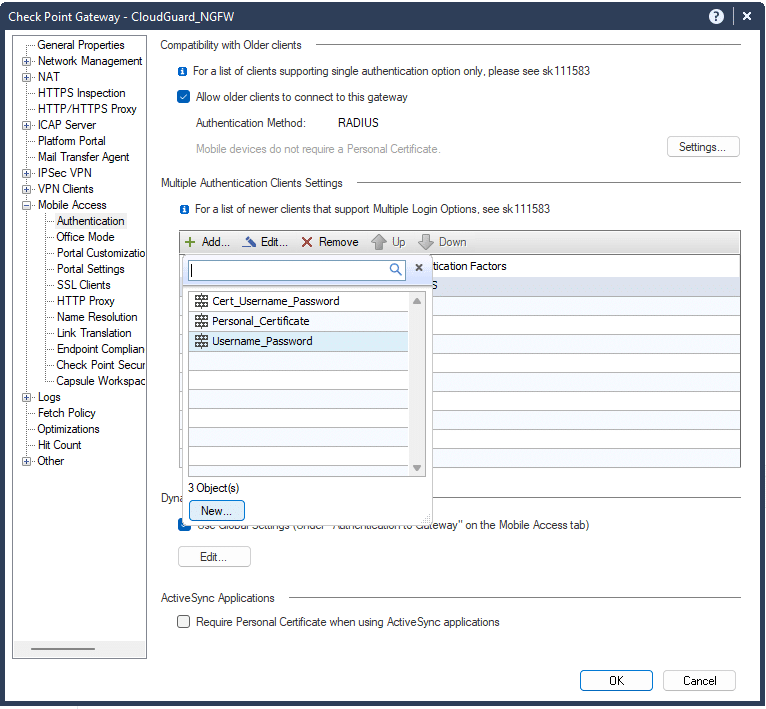
5. To add a RADIUS server as a login option for older clients, navigate to the Compatibility with Older Clients section and click Settings.
6. In the new window, fill in the form. Refer to the following image and table.
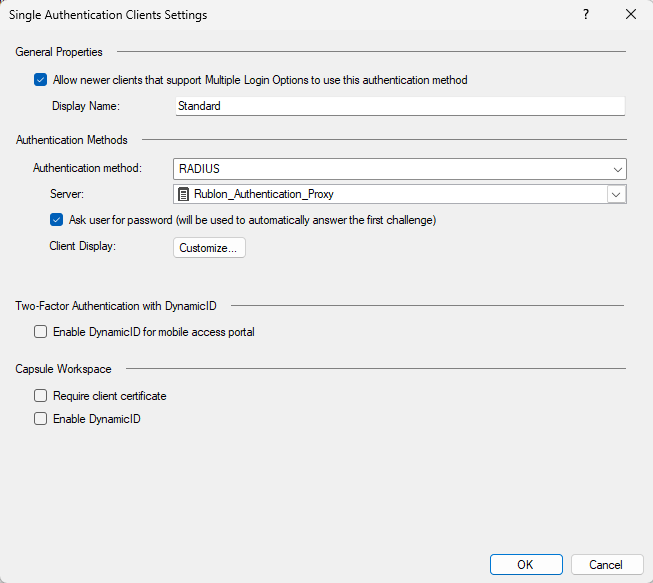
| Allow newer clients that support Multiple Login Options to use this authentication method | Decide if you want newer Mobile Access clients to also be able to use this authentication method. Recommended: Check. |
| Display Name | The name that will be displayed as one of the authentication methods on the Mobile Access portal, e.g., Standard. |
| Authentication method | Select RADIUS. |
| Server | Select the Rublon Authentication Proxy server you created before. |
| Ask user for password (will be used to automatically answer the first challenge) | Check. |
7. Click OK to confirm your changes.
8. You now have to add a RADIUS server as an authentication method for newer Mobile Access clients. To do this, navigate to the Multiple Authentication Client Settings section and click the Add button.
9. A small window will pop up. Click New.
10. In the new window, enter the following information:
- Name: Enter a name for your RADIUS server
- Display Name: Enter a display name for your RADIUS server
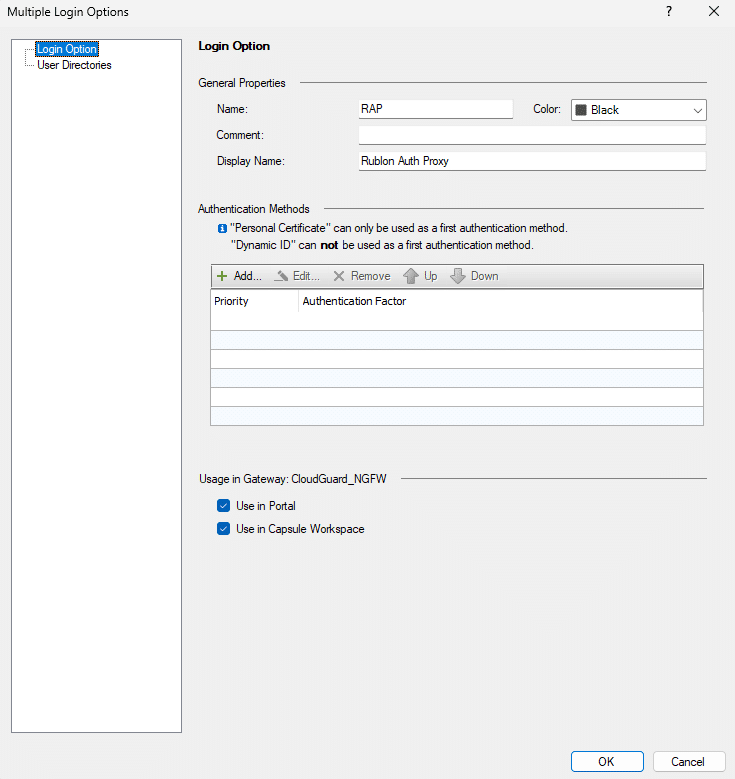
11. In the Authentication Methods section, click Add.
12. In the new window, set Authentication Factors to RADIUS and then select your Rublon Authentication Proxy server in the Server dropdown.
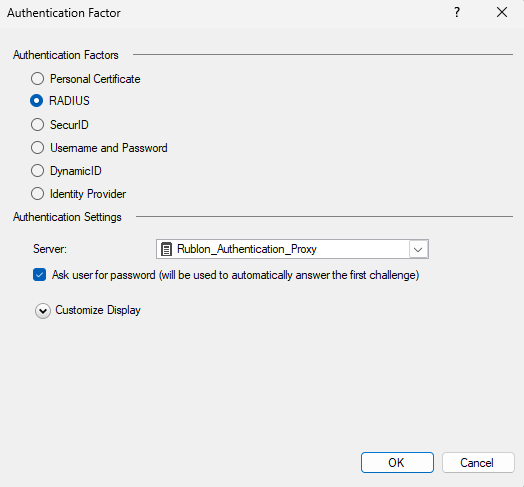
13. Click OK to confirm changes, and then click OK on every other opened window to confirm all the changes you made while configuring RADIUS as the authentication source for Mobile Access.
Updating The Policy for Mobile Access
1. In SmartConsole, select the GATEWAYS & SERVERS tab and then right-click your CloudGuard instance with the Mobile Access module installed (in our case, it’s CloudGuard NGFW) and select Edit.
2. In the new window, click Mobile Access. Then, in the Policy Source section, select either Unified Access Policy or Legacy Policy, depending on your Mobile Access configuration.
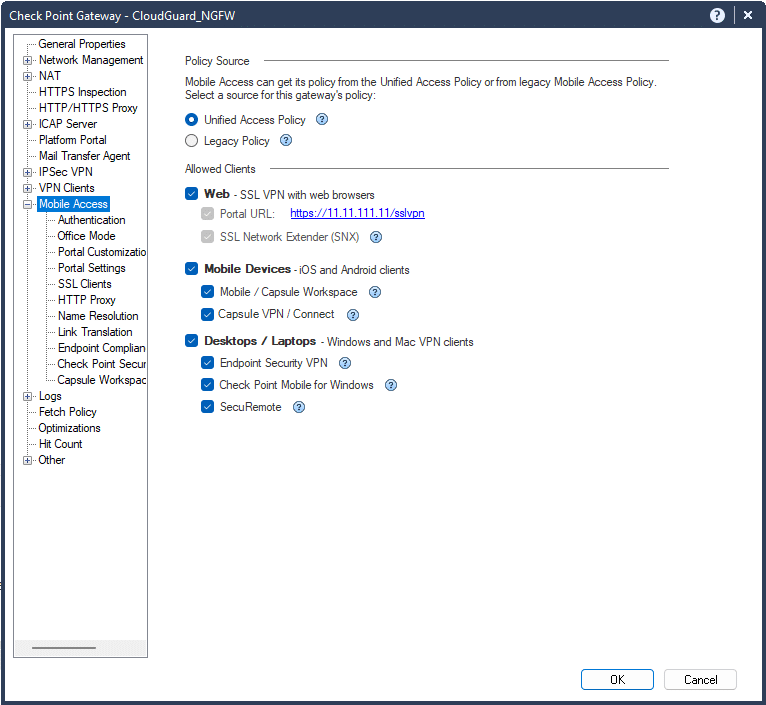
3. Click OK to confirm your selection. Now, depending on your configuration, you have to update the policy.
For Unified Access Policy
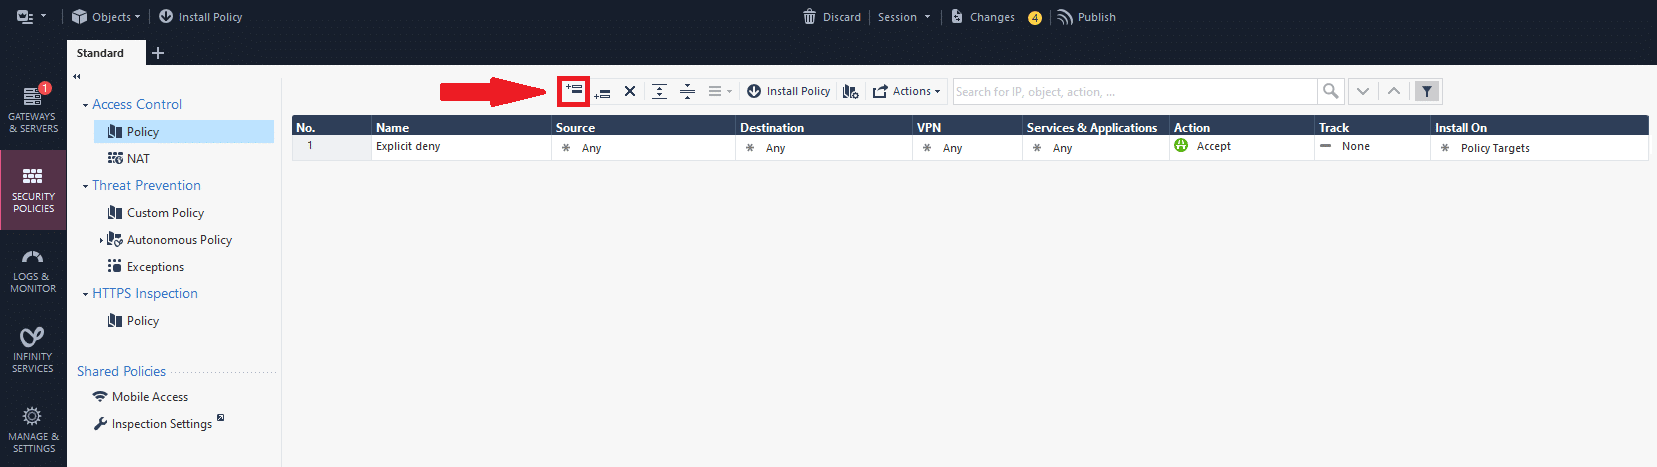
1. In SmartConsole, select the SECURITY POLICIES tab and select Policy from the menu on the left.
2. Click the first toolbar icon to add a new rule, which will allow the previously created group of users to access Mobile Access.
3. After a new rule has been added to the table, you have to edit each column according to your configuration. Refer to the following image and table.

| Column Name | Action(s) to Take |
| Name | Enter a name for your rule, e.g., Allow Remote Access VPN. |
| Source | Right-click and select Add Legacy User Access. In the new window: 1. In User Group, select the user group you have created before. 2. In Location, select Any. 3. Click OK to confirm the changes. |
| Destination | Any |
| VPN | Right-click and select Specific VPN Communities. In the new window, select RemoteAccess. |
| Services & Application | Any |
| Action | Allow |
For Legacy Policy
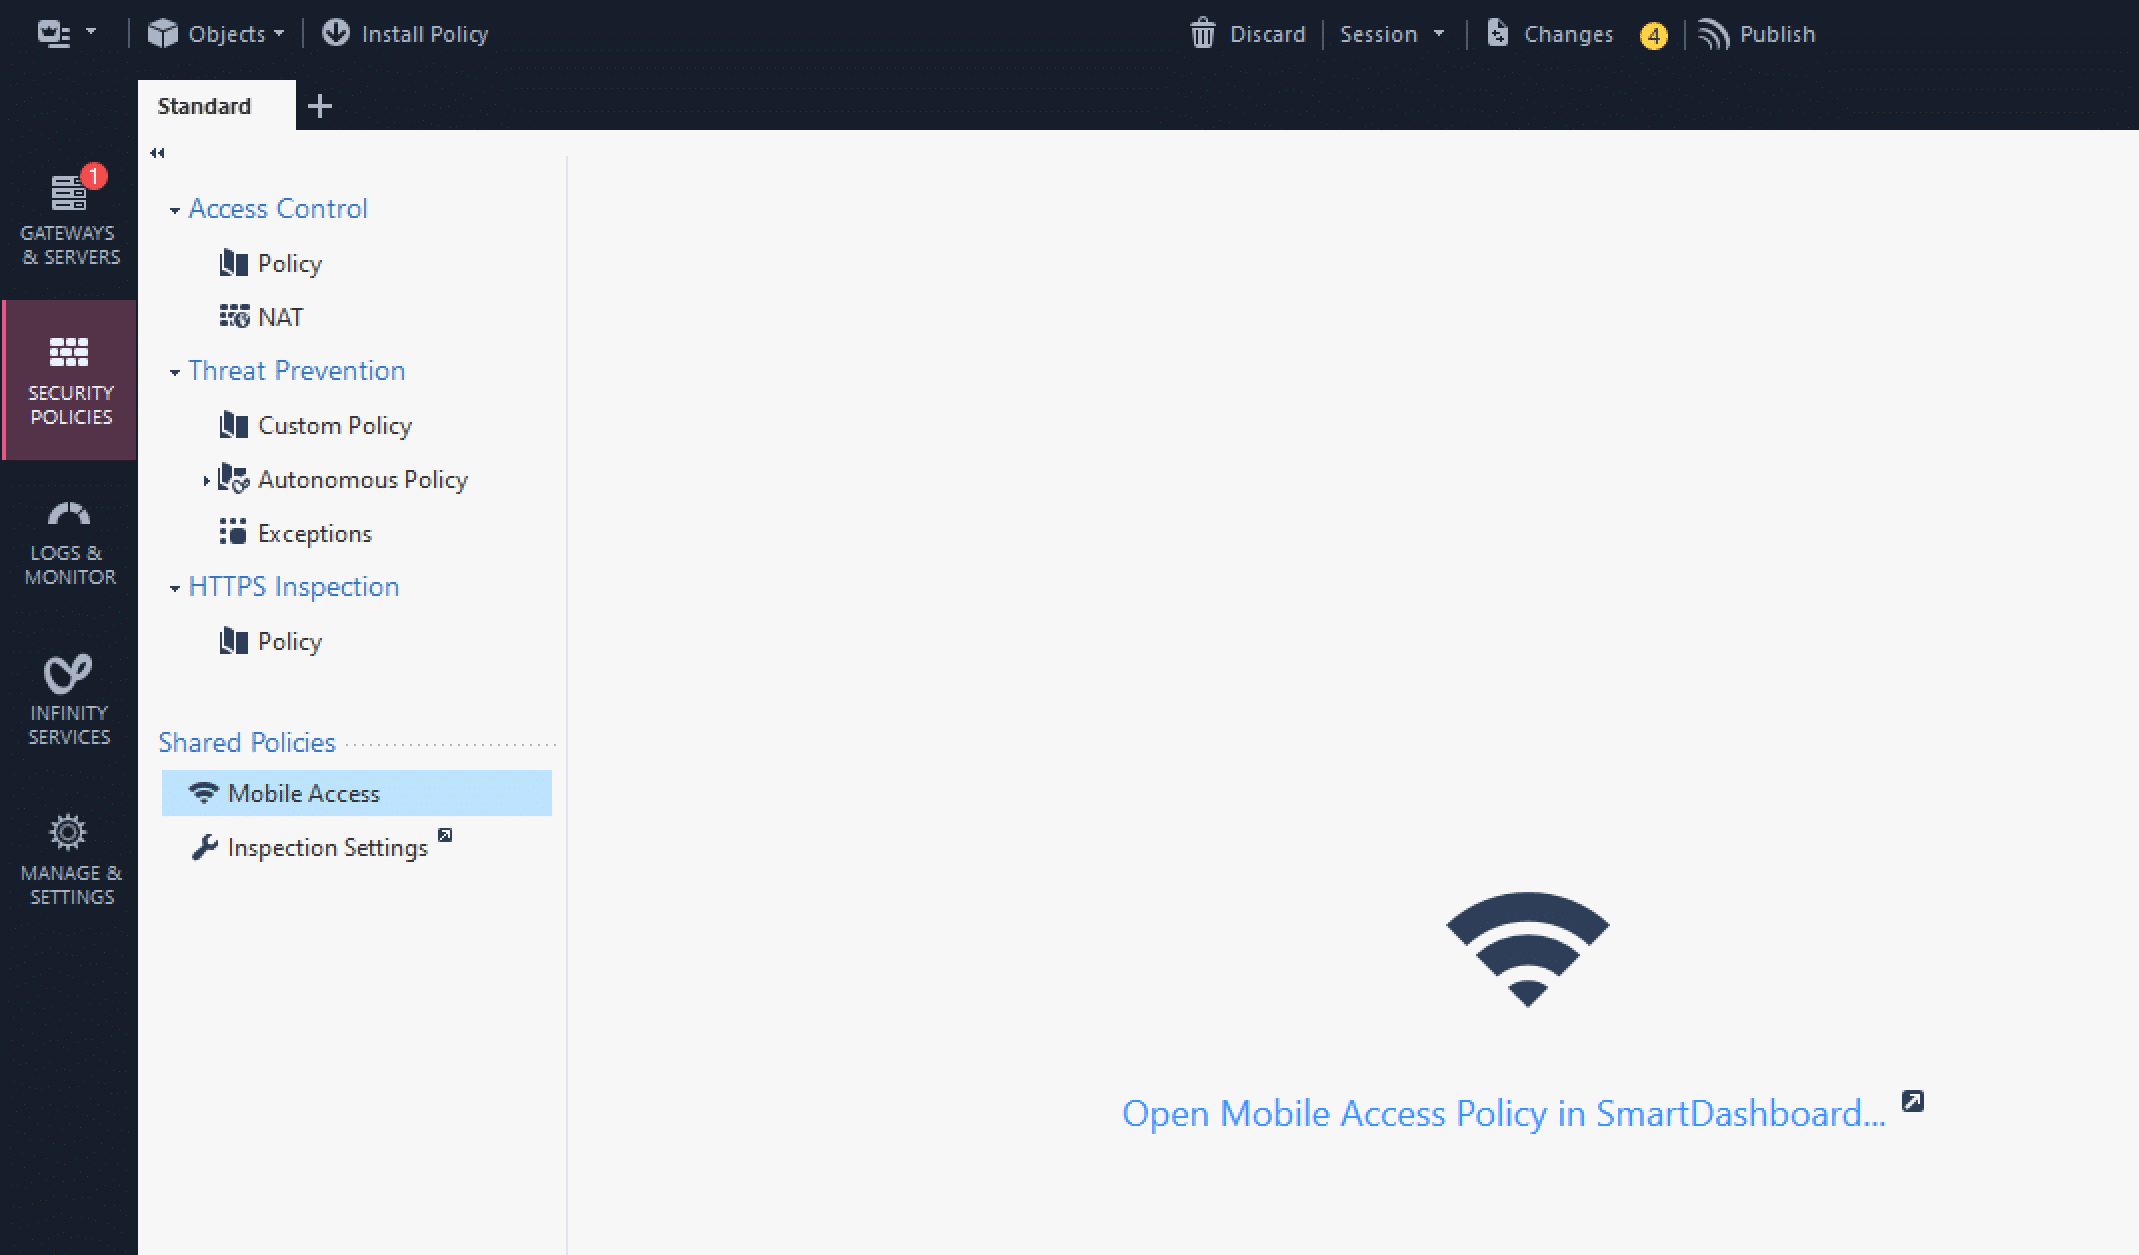
1. In SmartConsole, go to SECURITY POLICIES → Mobile Access and click Open Mobile Access Policy in SmartDashboard.
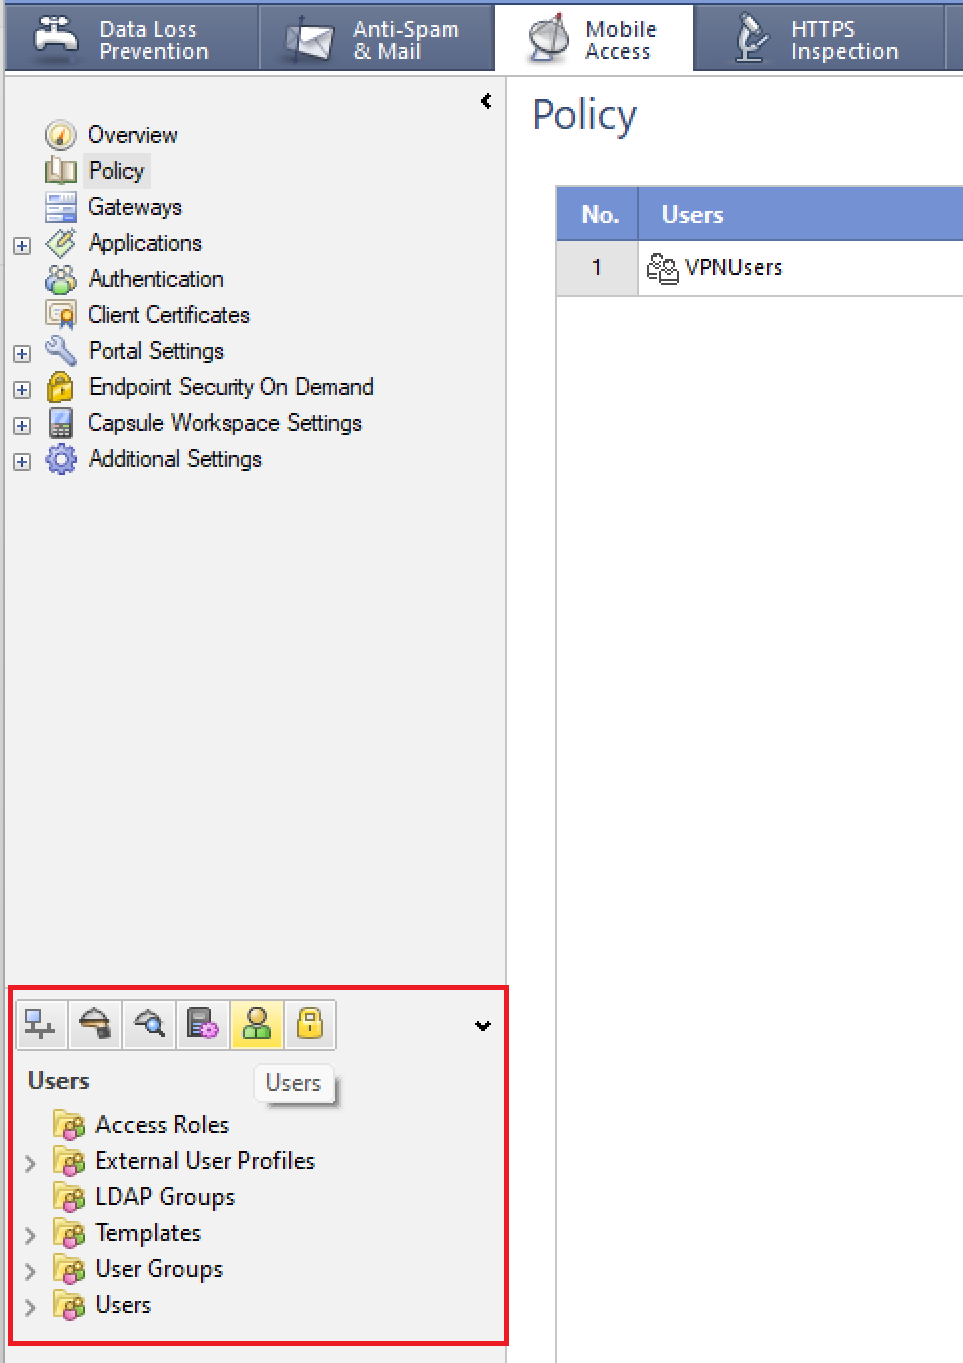
2. The CheckPoint SmartDashboard application will open. Select the Mobile Access tab and then select Policy from the menu on the left.

3. Click the Users column to select it, and then click the + (plus) icon and select the user group for Mobile Access from the list.

Repeat this step for each policy and application you have created for Mobile Access.
4. Confirm your changes using the floppy disk Update icon in the toolbar at the top.

Adding External User Profile for Mobile Access
1. In SmartConsole, go to SECURITY POLICIES → Mobile Access and click Open Mobile Access Policy in SmartDashboard.

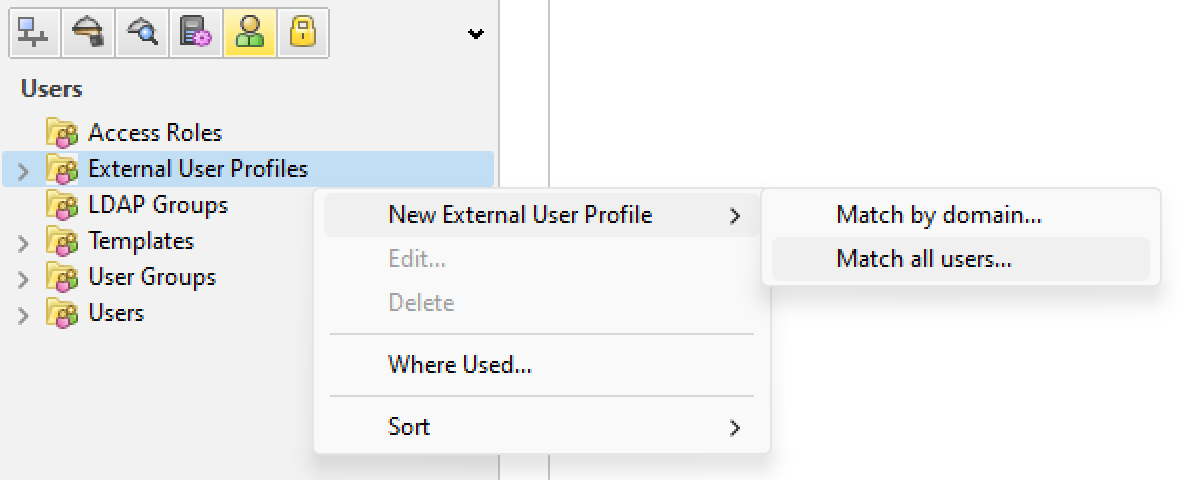
3. Right-click External User Profiles and then select New External User Profile → Match all users.
4. In General Properties, set a name for the new External User Profile.
5. In Authentication, select the following and click OK:
- Authentication Scheme: Select RADIUS
- Settings > Select a RADIUS Server or Group of Servers: Select the Rublon Authentication Proxy server

6. Confirm your changes using the floppy disk Update icon in the toolbar.

7. After updating, you can close the SmartDashboard.
Finalizing the Configuration
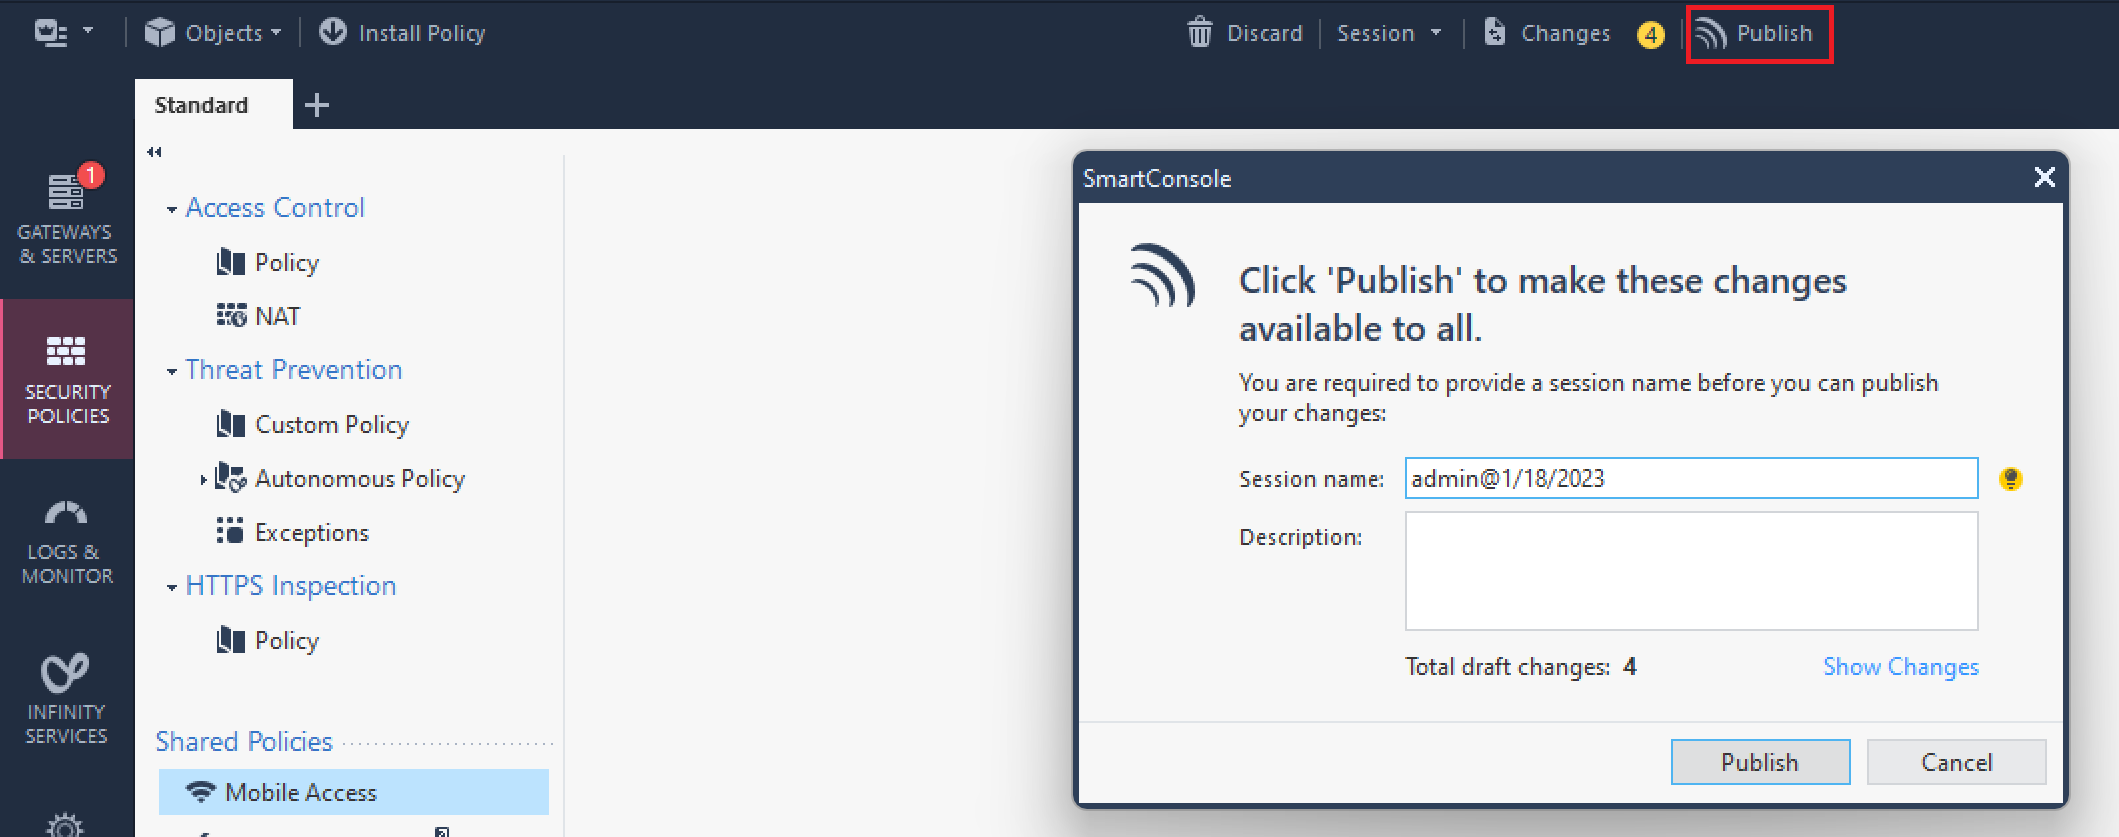
1. Click Publish in the top bar of the SmartConsole window.
2. In the new window, confirm your choice by clicking Publish again.
3. After publishing your changes is complete, you can proceed to install the previously created policies on your Check Point CloudGuard instances. To do this, click Install Policy in the top-left bar of the SmartConsole window.
4. In the new window, select the instances to which you want to send the new settings and click the Install button to confirm your choice. If you have more than one Gateway with the Mobile Access module, remember to include them all!

5. You can track the progress of the installation in the SmartConsole at the bottom of the page.
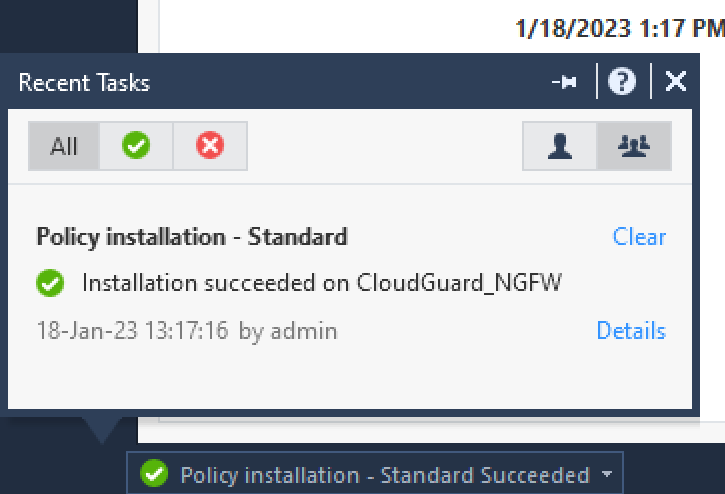
6. After the installation of policies is complete, you are all set to test your configuration.
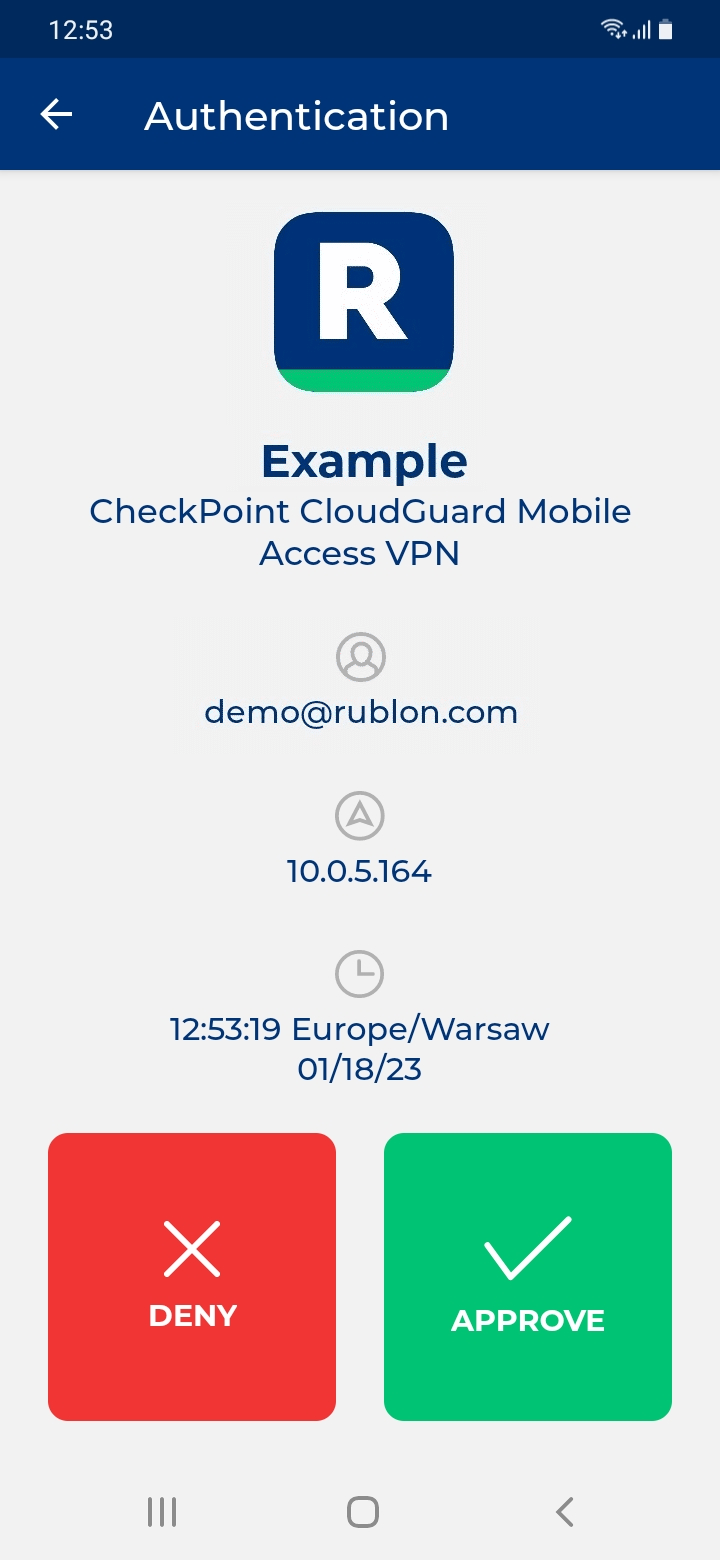
Testing Multi-Factor Authentication (MFA) for Check Point Mobile Access VPN
1. Go to the Mobile Access Portal to initiate login.
2. In Login option, select Rublon Auth Proxy.