Overview of MFA for Fortinet FortiGate IPSec VPN Using RADIUS
Multi-Factor Authentication (MFA) for Fortinet FortiGate IPSec VPN using FortiClient or a web browser is an additional layer of security that requires users to provide two authentication factors to gain access to the VPN. The initial factor requires users to enter their Active Directory / RADIUS username and password. Following the completion of the first factor, the user then has to authenticate with an available authentication option, like Mobile Push or Email Link. Once both factors have been completed, the user can access the resource. Enabling Two-Factor Authentication (2FA) or Multi-Factor Authentication (MFA) for Fortinet FortiGate IPSec VPN helps protect from hackers accessing resources even if they possess the user’s login credentials.
Demo Video

Supported Authentication Methods
Before you start
You need to install and configure Rublon Authentication Proxy before configuring Fortinet FortiGate IPSec VPN to work with it. Read Rublon Authentication Proxy and follow the steps in the Installation and Configuration sections. Afterward, follow the Configuration section in this document.
Ensure that you have properly set up your authentication source, that is an external Identity Provider (IdP) like RADIUS, OpenLDAP, or Microsoft Active Directory.
Configuration of MFA for Fortinet FortiGate IPSec VPN Using RADIUS
Add Rublon Authentication Proxy as RADIUS Server in Fortinet FortiGate


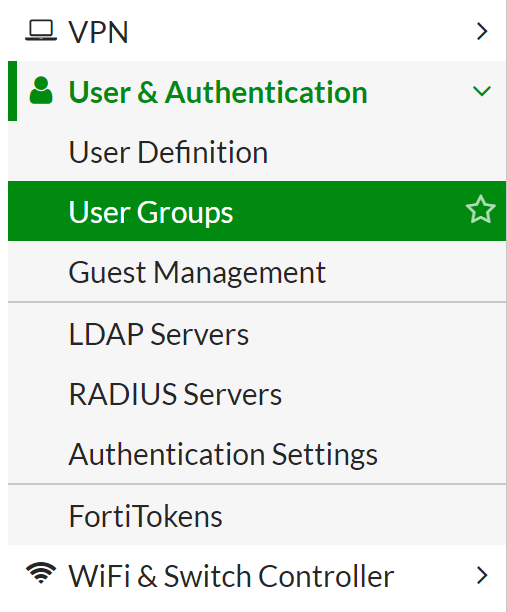
Configure a User Group

set member NAME_OF_THE_SERVER_FROM_LDAP_SERVERS
config match
edit 1
set server-name NAME_OF_THE_SERVER_FROM_LDAP_SERVERS
set group-name DN_OF_THE_GROUP_FROM_AD
next
end
endNote
Configure Firewall Policy and Mapping
Configure Timeout and Additional Options
config system global
set remoteauthtimeout 60
set ldapconntimeout 60000
endConfigure IPSec
1. In the Fortinet FortiGate administrator panel, go to VPN → VPN Tunnels and select your IPSec VPN profile. Then select Edit.

2. In the Tunnel Settings tab, navigate to the Authentication section and fill out the fields. Refer to the following image and table.
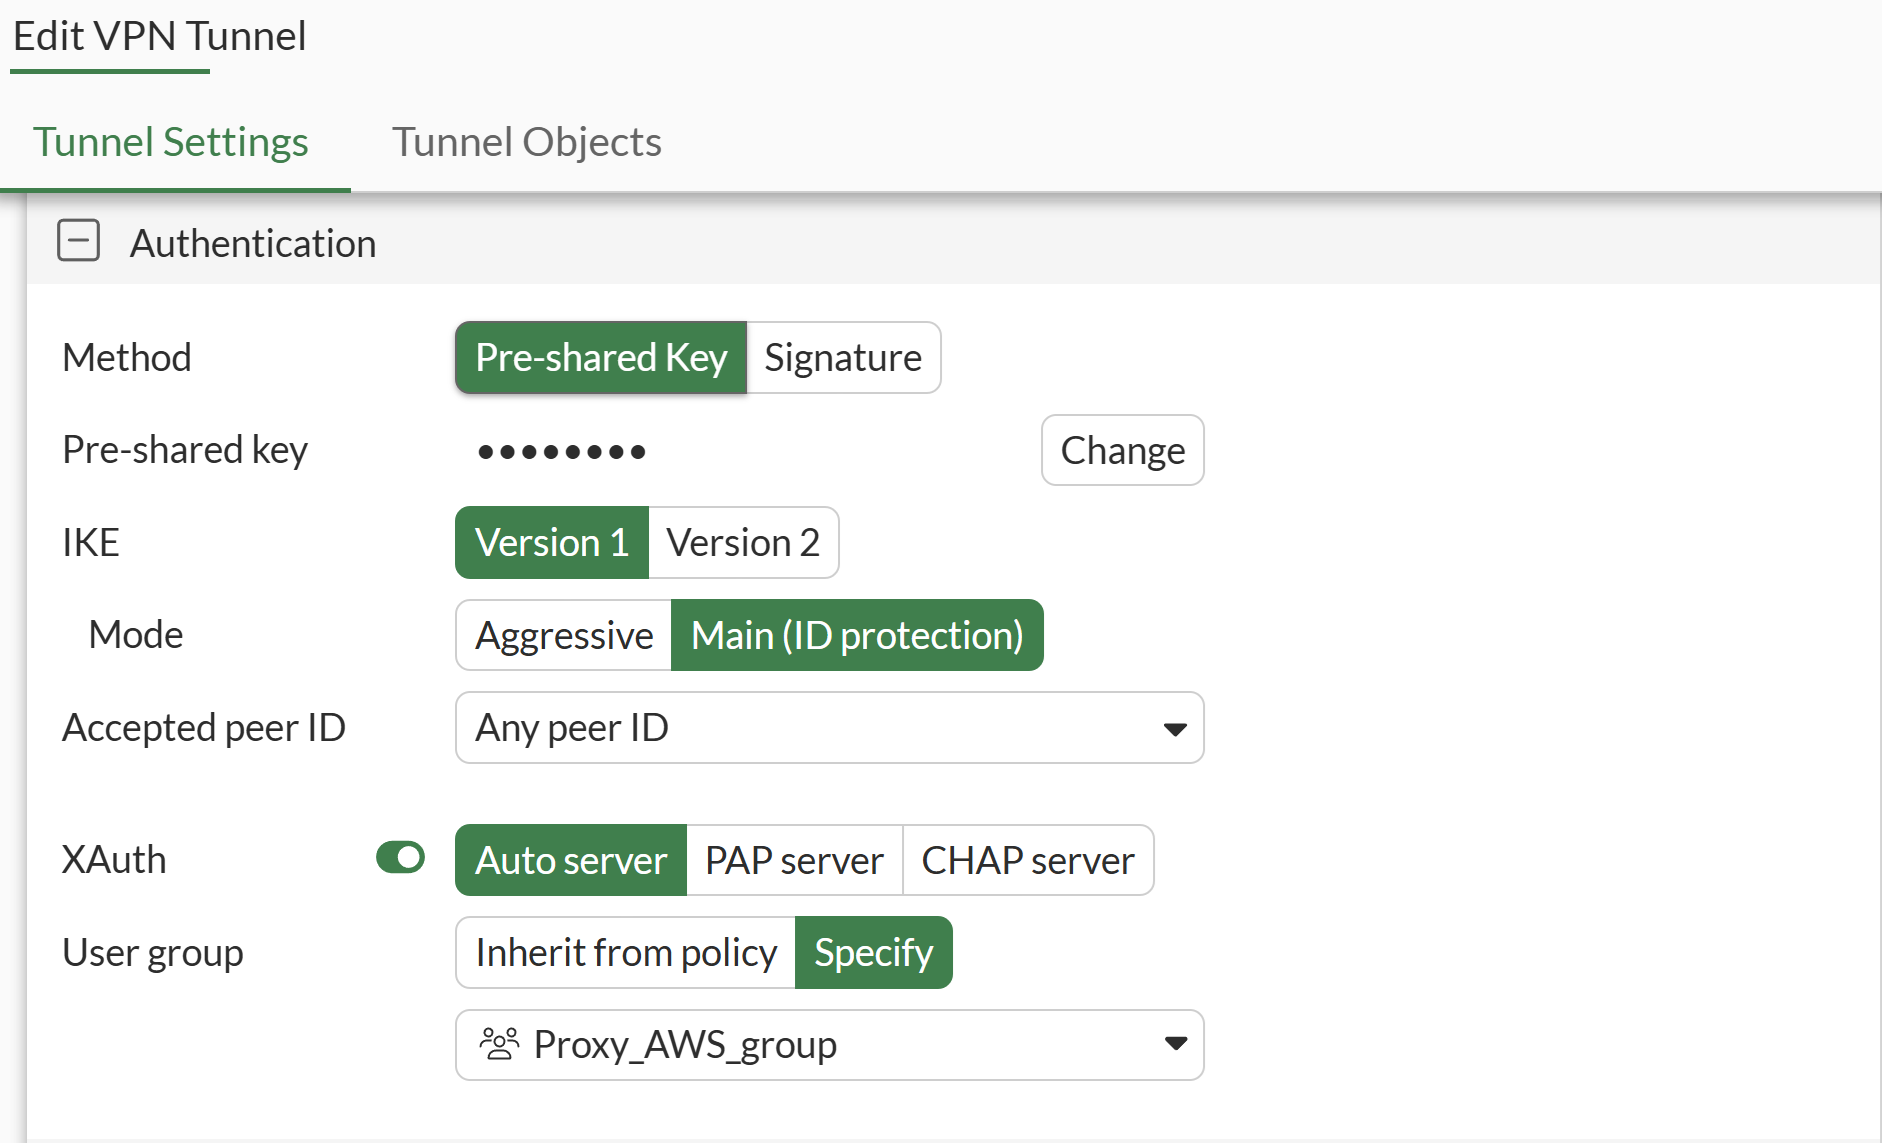
| Method | Select Pre‑shared Key or Signature, depending on your IPSec configuration. These are methods of authenticating the connection between the client and the server. The first uses a shared password, while the second relies on a certificate. More information: Pre-shared key vs digital certificates |
| IKE | Version 1 |
| Mode | Main (ID Protection) |
| Accepted peer ID | Any peer ID |
| XAuth | Auto server |
| User Group | Specify and select the group you have created in Configure a User Group. |
3. Leave all other fields at their default values or adjust them according to your needs, and then select OK to save your configuration.
Log in to FortiGate IPSec VPN using MFA for Fortinet FortiGate IPSec VPN Integrated Via RADIUS
Rublon MFA for FortiGate IPSec VPN requires the use of the FortiClient VPN.
In this example, Mobile Push has been set as the second factor in Rublon Authentication Proxy configuration (AUTH_METHOD was set to push).
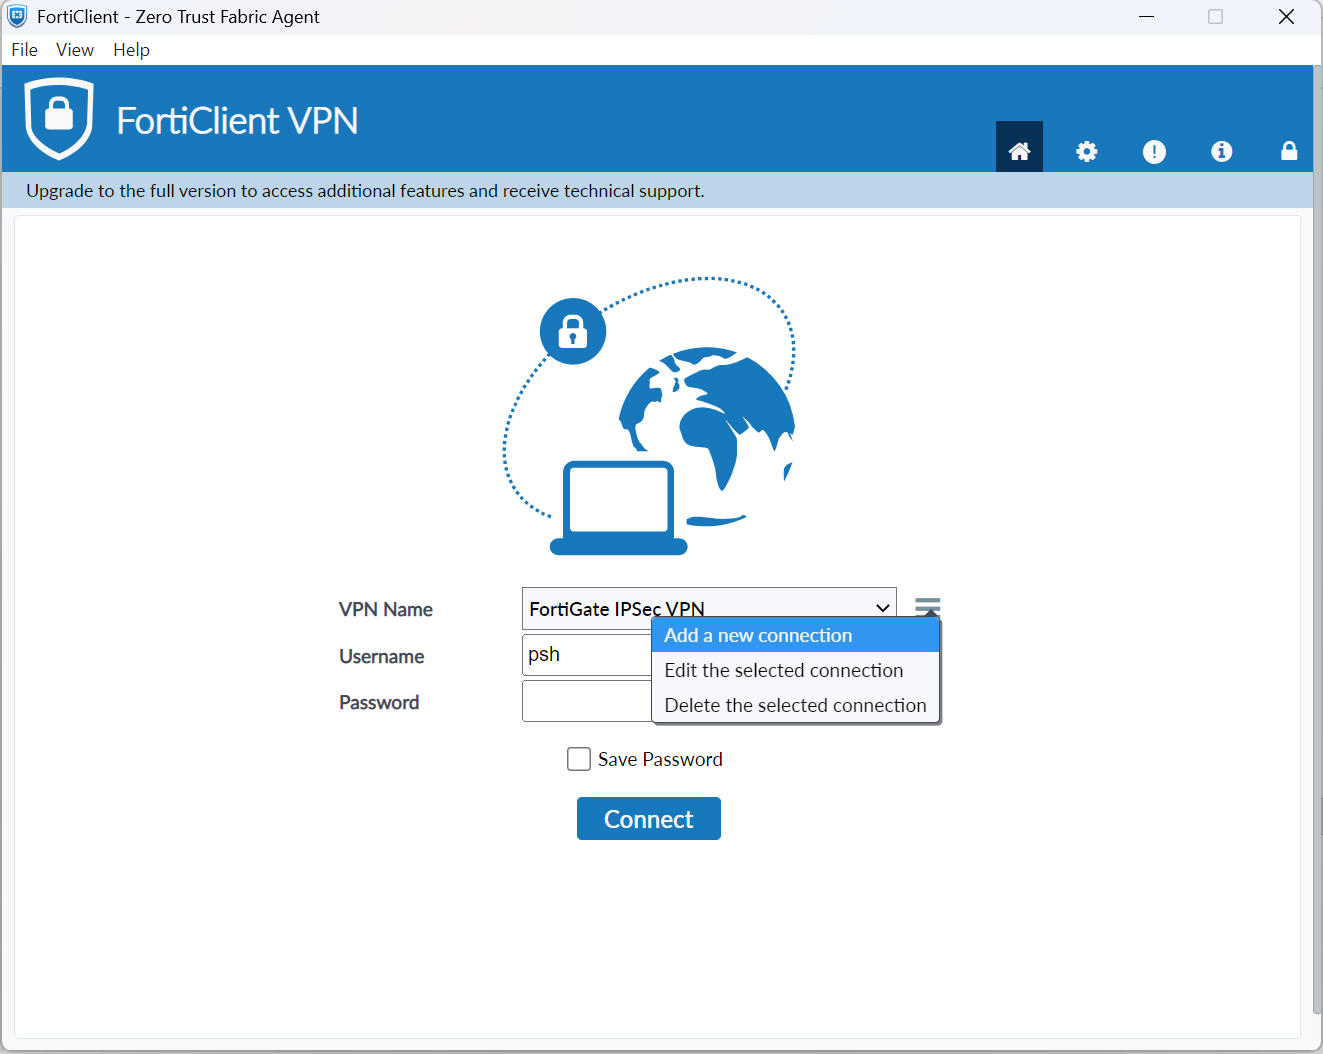
1. Open the FortiClient VPN and create a new IPSec VPN connection.
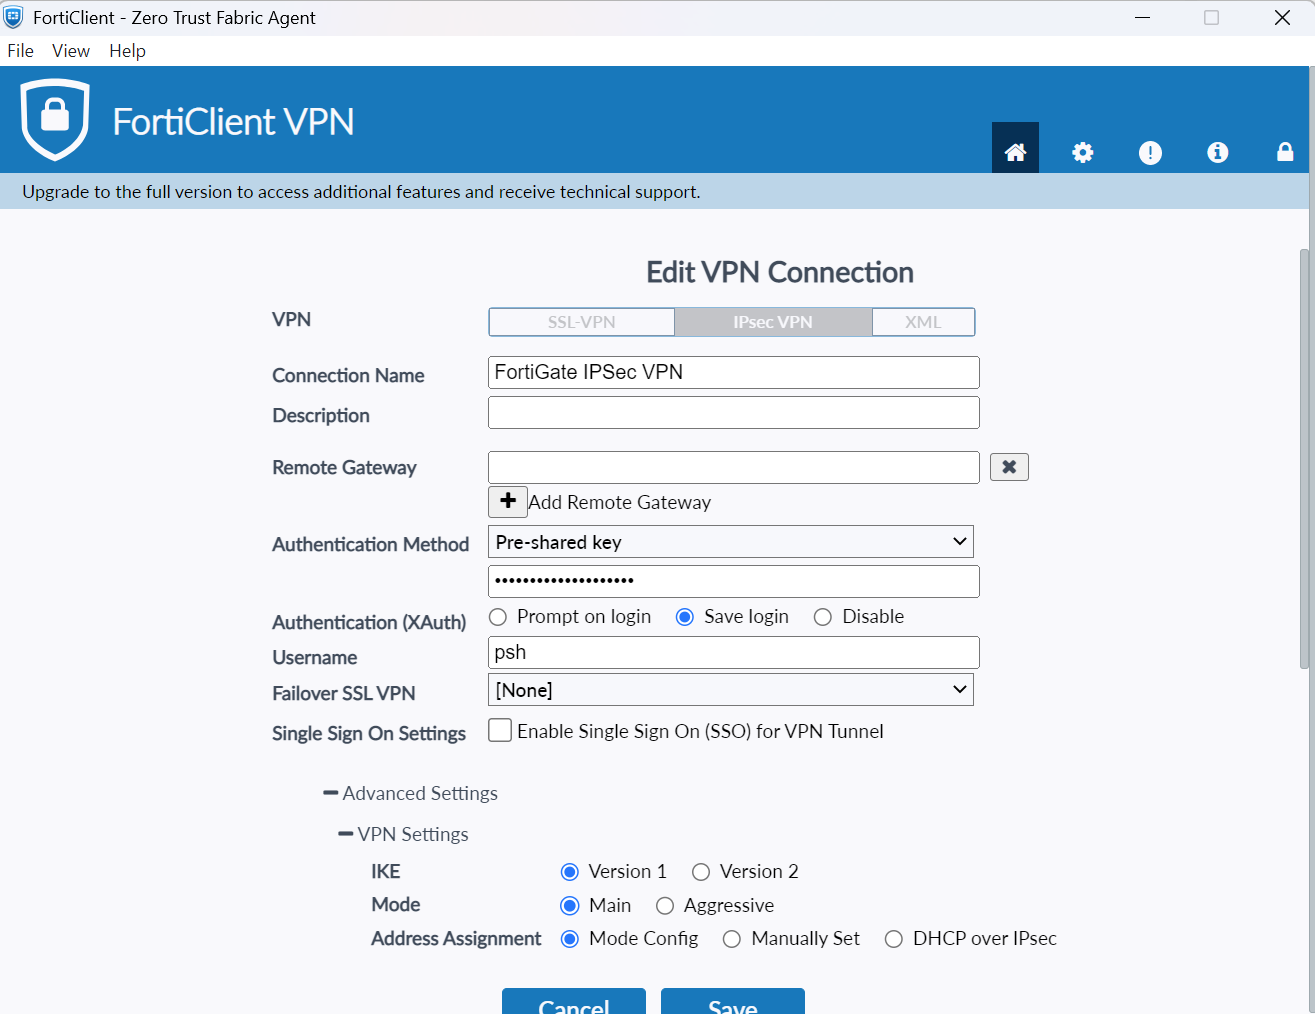
2. Select IPSec VPN and then set the following settings:
- Enter the IP in the Remote Gateway.
- Specify the Authentication Method.
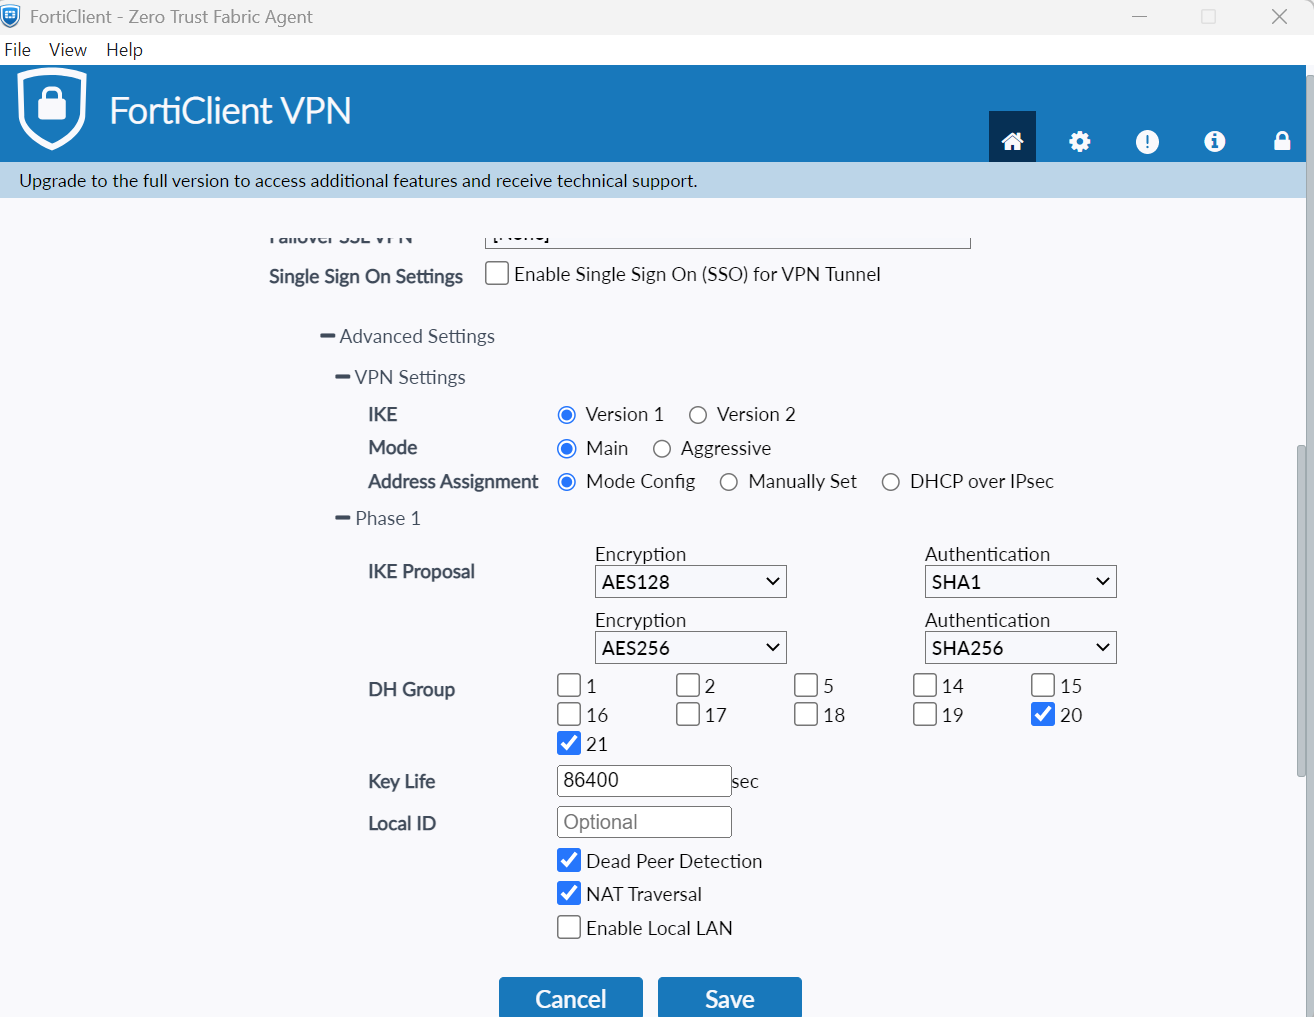
- Expand Advanced Settings → VPN Settings and set the following:
- IKE: Version 1
- Mode: Main
- Address Assignment: Mode Config
- Expand Advanced Settings → Phase 1 and set the following:
- IKE Proposal: AES128/SHA1; AES256/SHA256
- DH Group: 20 i 21
- Key Life: 86400
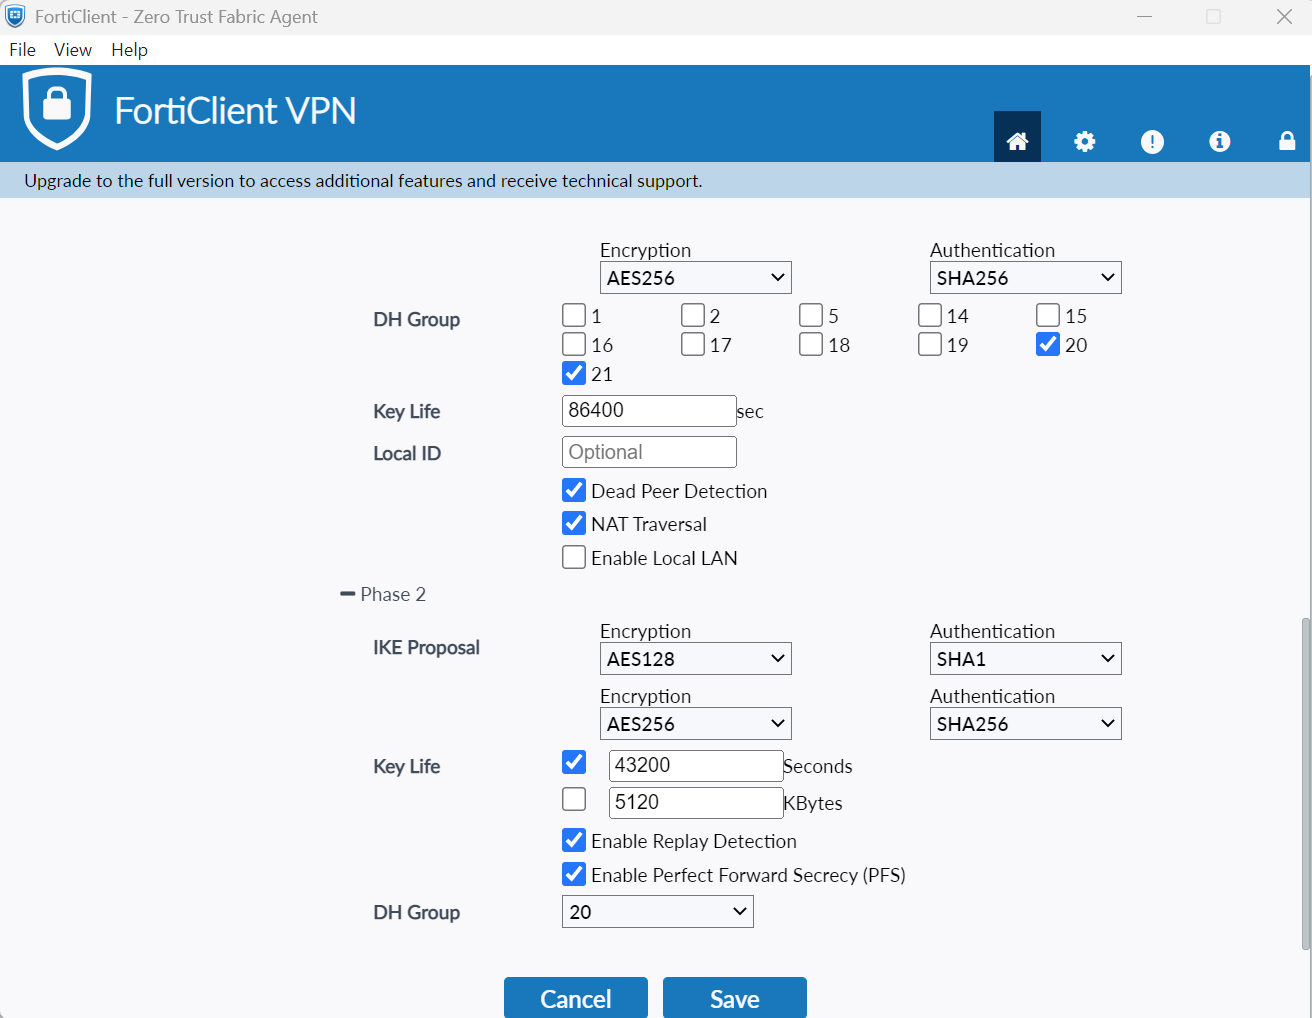
- Expand Advanced Settings → Phase 2 and set the following:
- IKE Proposal: AES128/SHA1; AES256/SHA256
- Key Life: 43200
- DH Group: 20
- Select Save.
3. Provide your username and password, and click Connect.
4. You will be sent an automatic push notification on your phone.
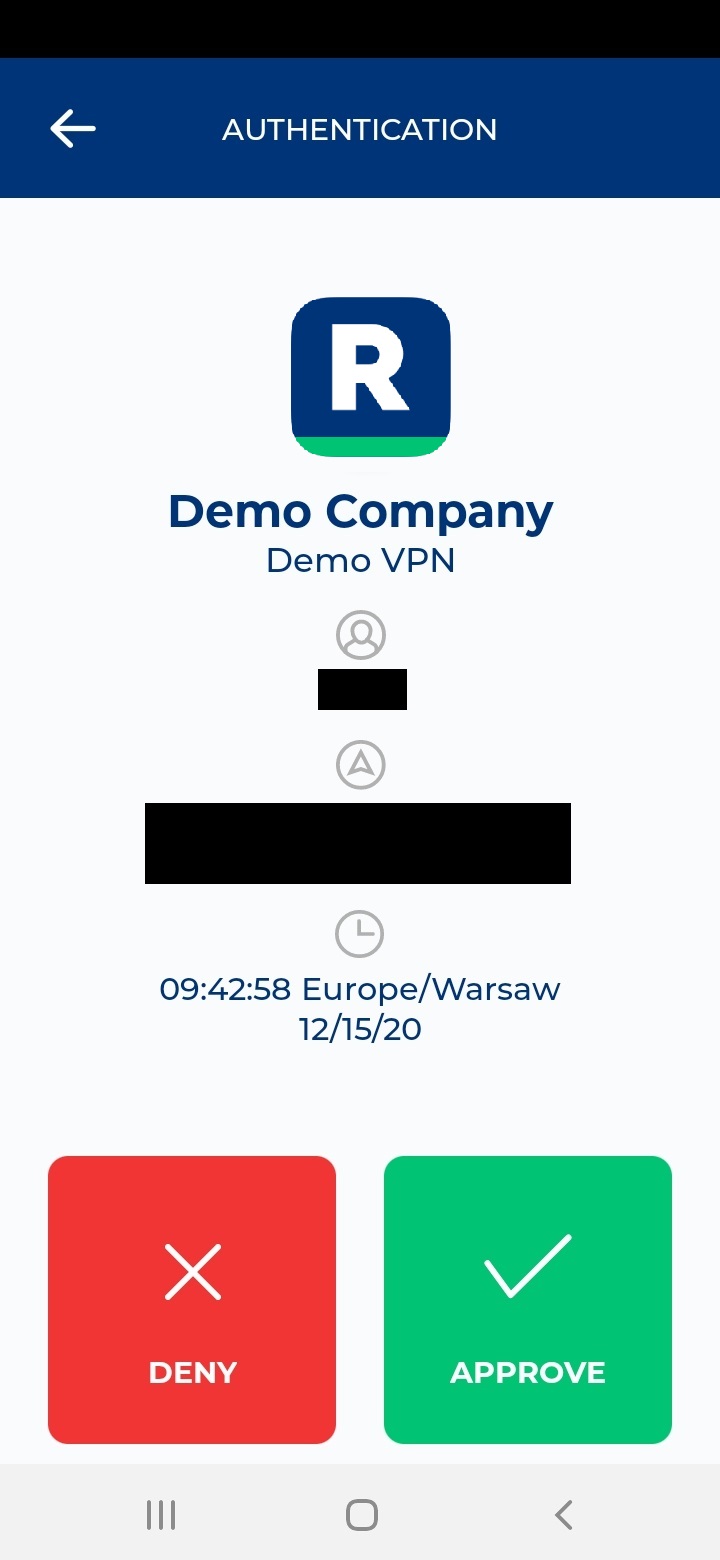
5. Tap APPROVE.
6. You will be logged in to your VPN.
Troubleshooting MFA for FortiGate IPSec VPN Using RADIUS
If you encounter any issues with your Rublon integration, please contact Rublon Support.