Last updated on December 8, 2025
Overview
Supported Authentication Methods
Before you start
Configuration
Follow these steps to enable Rublon 2FA in Jitbit.
Jitbit
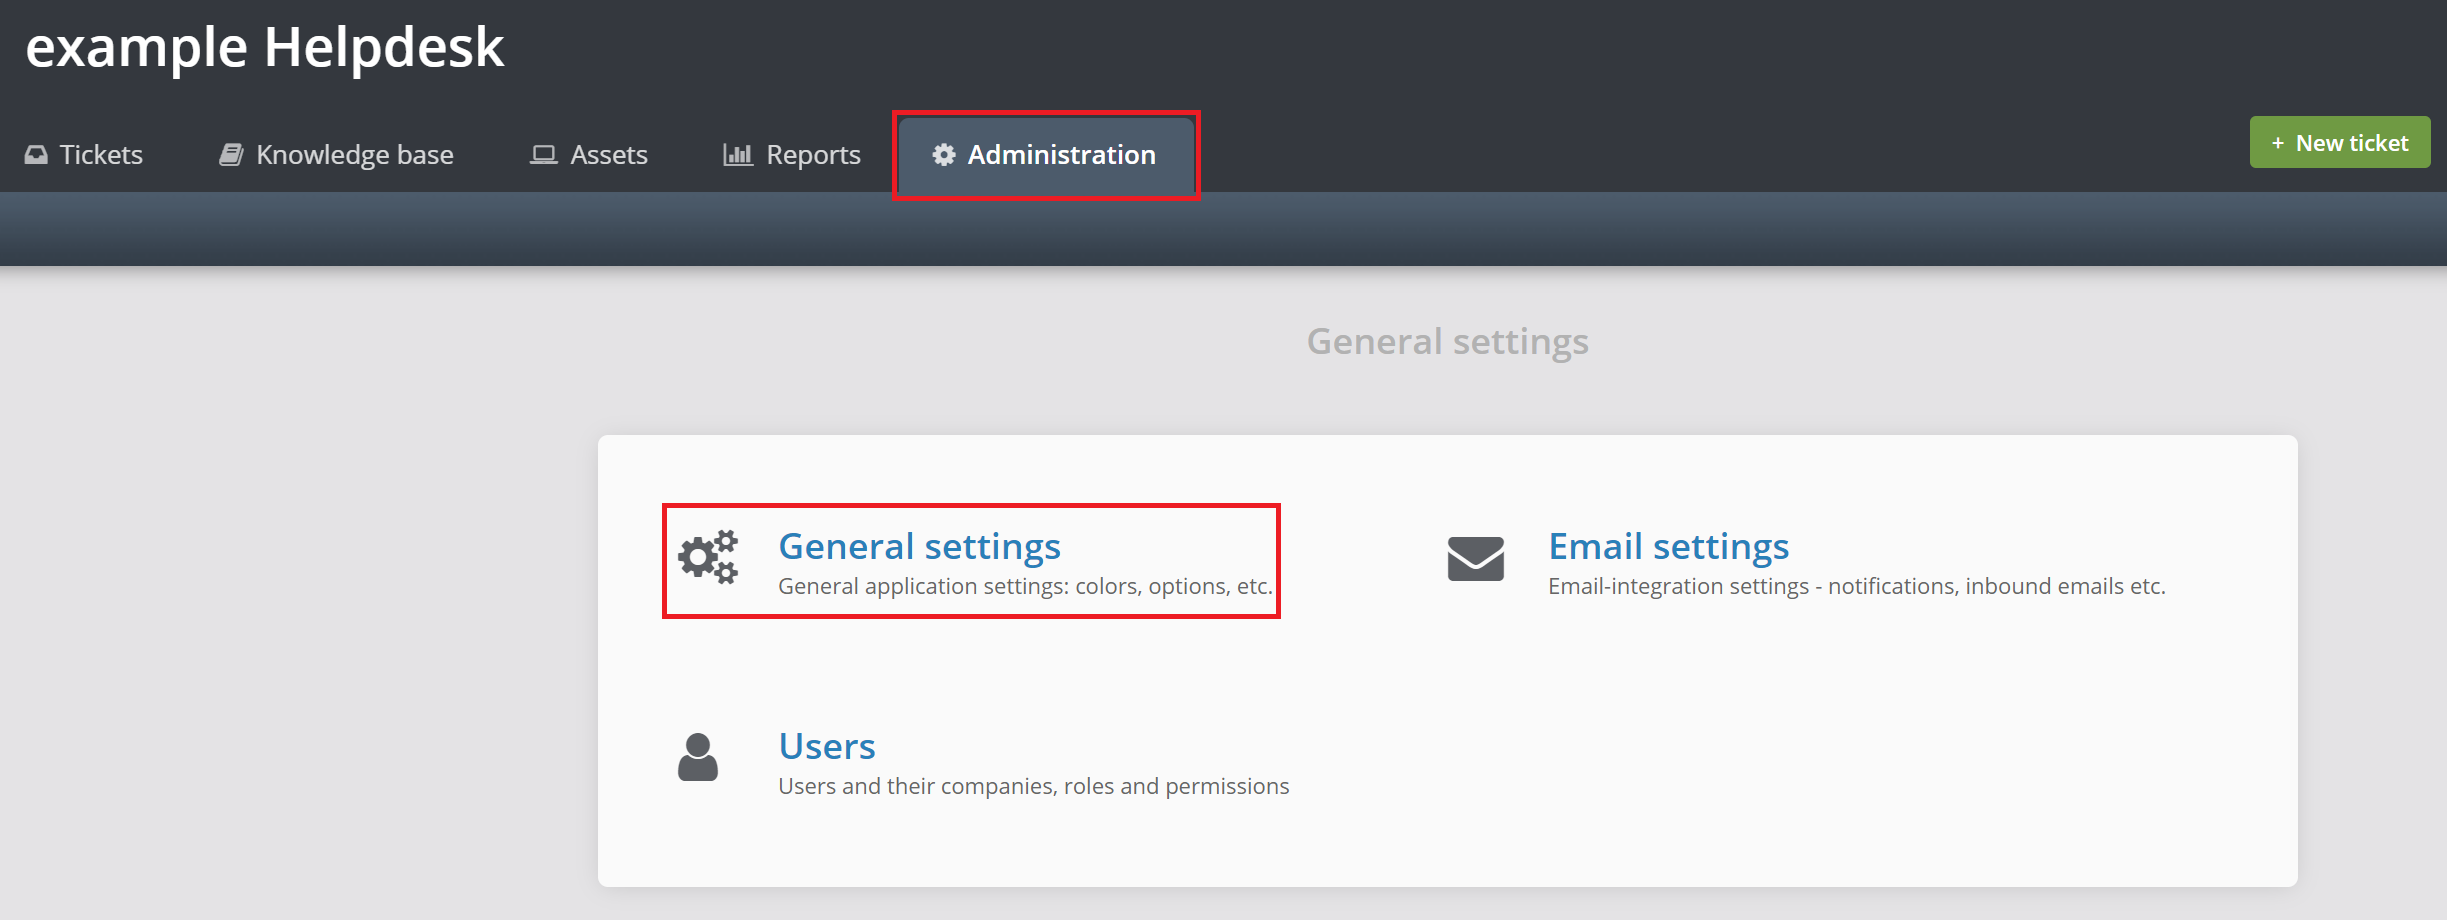
1. Log in to Jitbit Helpdesk as administrator.
2. Select the Administration tab.
3. Click General settings.
4. Navigate to the bottom of the page and click Enable SAML 2.0. single sign on.
5. Fill in the form. Refer to the following image and table.

Note
Rublon Access Gateway

| Application name | Enter a name for the application, e.g. Jitbit. The name will be displayed during Rublon 2FA. |
| Entity ID | https://www.jitbit.com/web-helpdesk/ |
| Assertion Consumer Service | https://example.jitbit.com/helpdesk/Saml/Consume Note: Replace example with the name of your subdomain in Jitbit. |
| Single Logout Service | https://www.jitbit.com/ |
| NameID format | urn:oasis:names:tc:SAML:1.1:nameid-format:emailAddress |
| NameID attribute | |
| Send Attributes | NameID |
| Signature algorithm | sha-256 |
| Validate Authn Request | Uncheck. |
| Sign response | Check. |
| Certificate for signing | Select the certificate you have downloaded from Applications → Information for configuring applications with Rublon Access Gateway → DOWNLOAD CERTIFICATE. |
Log in to Jitbit with Rublon 2FA
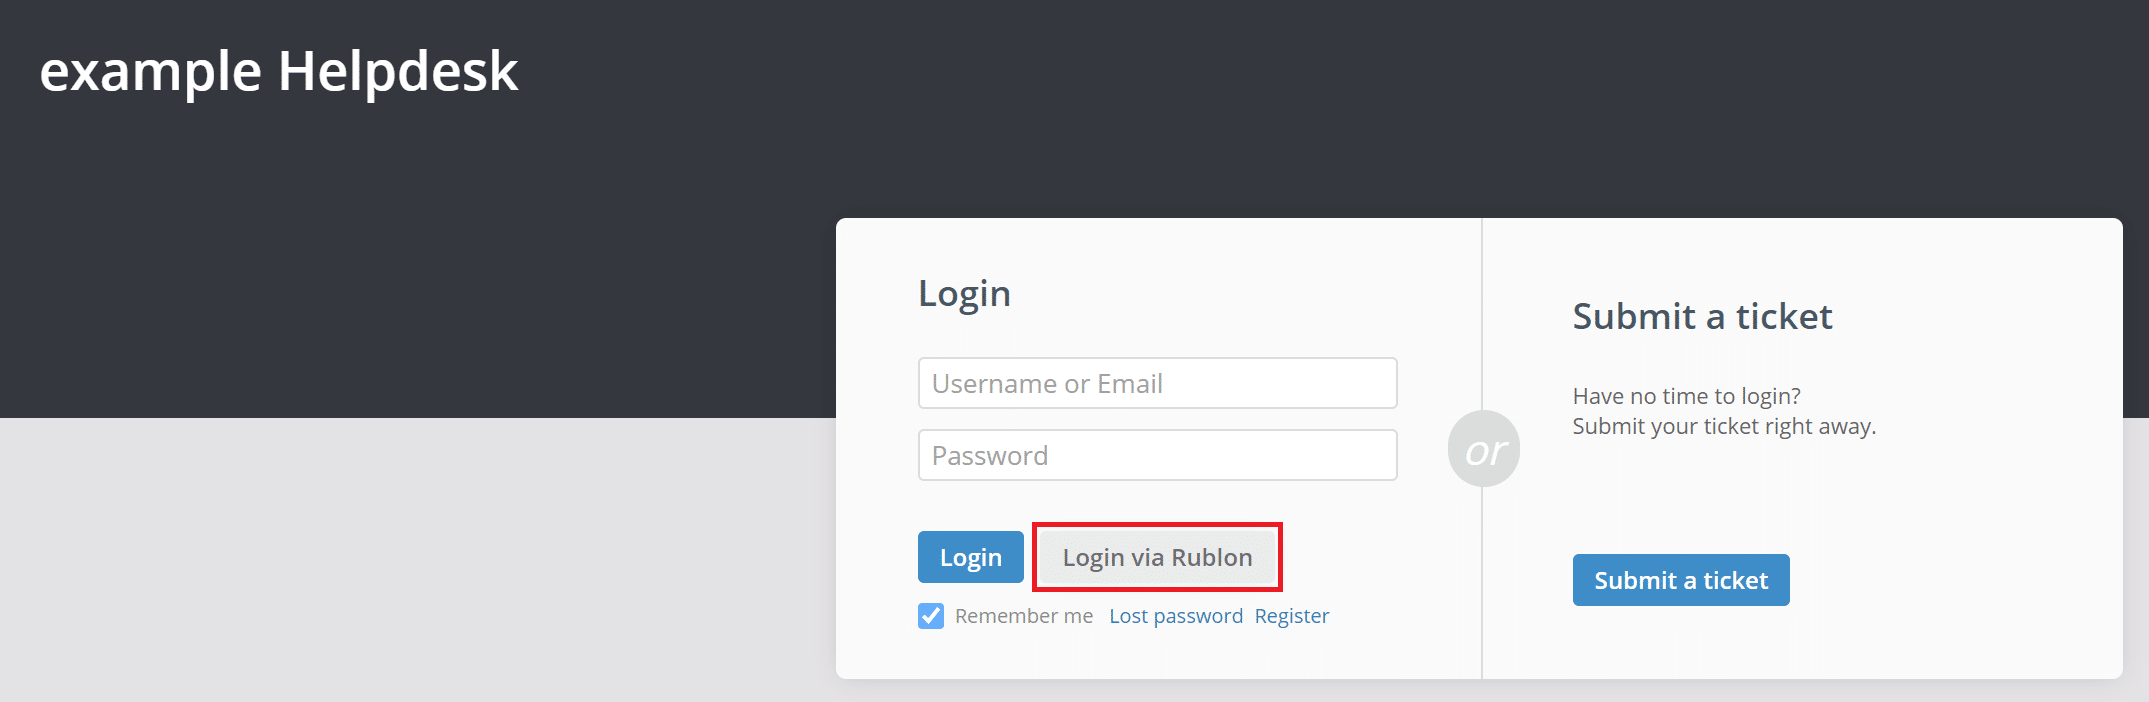
1. Go to https://example.jitbit.com/helpdesk/User/Login. Replace example with the name of your subdomain in Jitbit.
2. Click Login via Rublon.
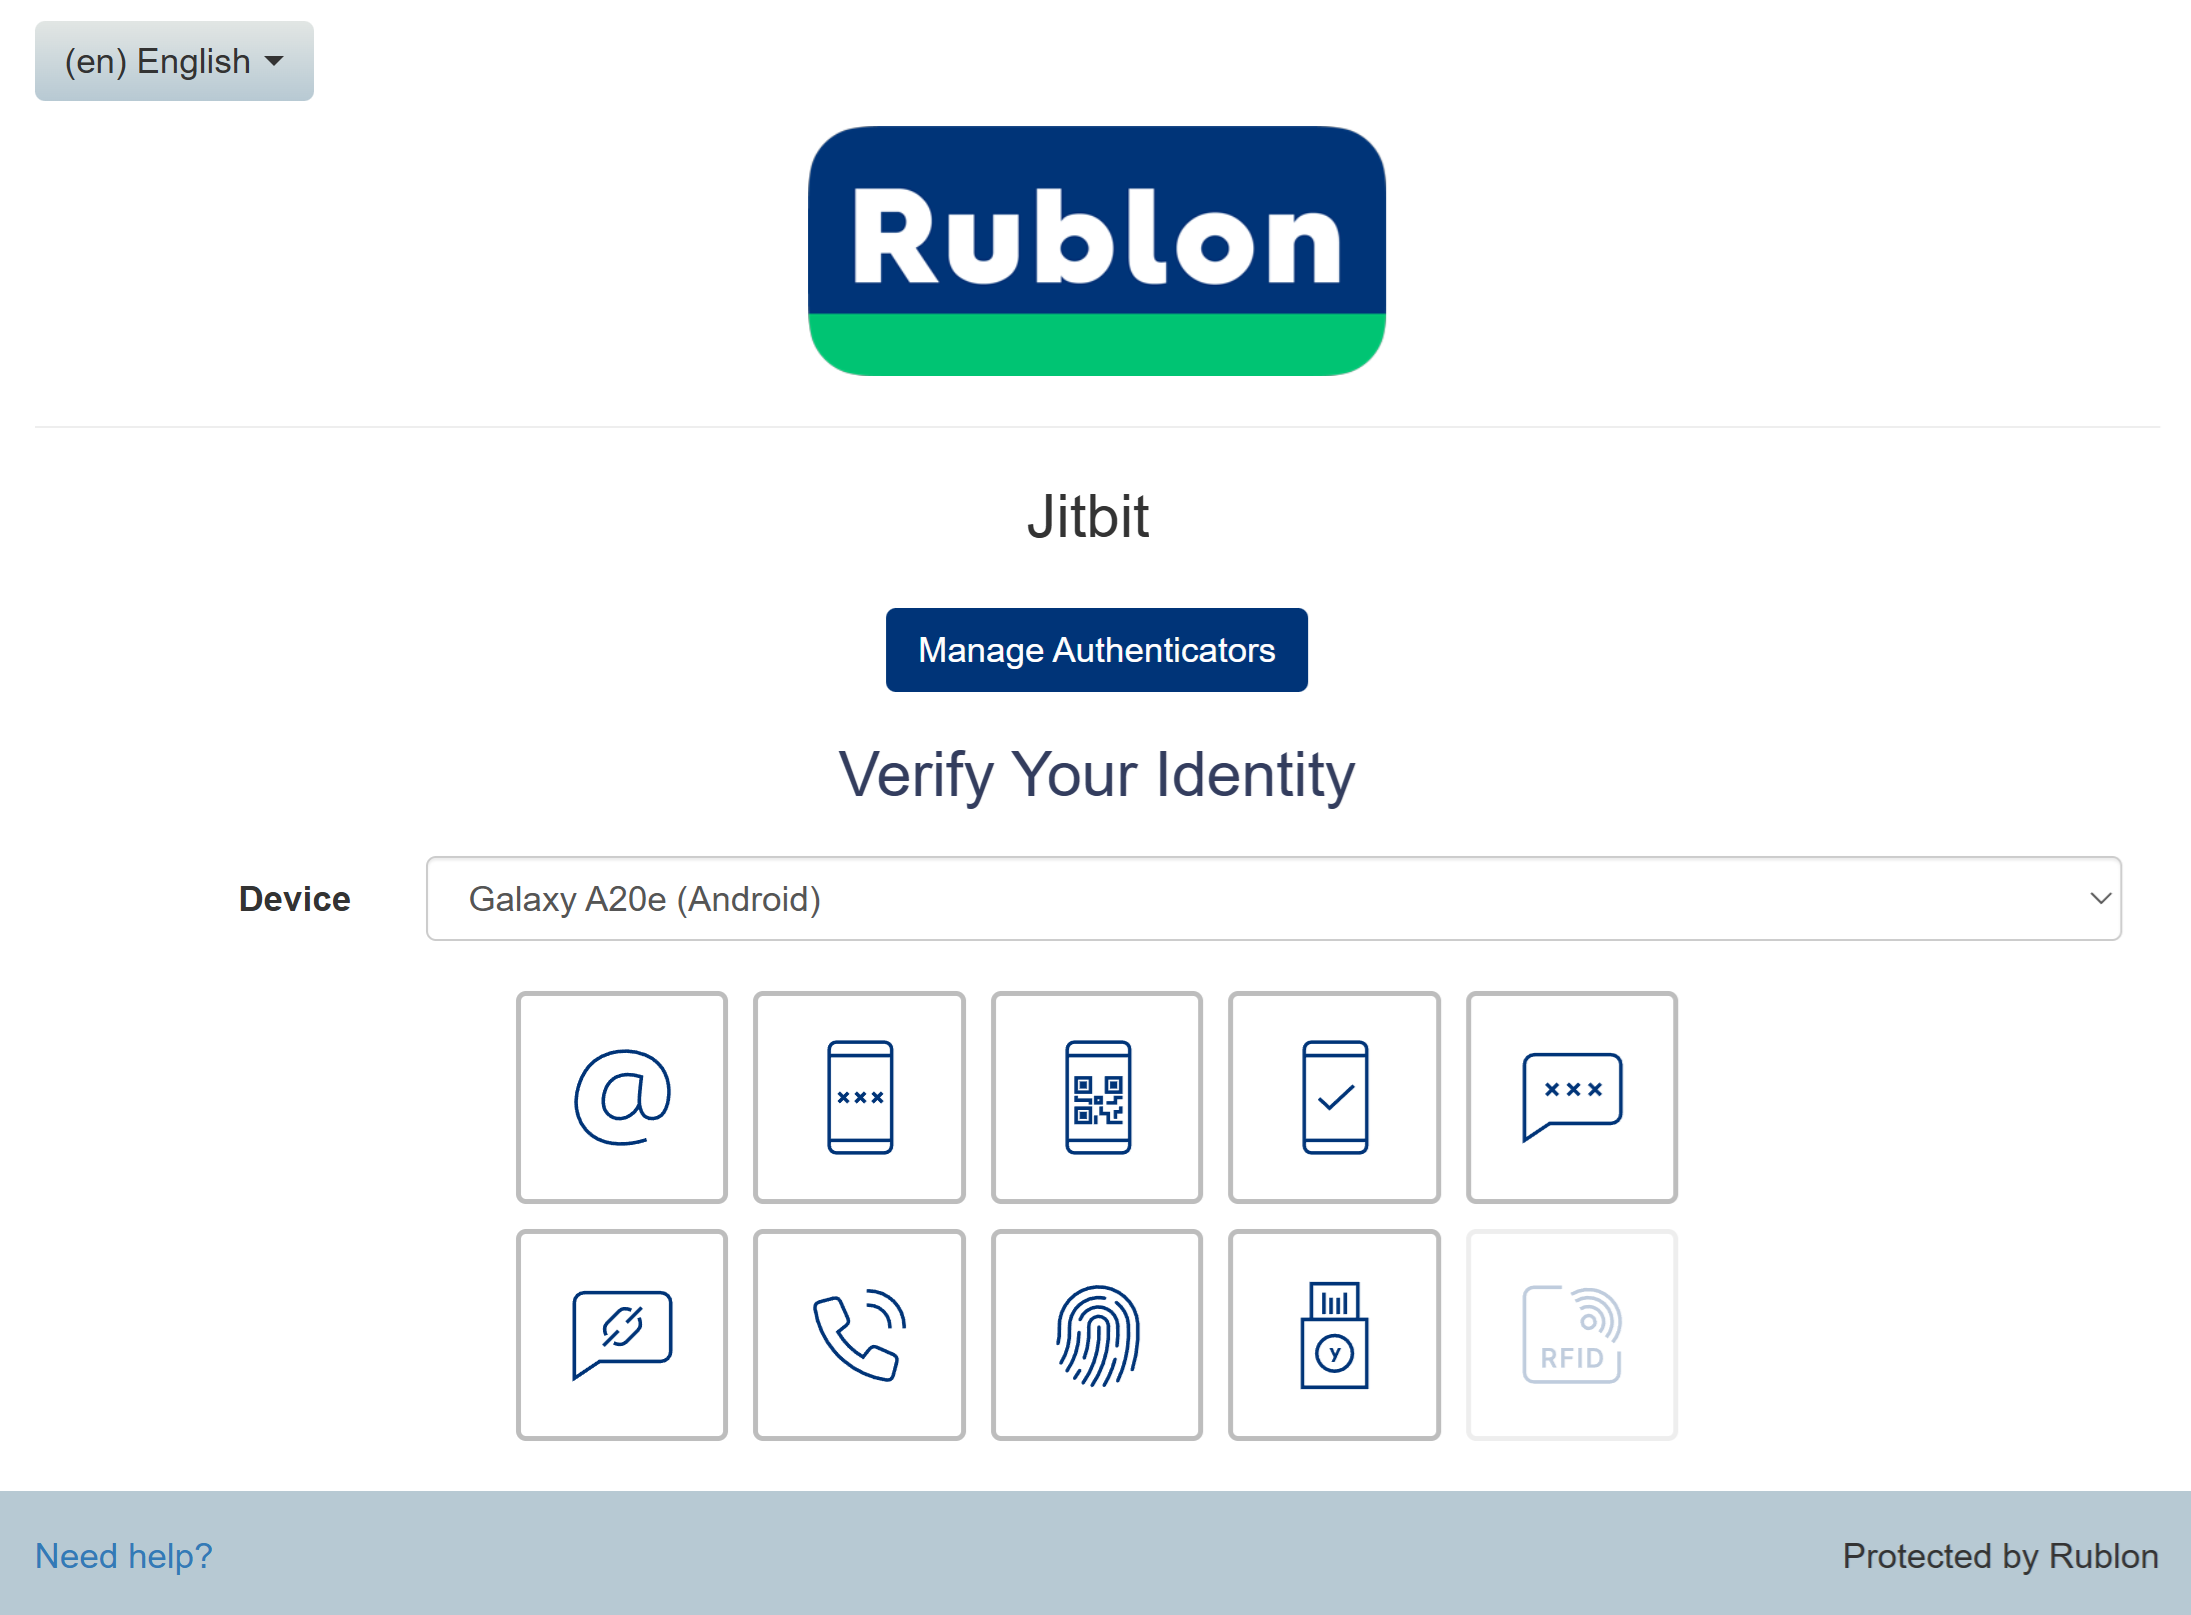

6. You will be successfully logged in to Jitbit.
Troubleshooting
If you encounter any issues with your Rublon integration, please contact Rublon Support.