Last updated on December 17, 2025
Overview
Supported Authentication Methods
Before You Start
Before configuring Rublon MFA for Kemp LoadMaster:
- Ensure you have prepared all required components.
- Create an application in the Rublon Admin Console.
- Install the Rublon Authenticator mobile app.
Required Components
1. User Identity Provider (IdP) – You need an external Identity Provider, such as FreeRADIUS or Microsoft NPS.
2. Rublon Authentication Proxy – Install the Rublon Authentication Proxy if you have not already, and configure the Rublon Authentication Proxy as an RADIUS proxy.
3. Kemp LoadMaster – A properly installed and configured Kemp LoadMaster. Tested on Kemp LoadMaster LX-25.
Create an Application in the Rublon Admin Console
1. Sign up for the Rublon Admin Console. Here’s how.
2. In the Rublon Admin Console, go to the Applications tab and click Add Application.
3. Enter a name for your application (e.g., Kemp) and then set the type to Rublon Authentication Proxy.
4. Click Save to add the new application in the Rublon Admin Console.
5. Copy the values of System Token and Secret Key of the newly created application. You will need them later.
Install Rublon Authenticator
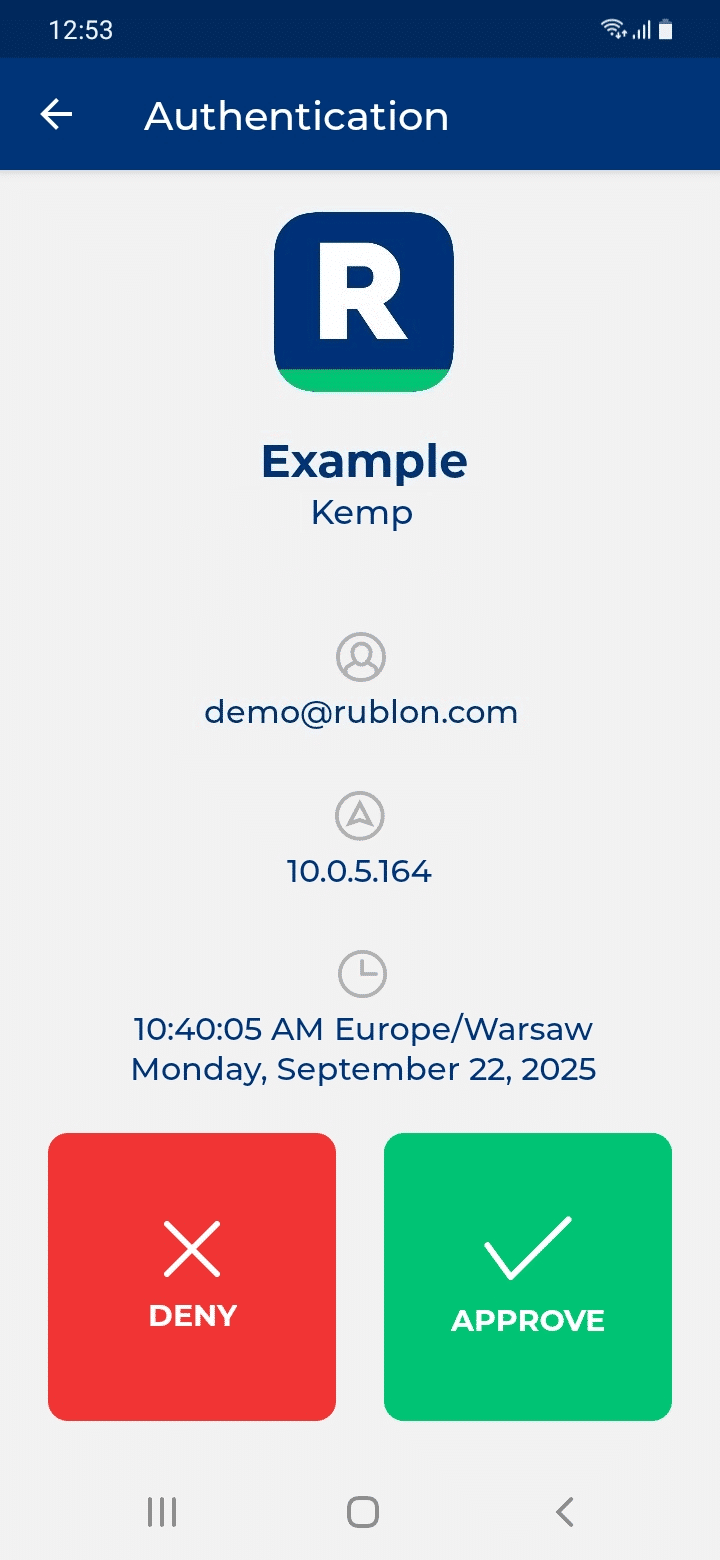
Some end-users may use the Rublon Authenticator mobile app. So, as a person configuring MFA for Kemp LoadMaster, we highly recommend you install the Rublon Authenticator mobile app, too. Thanks to that, you will be able to test MFA for Kemp LoadMaster via Mobile Push.
Download the Rublon Authenticator for:
Configuration
Rublon Authentication Proxy
1. Edit the Rublon Auth Proxy configuration file and paste the previously copied values of System Token and Secret Key in system_token and secret_key, respectively.
2. Config example file in YAML:
global:
  secret_source: plain  # Options: plain, env, vault

log:
  debug: false

rublon:
  api_server: https://core.rublon.net
  system_token: YOURSYSTEMTOKEN
  secret_key: YOURSECRETKEY

proxy_servers:
  - name: RADIUS-Proxy
    type: RADIUS
    radius_secret: YOURRADIUSSECRET
    ip: 0.0.0.0
    port: 1812
    mode: standard
    auth_source: LDAP_SOURCE_1
    auth_method: push,email
    cert_path: /etc/ssl/certs/ca.crt
    pkey_path: /etc/ssl/certs/key.pem
    force_message_authenticator: false

auth_sources:
- name: LDAP_SOURCE_1
  type: LDAP
  ip: 172.16.0.127
  port: 636
  transport_type: ssl
  search_dn: dc=example,dc=org
  access_user_dn: cn=admin,dc=example,dc=org
  access_user_password: CHANGE_ME
  ca_certs_dir_path: /etc/ssl/certs/
See: How to set up LDAPS certificates in the Rublon Authentication Proxy?
3. (Optional) If you want to use the Challenge Mode, change:
mode: standard
To:
mode: challenge
Then, you can set the message displayed on the challenge request:
challenge_request: “Enter Your MFA Code”
If you do not set challenge_request in the config file, the default message will be used instead, as defined in the Rublon Authentication Proxy documentation.
Kemp LoadMaster

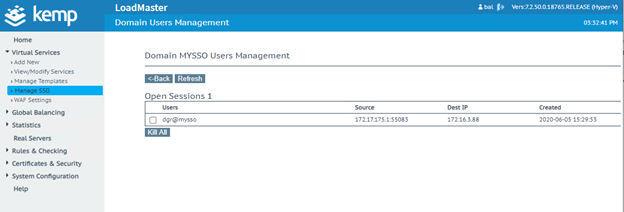
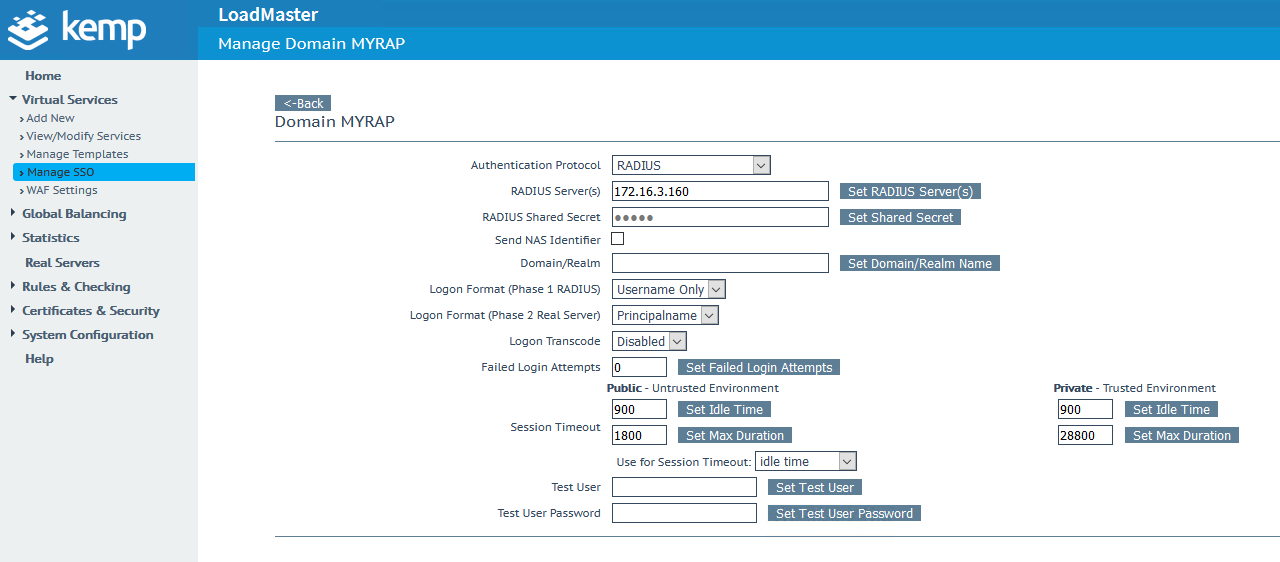
4. Navigate to Virtual Services → Manage SSO, and fill in the Add new Client Side Configuration field with the name of your new SSO configuration. Afterwards, click Add to create a new Client Side Configuration.

5. Select RADIUS in the Authentication Protocol drop-down list.
6. Enter the address of your Rublon Authentication Proxy in the RADIUS Server(s) field. Confirm by clicking the Set RADIUS Server(s) button.
7. Enter the RADIUS Secret set in Rublon Authentication Proxy as the RADIUS Shared Secret, and confirm by pressing the Set Shared Secret button.
8. Set Logon Format (Phase 1 RADIUS) to Username Only.
9. You can optionally enable Send NAS Identifier. It’s disabled by default. If you enable it, a NAS identifier string is sent to the RADIUS server. This string is set to hostname by default. If you check Send NAS Identifier, a RADIUS NAS Identifier field will appear, and you will be given an opportunity to specify the value to be used as the NAS identifier. If the value is not specified, the hostname is used.
Other settings depend on your preferences. If you would like to learn more, please visit this page.
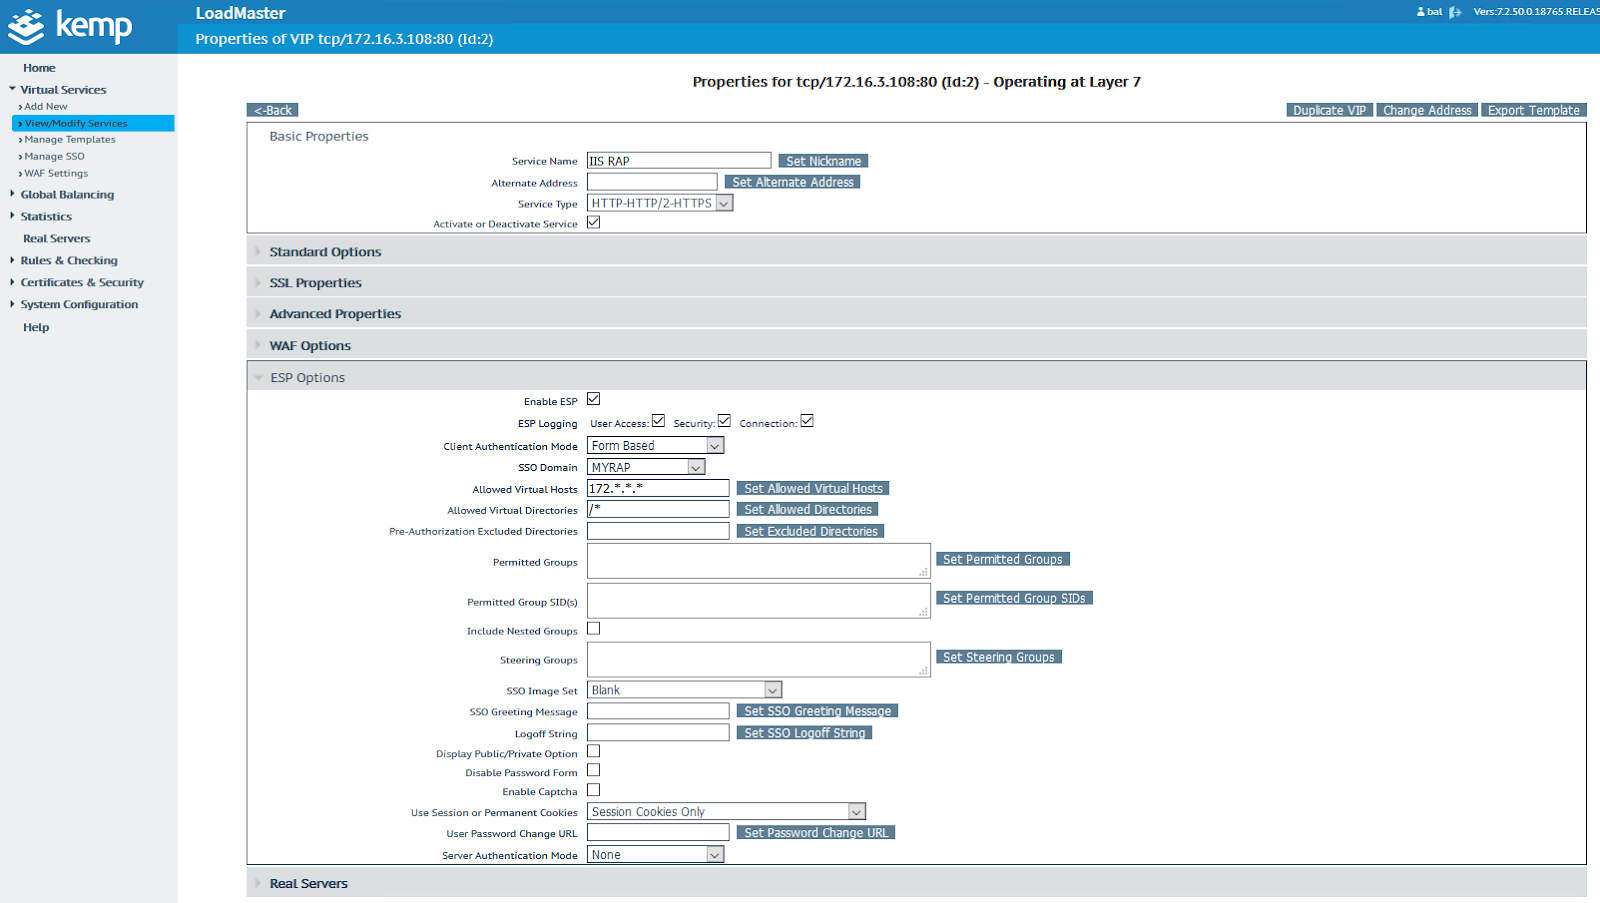
10. Navigate to View/Modify Services, and click the Modify button. Extend ESP options.
11. Check Enable ESP, and fill in the required data.
12. Set Client Authentication Mode to Form Based. Set the SSO Domain you have created before, and finally specify the Allowed Virtual Hosts, Allowed Virtual Directories and Server Authentication Mode according to your configuration. If you would like to learn more about the ESP configuration, please visit this page.
13. Your configuration is complete. Your users have 2FA enabled when logging in to their Virtual Service.
Log in to Kemp LoadMaster with Rublon 2FA
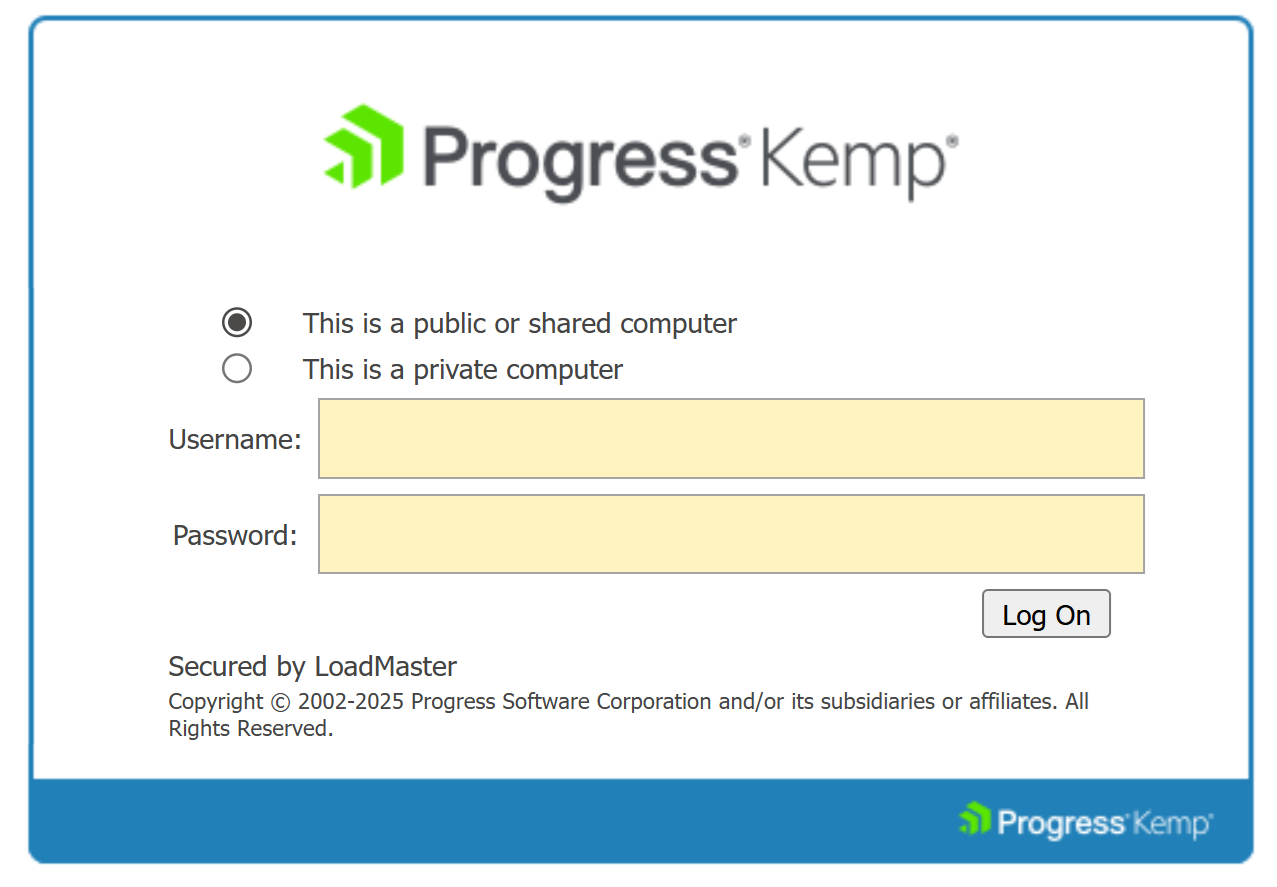
1. Initiate the Kemp Virtual Service and supply LDAP credentials.