Last updated on April 3, 2026
Overview
Rublon Authentication Proxy is an on-premises RADIUS and LDAP proxy server that allows you to enable Multi-Factor-Authentication (MFA/2FA) on any service that supports RADIUS or LDAP authentication protocol.
Supported systems:
- Linux (Ubuntu 20.04, Amazon Linux 2023)
- Windows Server 2012
- Windows Server 2016
- Windows Server 2019
- Windows Server 2022
- Windows Server 2025
Available authentication methods:
- Mobile Push
- Email Link
- Passcode (TOTP, Bypass Code)
- SMS Link
- Phone Call
- YubiKey OTP
Minimum Hardware Requirements:
- 1 CPU
- 300 MB disk space
- 4 GB RAM
How does Rublon Authentication Proxy work?
After you deploy the Rublon Authentication Proxy as an on-premises service and set it up as a RADIUS or LDAP authentication source on one or more services (e.g. OpenVPN), the Rublon Authentication Proxy starts listening for any incoming authentication requests.
When you initiate login to one of the integrated services, the Rublon Authentication Proxy receives an Access-Request. Then, Rublon asks for your IdP credentials. If the user credentials you provided are correct, Rublon initiates the second step of authentication.
After you complete the second step of authentication, the Rublon Authentication Proxy returns an Access-Accept response, which concludes MFA. The following diagram shows a simplified, successful authentication process:

The following diagram portrays a Rublon Authentication Proxy login flow along with the names of protocols used in each part of the transaction.

Before you start
Rublon Authentication Proxy is not an Identity Provider (IdP). Rublon Authentication Proxy is a RADIUS/LDAP proxy server that pulls users from an external IdP. As a result, you have to use (or set up) an external IdP that manages your user identities.
List of tested and verified IdPs:
- Active Directory
- OpenLDAP
- FreeIPA
- FreeRADIUS (standalone, full version)
- Cisco ACS
- Microsoft NPS (Network Policy Server)
Rublon requires a user’s email address to perform 2FA. Consequently, every user who wants to log in using the Rublon Authentication Proxy must have their email address assigned in the Rublon Admin Console. If the user has an email address added to their IdP account, Rublon will automatically add this email address to the Rublon Admin Console during user enrollment. Otherwise, you must manually add the user’s email address in the Admin Console.
Rublon Authentication Proxy does not support RADIUS Accounting. As a result, the Rublon Authentication Proxy does not listen on port 1813. Rublon may add support for RADIUS Accounting in the future. In the meantime, turn off RADIUS Accounting to avoid potential errors.
Install Rublon Authentication Proxy
You can install the Rublon Authentication Proxy on Linux or Windows.
Linux
Important
Note that version 3.3.1 of the Rublon Authentication Proxy does not support Unix distributions with glibc version lower than 2.31. Contact Rublon Support in case you need the Auth Proxy to support those.
- Deploy the latest Linux package in the desired location on the server and unpack it (make sure to change the file name when copy-pasting the command below).
tar -xzf rublonauthproxy-X.Y.Z.tgz - Go to the unpacked folder:
cd rublonauthproxy - Create a service file:
make service - Move the created service file to /lib/systemd/system:
mv rublon.service /lib/systemd/system - Reload daemon services:
systemctl daemon-reload - Utilize the config.template file located in the config/examples directory to generate a config file (either config.json or config.yaml). This file should be placed in the rublonauthproxy/config/ directory. Read more about configuration in the Configure Rublon Authentication Proxy section.
- If the Rublon service does not start automatically after server restart, run the following command:
systemctl enable rublon
Windows
- Download the Rublon Authentication Proxy installer.
- Launch the installer with administrator rights and follow the instructions to complete the installation.
- Utilize the config.template file located in the config/examples directory to generate a config file (either config.json or config.yaml). This file should be placed in the Rublon Auth Proxy\config directory. Read more about configuration in the Configure Rublon Authentication Proxy section.
Note
Some antivirus software, such as CrowdStrike and Kaspersky, may interfere with the installation or operation of the Rublon Authentication Proxy. To avoid this problem, please add Auth Proxy to the list of exceptions or trusted applications in your antivirus settings.
Configure Rublon Authentication Proxy
The configuration file (config.json or config.yaml) must be located inside the rublonauthproxy/config directory. Use proper JSON or YAML convention. All property names must be lowercase.
Example configuration templates are the easiest way to start a configuration. Templates are located inside the rublonauthproxy/config/examples directory after you unpack/install the Rublon Authentication Proxy.
To obtain system_token and secret_key, sign in to the Rublon Admin Console and add a new application of type Rublon Authentication Proxy.
Note that after every change in the configuration file, you must restart the Rublon Authentication Proxy service for the changes to take effect.
Sections
Important
Note that Rublon Authentication Proxy version 3.x is not backward compatible with version 2.x. Upgrading to 3.x will leave your config.json file in its original state, which may lead to configuration errors. To ensure a smooth transition, update the config.json file according to the new configuration format detailed in this section.
The Rublon Authentication Proxy configuration file consists of the following sections:
- rublon
- global
- log
- proxy_servers
- auth_sources
- hosts_whitelist
- directory_sync
The first section, rublon, allows you to bind your Auth Proxy configuration to a specific application of type Rublon Authentication Proxy defined in the Rublon Admin Console. Note that you can define multiple “rublon” sections by adding a suffix number (2-9).
The second section, global, allows you to define general settings that may reference resources outside of the Auth Proxy, like OS environment variables.
The third section, log, allows you to configure logging settings.
The next two sections, proxy_servers and auth_sources, are both lists.
- Use the proxy_servers section to define all proxy servers to be run with the Rublon Authentication Proxy (the Auth Proxy can simulate multiple proxy servers with one installation).
- Use the auth_sources section to define all Identity Providers (IdP) that proxy servers will use.
The hosts_whitelist section allows you to define a list of allowed hosts.
The directory_sync section allows you to synchronize users from Active Directory to the Rublon Admin Console.
Section: rublon
| api_server | Rublon API host (https://core.rublon.net) |
| system_token | The System Token of the application with type Rublon Authentication Proxy added in the Applications tab of the Rublon Admin Console |
| secret_key | The Secret Key of the application with type Rublon Authentication Proxy added in the Applications tab of the Rublon Admin Console |
Note
Starting with Rublon Authentication Proxy 3.7.0, you can define multiple rublon sections by adding a number at the end of the name, like rublon2, rublon3, and so on (up to rublon9). For example, you can define rublon and rublon2:
rublon:
  api_server: https://core.rublon.net
  system_token: YOURTOKEN
  secret_key: yoursecret

rublon2:
  api_server: https://core.rublon.net
  system_token: YOURTOKEN2
  secret_key: yoursecret2
Then, in your proxy_servers or directory_sync section, you can choose which rublon section to use by setting the rublon_section option to the right name. For example:
proxy_servers:
  - name: RADIUS-Proxy
    type: RADIUS
    radius_secret: secret_to_communicate_with_the_proxy
    ip:
    port: 1812
    mode: standard
    auth_source: LDAP_SOURCE_1
    auth_method: email
    rublon_section: rublon
  - name: LDAP-Proxy
    type: LDAP
    ip:
    port: 389
    auth_source: LDAP_SOURCE_1
    auth_method: email
    rublon_section: rublon2
This approach allows you to define multiple applications of the type Rublon Authentication Proxy in the Applications tab of the Rublon Admin Console, and then have a few corresponding proxy server and Directory Sync configurations on a single instance of the Rublon Authentication Proxy.
Section: global
| secret_source | Whether to resolve secrets from environment variables or the config file. Possible values: “plain” – Resolve secrets directly from the Auth Proxy config file. “env” – Resolve secrets from environment variables. For more details, see: Configuring the Rublon Authentication Proxy Secret Source – Environment Variables (env) “winvault” – Resolve secrets from Windows Credential Manager. For more details, see: Configuring the Rublon Authentication Proxy Secret Source – Windows Credential Manager Default: “plain” |
| http_proxy | HTTP Proxy used to proxy MFA authentication requests to the Rublon API. Default: None |
| https_proxy | HTTP Proxy used to proxy MFA authentication requests to the Rublon API. Default: None |
Section: log
| debug | Whether to log more verbose information to log files. Default: false |
| remove_logs_older_than | Logs are stored within a day range. This number indicates how many log files should be kept. If the number of log files reaches this value, the oldest log file is overridden by the newest. Default: 7 |
| syslog_enabled | When set to true, logs are sent to the local syslog daemon via /dev/log. File logging to rublonauthproxy/logs/rublon-authproxy.log remains enabled. This option is supported only on Linux and is ignored on Windows. Default: false |
Section: proxy_servers
You can define one or more proxy servers in this section.
- General proxy server settings apply to all proxies, both RADIUS and LDAP
- RADIUS proxy server settings apply only to proxies that are RADIUS proxies
- LDAP proxy server settings apply only to proxies that are LDAP proxies
General proxy server settings
This subsection describes the possible options of a single element in the “proxy_servers” array inside the configuration file. These options are related to both RADIUS and LDAP proxy servers.
| name | The name for this PROXY. It will be printed in the logs to distinguish between the servers. |
| type | The auth protocol that this proxy should simulate. Possible values: “LDAP” or “RADIUS” Default: “RADIUS” |
| ip | The IP address on which the proxy will listen. If this option is not defined in the config file, the Rublon Authentication Proxy will listen on 0.0.0.0. |
| port | The port the proxy will be listening on. If you configure more than one server, make sure to provide different ports for each server. Default: 1812 |
| auth_timeout | Time limit (in seconds) for a user to finish MFA. After that time the login request will be rejected and the user will have to re-authenticate. Default: 90 |
| auth_source | Indicates which authentication source should be used for primary authentication. Use the names of auth sources configured in the auth_sources section. You can specify backup authentication sources by separating them by a comma, e.g., “NAME,NAME_2”. Note: The LDAP proxy server works only with LDAP authentication sources and all auth_sources have to be of the same transport_type. See the configuration examples located in config/examples for more details. |
| use_append_mode | Available only in “standard” mode. Allows the user to choose the authentication method by appending it to the password. More details can be found here. If proxy_request is set to true, Append Mode is supported only with the PAP protocol. Default: false |
| append_mode_separator | If “use_append_mode” is set to true, AppendMode will use this value to extract the appended auth method used by the user. Default: “,” (comma) |
| auth_method | The authentication method used for MFA. Valid Values Valid values are “push”, “email”, “smsLink”, and “phoneCall”. Passcode and YubiKey OTP are not valid auth_method values and must not be configured in auth_method. If these methods are enabled in the Rublon Admin Console and Append Mode is enabled, the user simply appends the Passcode / Bypass Code / YubiKey OTP to their password after the separator during login. If you use the Rublon Authentication Proxy as a RADIUS Proxy server and your integrated service supports Passcode / YubiKey OTP authentication method, you can alternatively use these methods in the same way in NoCred Mode and Challenge Mode. Sequencing Methods You can provide a sequence of values, e.g., “push,email,phoneCall”. In this case, if “push” fails, “email” will be used instead. If “email” also fails, then “phoneCall” will be used. Consistency with Rublon Admin Console Settings Make sure that the authentication methods you intend for your users to use are enabled in the Rublon Admin Console for the Rublon Authentication Proxy application, either through the application’s Custom Policy or through the organization’s Global Policy. For methods configured in auth_method, make sure that the methods allowed in the Rublon Admin Console are consistent with the values configured in auth_method, and ensure that each user has at least one of these methods enrolled. Otherwise, users without any enrolled method will not be able to gain access. Passcode and YubiKey OTP are not auth_method values, but they must still be allowed in the Rublon Admin Console if you want users to authenticate with them. Default Value Default: “email” |
| fail_mode | Either “bypass” or “deny”. Indicates whether the user’s access should be bypassed or denied when connection issues with a Rublon server occur. Default: “bypass” |
| use_username_as_email | Allows using the username as an email address. If the username is not a valid email address, Rublon Authentication Proxy fetches the email address from the authentication source. Default: false |
| rublon_section | Defines the name of the rublon section to be used with the proxy server. If you have defined more than one rublon section, e.g., rublon, rublon2, and rublon3, and want to use rublon3 with this proxy server, set rublon_section to rublon3. Default: “rublon” |
RADIUS proxy server settings
This subsection describes the possible additional options of a single element in the “proxy_servers” array when the element is a RADIUS proxy server.
| radius_secret | The RADIUS secret that services will use to communicate with the Rublon Authentication Proxy. Note that even if you use LDAP as your authentication source, you still need to set the radius_secret. You have to generate this value yourself. We recommend you use a password-generating tool to generate a strong and secure RADIUS secret. |
| mode | “standard” – Log in using a predefined MFA auth method or using Append Mode. More info and examples: Standard Mode. “challenge” – Use Radius Challenge. Rublon Authentication Proxy will respond with the AccessChallenge packet and wait for the authentication method provided in the next request e.g. “email”, “push”. More info and examples: Challenge Mode. “nocred” – Specific system integration. Rublon Authentication Proxy will search for user email in AD, and then perform 2FA against Rublon. More info and examples: NoCred Mode. Default: “standard” To learn more about Auth Proxy Modes, refer to Rublon Authentication Proxy Modes Explained. |
| client_ip_attr | The RADIUS attribute that contains an IP address, which will be displayed during the user authentication process, e.g., “NAS-IP-Address”. If this attribute is not found within the request authentication packet, the IP address found in the UDP datagram will be used. It will usually be a local IP address. Case-sensitive. Default: “Calling-Station-Id” |
| radius_class_attr | The RADIUS CLASS attribute that will be sent in the “Access-Accept” response by the proxy. |
| force_message_authenticator | Whether to drop all request packets from clients with invalid or missing “Message-Authenticator” values. Default: true |
| challenge_message | Message displayed on challenge request in the Reply-Text attribute. Used only in Challenge Mode. Default: Enter your challenge code |
LDAP proxy server settings
This subsection describes the possible additional options of a single element in the “proxy_servers” array when the element is an LDAP proxy server.
A few things to note when configuring the LDAP proxy server:
- Option transport_type will be copied from the authentication source configured for the proxy server. This means that whether to use a PLAIN or SSL connection is determined by the auth_source.
- When using “ssl” (or “starttls”) transport type (which again, is determined by the authentication source), you will have to provide a certificate and private key for the proxy server itself
- CA certificates will be taken from the auth_source configuration
- If CA certificates are not found under the configured ca_certs directory, they are omitted. However, when at least one of the certificates is present in this directory, the Rublon Authentication Proxy will verify it and deny the connection if it is untrusted.
| cert_path | The path to the trusted certificate for LDAP Proxy over SSL. This is the certificate that the Rublon Authentication Proxy will use to gain the trust of the integrated applications. For more information, refer to How to set up LDAPS certificates in the Rublon Authentication Proxy?. |
| pkey_path | The path to the private key used when setting up the LDAP Proxy over SSL. |
| pkey_password | Password to the private key given above. Leave it empty when the private key is not protected by a password. |
| allow_anonymous_bind | Allows the use of anonymous binds (connection without a username and password) with the LDAP connection. Default: false |
Section: auth_sources
You can define one or more authentication sources in this section.
- LDAP source settings applies only to LDAP authentication sources
- RADIUS source settings applies only to RADIUS authentication sources
LDAP source settings
You can configure multiple LDAP authentication sources by adding more than one list element in the “auth_sources” section. See the configuration examples located in config/examples for more details.
| name | The unique identifier used to distinguish this authentication source. Ensure all names under the auth_sources section are unique. |
| type | The auth protocol that this authentication source uses: “LDAP” or “RADIUS” |
| ip | The hostname or IP address of the Active Directory used for primary authentication. |
| port | The LDAP port used for primary authentication. By default, port 389 is used for “plain” connection (LDAP) and port 636 is used for “ssl” (LDAPS). |
| transport_type | “plain” – Does not use encryption when connecting via LDAP, not recommended due to security concerns. “ssl” – Uses SSL encryption and trusts certificates located inside the certs directory if present. “starttls” – Starts with a normal connection and then immediately switches to an encrypted one. Default: “plain” |
| search_dn | Rublon uses the Distinguished Name to search for groups of users that will authenticate with the Rublon Authentication Proxy. This is typically your company’s AD FQDN. Example: dc=example,dc=com Here’s how to find FQDN. |
| access_user_dn | The full case-insensitive Bind DN of a user that has Read rights in Active Directory. This account will be used for user searches. We suggest creating an additional user with Read-only rights. Here’s how to find Bind DN. |
| access_user_password | The password of the user access user mentioned above. Not required in the LDAP Proxy. |
| security_group_dn | The distinguished name of a group whose users will be authenticated against. If not set, all users found by using search_dn will be able to log in. |
| ca_certs_dir_path | The path to the directory containing CA certificates for the SSL connection that the Auth Proxy should trust when connecting to the LDAP server. Certificates should be in .pem format, with one certificate per file. By default, Rublon Authentication Proxy will search inside the config/ca_certs directory. For more information, refer to How to set up LDAPS certificates in the Rublon Authentication Proxy?. |
| email_attribute | Rublon needs a user’s email address to link the user to their Rublon account. The email_attribute allows you to choose which Active Directory attribute to use as an email attribute. If you have a custom AD attribute that stores email addresses, then provide the name of this AD attribute here. Default: “mail” |
| custom_filter | Rublon Authentication Proxy will grant access only to the users matching this LDAP filter. Use standard LDAP filter syntax. |
| timeout | The time (in seconds) after which the LDAP connection attempt will be aborted and access rejected. Default: 10 |
| username_attribute | Specifies the attribute whose value will be sent to the Rublon Admin Console as the username. Default: sAMAccountName |
RADIUS source settings
You can configure multiple RADIUS authentication sources by adding more than one list element in the “auth_sources” section. See the configuration examples located in config/examples for more details.
| name | The unique identifier used to distinguish this authentication source. Ensure all names under the AUTH_SOURCES section are unique. |
| type | The auth protocol that this authentication source uses: “LDAP” or “RADIUS” |
| ip | The IP address of the RADIUS server used for primary authentication. |
| port | The port of the RADIUS server for Access-Request. Typically, this port is 1812. |
| radius_secret | The RADIUS Secret used in the Rublon Authentication Proxy – RADIUS server communication. If this option is not defined in the config file, the proxy’s radius_secret is used. |
| timeout | The time (in seconds) after which a single connection attempt with the RADIUS server will be aborted. Note that you have to multiply this value by the retries count to get the actual time, after which Rublon will abort trying to connect to the RADIUS server. Default: 5 |
| retries | The number of reconnection attempts when a response is not received. Default: 3 |
| proxy_requests | Whether to proxy requests to the RADIUS server. Rublon MFA will be performed after successful authentication. Works only in “standard” proxy mode. Note that you will have to set the proxy’s RADIUS Secret to the same value as the RADIUS server secret. See Non-PAP protocol for RADIUS communication communication for more information. Default: false |
| nas_ip_address | The IP address that will be sent in the “NAS-IP-Address” attribute to the RADIUS server. If this option is not defined in the config file, no “NAS-IP-Address” is sent. However, proxied requests will copy “NAS-IP-Attribute” from origin requests. |
| force_message_authenticator | Whether to drop from auth-source the packets with invalid or missing “Message-Authenticator” attribute. This option secures the proxy from Blast-RADIUS attacks. Default: true |
Section: hosts_whitelist
A list of hosts allowed to send requests to the proxy. Requests coming from hosts (IPs) not included in this list will be ignored.
If the list is empty (or not present), all hosts are allowed to log in. If the list is not empty, only hosts specified in the list are allowed to log in
IP ranges and CIDRs are not supported yet.
Configuration example:
rublon: ...
proxy_servers: ...
auth_sources: ...
hosts_whitelist:
  - 192.168.0.5
  - 172.16.1.11
Section: directory_sync
This section allows you to synchronize users from Active Directory to the Rublon Admin Console using Directory Sync. For more information, read How to synchronize users from Active Directory using AD Sync and Active Directory Sync – FAQ.
| enabled | Whether to run Directory Sync while the Rublon Authentication Proxy is running. The Directory Sync will generate a random time for the synchronization and run in 12-hour intervals. Note that this option is ignored when running the sync manually using the rublon-directorysync.exe. Default: false |
| auth_source | The name of the authentication source found under the auth_sources section that Directory Sync will synchronize users against. The auth source must be of type “LDAP”. |
| source_type | The type of the LDAP source. Possible values are: “ad” or “openldap” Default: ad |
| group_dns | The list of full DNs (distinguished names) of the groups to get the users from. Members of these groups will be added to the Users tab of the Rublon Admin Console. Listed groups will be added to the Groups tab. Note that this option is heavily dependent on the auth_source’s search_dn. Users are first filtered by the search_dn, and then a membership check is conducted to check if they belong to the specified groups. If this option is not defined in the config file, all users and all their groups found by the auth_source’s search_dn will be synchronized. Example: [“cn=some-group,dc=example,dc=org”] |
| groups_attribute | The attribute that will be used to get the user’s groups. These groups will be added to the Groups tab of the Admin Console. When group_dns is set in the configuration, groups_attribute is used to filter the users by groups. Default: memberof |
| import_groups | Whether to import groups to the Admin Console. Note that if group_dns is set and import_groups is set to false, it will import users from those groups, but not the groups themselves. Default: true |
| import_phones | Whether to import phones from Active Directory. Default: false |
| username_attribute | The attribute that will be used to get the username. It will be mapped to the user’s Username field in the Users tab of the Rublon Admin Console. Default for source_type: ad: sAMAccountName Default for source_type: openldap: uid |
| fullname_attribute | The attribute that will be used to get the full name. It will be mapped to the user’s Full Name field in the Users tab of the Rublon Admin Console. Default for source_type: ad: displayName Default for source_type: openldap: cn |
| email_attribute | The attribute that will be used to get the email address. It will be mapped to the user’s Email Address field in the Users tab of the Rublon Admin Console. Default: mail |
| phone_attribute | The attribute that will be used to get the phone number. It will automatically add a phone to the user’s Phones list in the Rublon Admin Console. Works only if import_phones is set to true. Default: telephoneNumber |
| user_aliasX | Replace “X” with a unique number ranging from 1 to 9, e.g. user_alias1. The attribute that will be used to fetch the user’s alias. You can add multiple of those, but ensure the alias numbers are unique. Example:user_alias9: cn Note that if this option is set, it will override the existing user alias for this user in the Admin Console under the specified number. |
| rublon_section | Defines the name of the rublon section to be used with Directory Sync. If you have defined more than one rublon section, e.g., rublon, rublon2, and rublon3, and want to use rublon2 for Directory Sync, set rublon_section to rublon2. Default: “rublon” |
| timeout | Timeout setting for requests to the Rublon API. Default: 60 |
Append Mode
Append Mode allows you to choose your authentication method by appending specific values to your password when logging in to an integrated service. The specific value is preceded by the append mode separator.
There are a few restrictions when it comes to Append Mode configuration:
- For RADIUS Proxy, it works only in “standard” mode and by using the PAP authentication protocol. It does not work when proxying requests to the RADIUS server.
- For LDAP Proxy, it always works, no matter which protocol is being used (“plain”/ “starttls” / ”ssl”)
Enable Append Mode by adding the following options to one of your server’s configurations under the “proxy_servers” section:
“use_append_mode”: true
“append_mode_separator”: “,”
By default, the separator is set to “,” (comma).
How does it work?
You can read more about Append Mode in this document.
Non-PAP protocol for RADIUS communication
Note
Non-PAP protocols do not work with an LDAP server configured as an authentication source. Non-PAP protocols only work with a RADIUS server.
By default, the Rublon Authentication Proxy uses only the PAP protocol to authenticate users. This means that all systems that try to use other protocols (like CHAPv1, EAP-MS-CHAPv2) to communicate with Rublon Authentication Proxy will not work. However, it is possible to configure the Rublon Authentication Proxy to proxy all non-PAP requests to the RADIUS server.
To do so, add:
"proxy_requests": true
To your RADIUS auth_source in the configuration file. Rublon MFA will be performed upon receiving the Access-Accept response packet from the RADIUS server.
If the RADIUS server was configured to accept these protocols, protocols such as CHAPv1 or MS-CHAPv2 (even EAP-MS-CHAPv2) should work from now on.
High Availability
If you run multiple services protected using the Rublon Authentication Proxy and cannot afford an interruption in authentication performance, refer to How to Set Up the Rublon Authentication Proxy in High Availability Mode for step-by-step instructions on how to deploy the Auth Proxy in High Availabiltiy (HA) mode using a Load Balancer and two (or more) Proxy instances.
Start Rublon Authentication Proxy
Linux
To run the Rublon Authentication Proxy, start the service using one of the following commands:
systemctl start rublon.service
or
service rublon start
You can also first run the Rublon Authentication Proxy as a terminal application to ensure everything is set up properly. This will print the log messages directly into your terminal’s stdout:
sudo rublonauthproxy/bin/rublon-authproxy
Windows
Run the Rublon Authentication Proxy as a console application to ensure everything is set up properly:
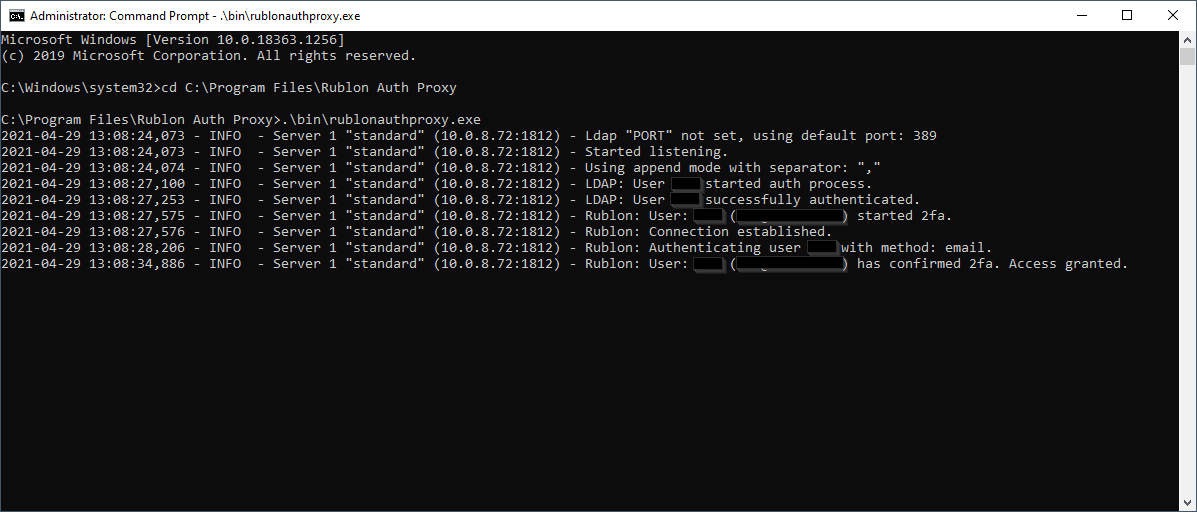
- Open cmd as administrator and go to the proxy’s installation directory:
cd C:\Program Files\Rublon Auth Proxy
- Run the proxy:
.\bin\rublon-authproxy.exe
If Rublon Authentication Proxy is configured properly, the console displays the Started listening log. At this point, you can test user authentication. To test user authentication, use NTRadPing or start configuring Rublon with one of the services that support the Rublon Authentication Proxy.
If everything works, start the proxy as a service:
net start RublonAuthProxy
Alternatively, you can start the proxy as a service in the following way:
- Find Rublon Authentication Proxy Service on the Windows services list (services.msc).
- Right-click Rublon Authentication Proxy Service and select Start.
Update Rublon Authentication Proxy
Linux
- Stop Rublon service:
systemctl stop rublon.service
or
service rublon stop - Make a backup of your current config file(s).
- Follow the instructions detailed in Uninstall Rublon Authentication Proxy
- Follow the instructions detailed in Install Rublon Authentication Proxy
Windows
Run the installer over your current installation to update Rublon Authentication Proxy. Config and log files will be preserved.
Uninstall Rublon Authentication Proxy
Linux
- Stop Rublon service:
systemctl stop rublon.service
or
service rublon stop - Remove rublon.service:
rm -f /lib/systemd/system/rublon.service - Remove the rublonauthproxy directory:
rm -rf rublonauthproxy
Windows
Run the unins000.exe file located in the installation directory. Note that configuration and log files will be preserved.
Troubleshooting
If you are facing an issue with the Rublon Authentication Proxy, try restarting the Rublon Authentication Proxy.
If restarting the Rublon Authentication Proxy didn’t fix your issue, take a look at the Rublon Help articles related to the Rublon Authentication Proxy, especially Troubleshooting Rublon Authentication Proxy issues.
If you have not found a solution for your issue in Rublon Help, go to your configuration file and set the debug option to true. Then, check the contents of your rublon-authproxy.log file. Information contained in this file should in most cases be enough to troubleshoot issues related to the Rublon Authentication Proxy.
If you installed the Rublon Authentication Proxy on Windows, then rublon-authproxy.log is located in the following location:
C:\Program Files\Rublon Auth Proxy\logs\rublon-authproxy.log
If you installed the Rublon Authentication Proxy on Linux, then rublon-authproxy.log is located in the following location:
rublonauthproxy/logs/rublon-authproxy.log
Note that most issues occur due to incorrect configuration.
If you encounter any issues with your Rublon integration, please contact Rublon Support.
Related Posts
Rublon Authentication Proxy – Release Notes
Rublon Authentication Proxy – Integrations
Rublon Authentication Proxy – Download
Rublon Authentication Proxy – Archive (Older Versions)
How to Set Up the Rublon Authentication Proxy in High Availability Mode
Rublon Authentication Proxy Modes Explained
Configuring the Rublon Authentication Proxy as an LDAP Proxy Server
Configuring the Rublon Authentication Proxy as a RADIUS Proxy Server
How to synchronize users from Active Directory using Directory Sync
How to synchronize users from OpenLDAP using Directory Sync
Configuring the Rublon Authentication Proxy Secret Source – Environment Variables (env)
Configuring the Rublon Authentication Proxy Secret Source – Windows Credential Manager