Last updated on December 8, 2025
Overview
Supported Authentication Methods
Demo Video

Before you start
- Ensure you have installed and fully configured Zabbix
- Install php-openssl
- Install and configure Rublon Access Gateway before configuring Zabbix to work with it. Read the Rublon Access Gateway documentation and follow the steps in the Installation and Configuration sections. Then, follow the Configuration section in this document.
Configuration
Follow these steps to enable Rublon 2FA on Zabbix.
Zabbix Server
1. From the Zabbix root web directory, go to conf/certs.
2. The conf/certs directory should contain the following files:
- sp.crt – Zabbix domain certificate
- sp.key– Zabbix domain private key
- idp.crt – a certificate you can download from Rublon Access Gateway (Applications → Information for configuring applications with Rublon Access Gateway → DOWNLOAD CERTIFICATE)

Note
Zabbix Frontend
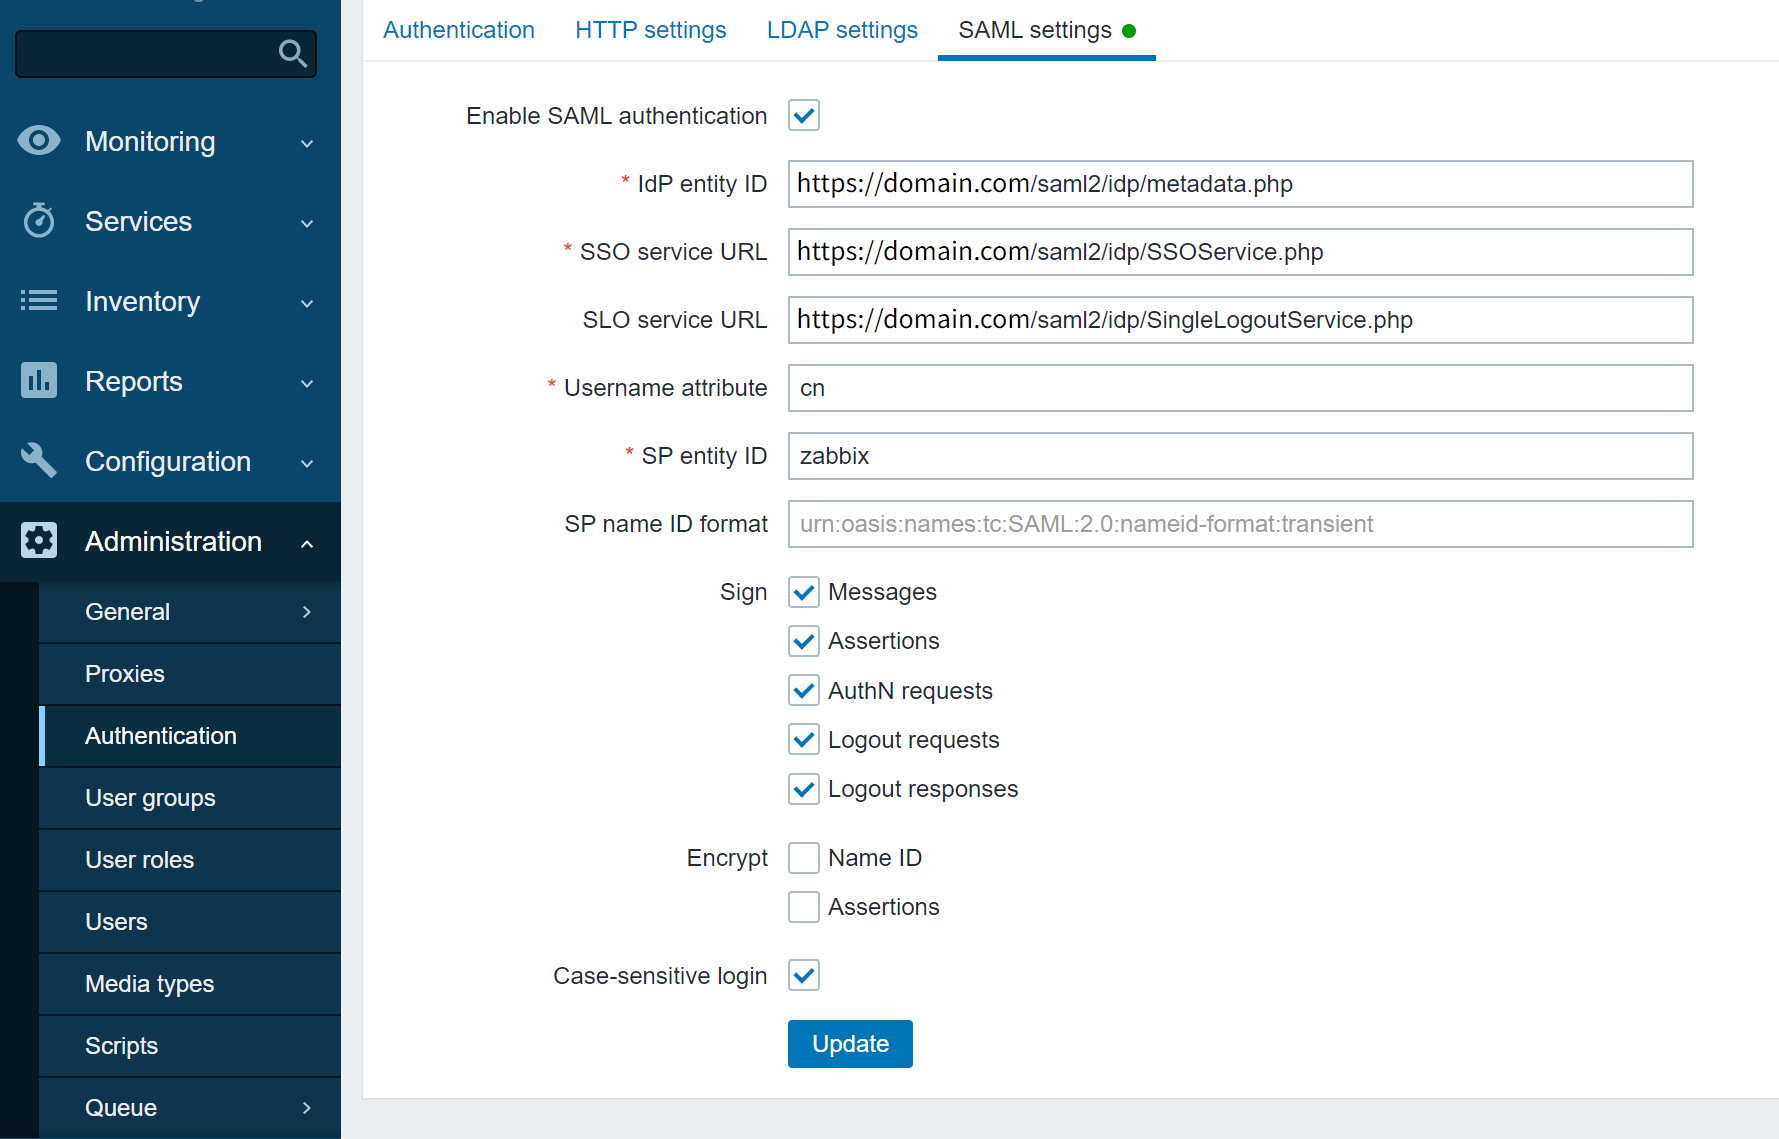
| IdP entity ID | Enter the value of Entity ID from Rublon Access Gateway (Applications → Information for configuring applications with Rublon Access Gateway). |
| SSO service URL | Enter the value of SSO URL from Rublon Access Gateway (Applications → Information for configuring applications with Rublon Access Gateway). |
| SLO service URL | Enter the value of Logout URL from Rublon Access Gateway (Applications → Information for configuring applications with Rublon Access Gateway). |
| Username attribute | The name of the parameter containing the username in the authentication source you use. For example, if you use Active Directory, enter cn. |
| SP entity ID | Enter the name of your domain or e.g., zabbix. Note that the SP entity ID you set here must be the same as the Entity ID field in the Rublon Access Gateway later on during configuration. |
5. Click Update to save your SAML settings.
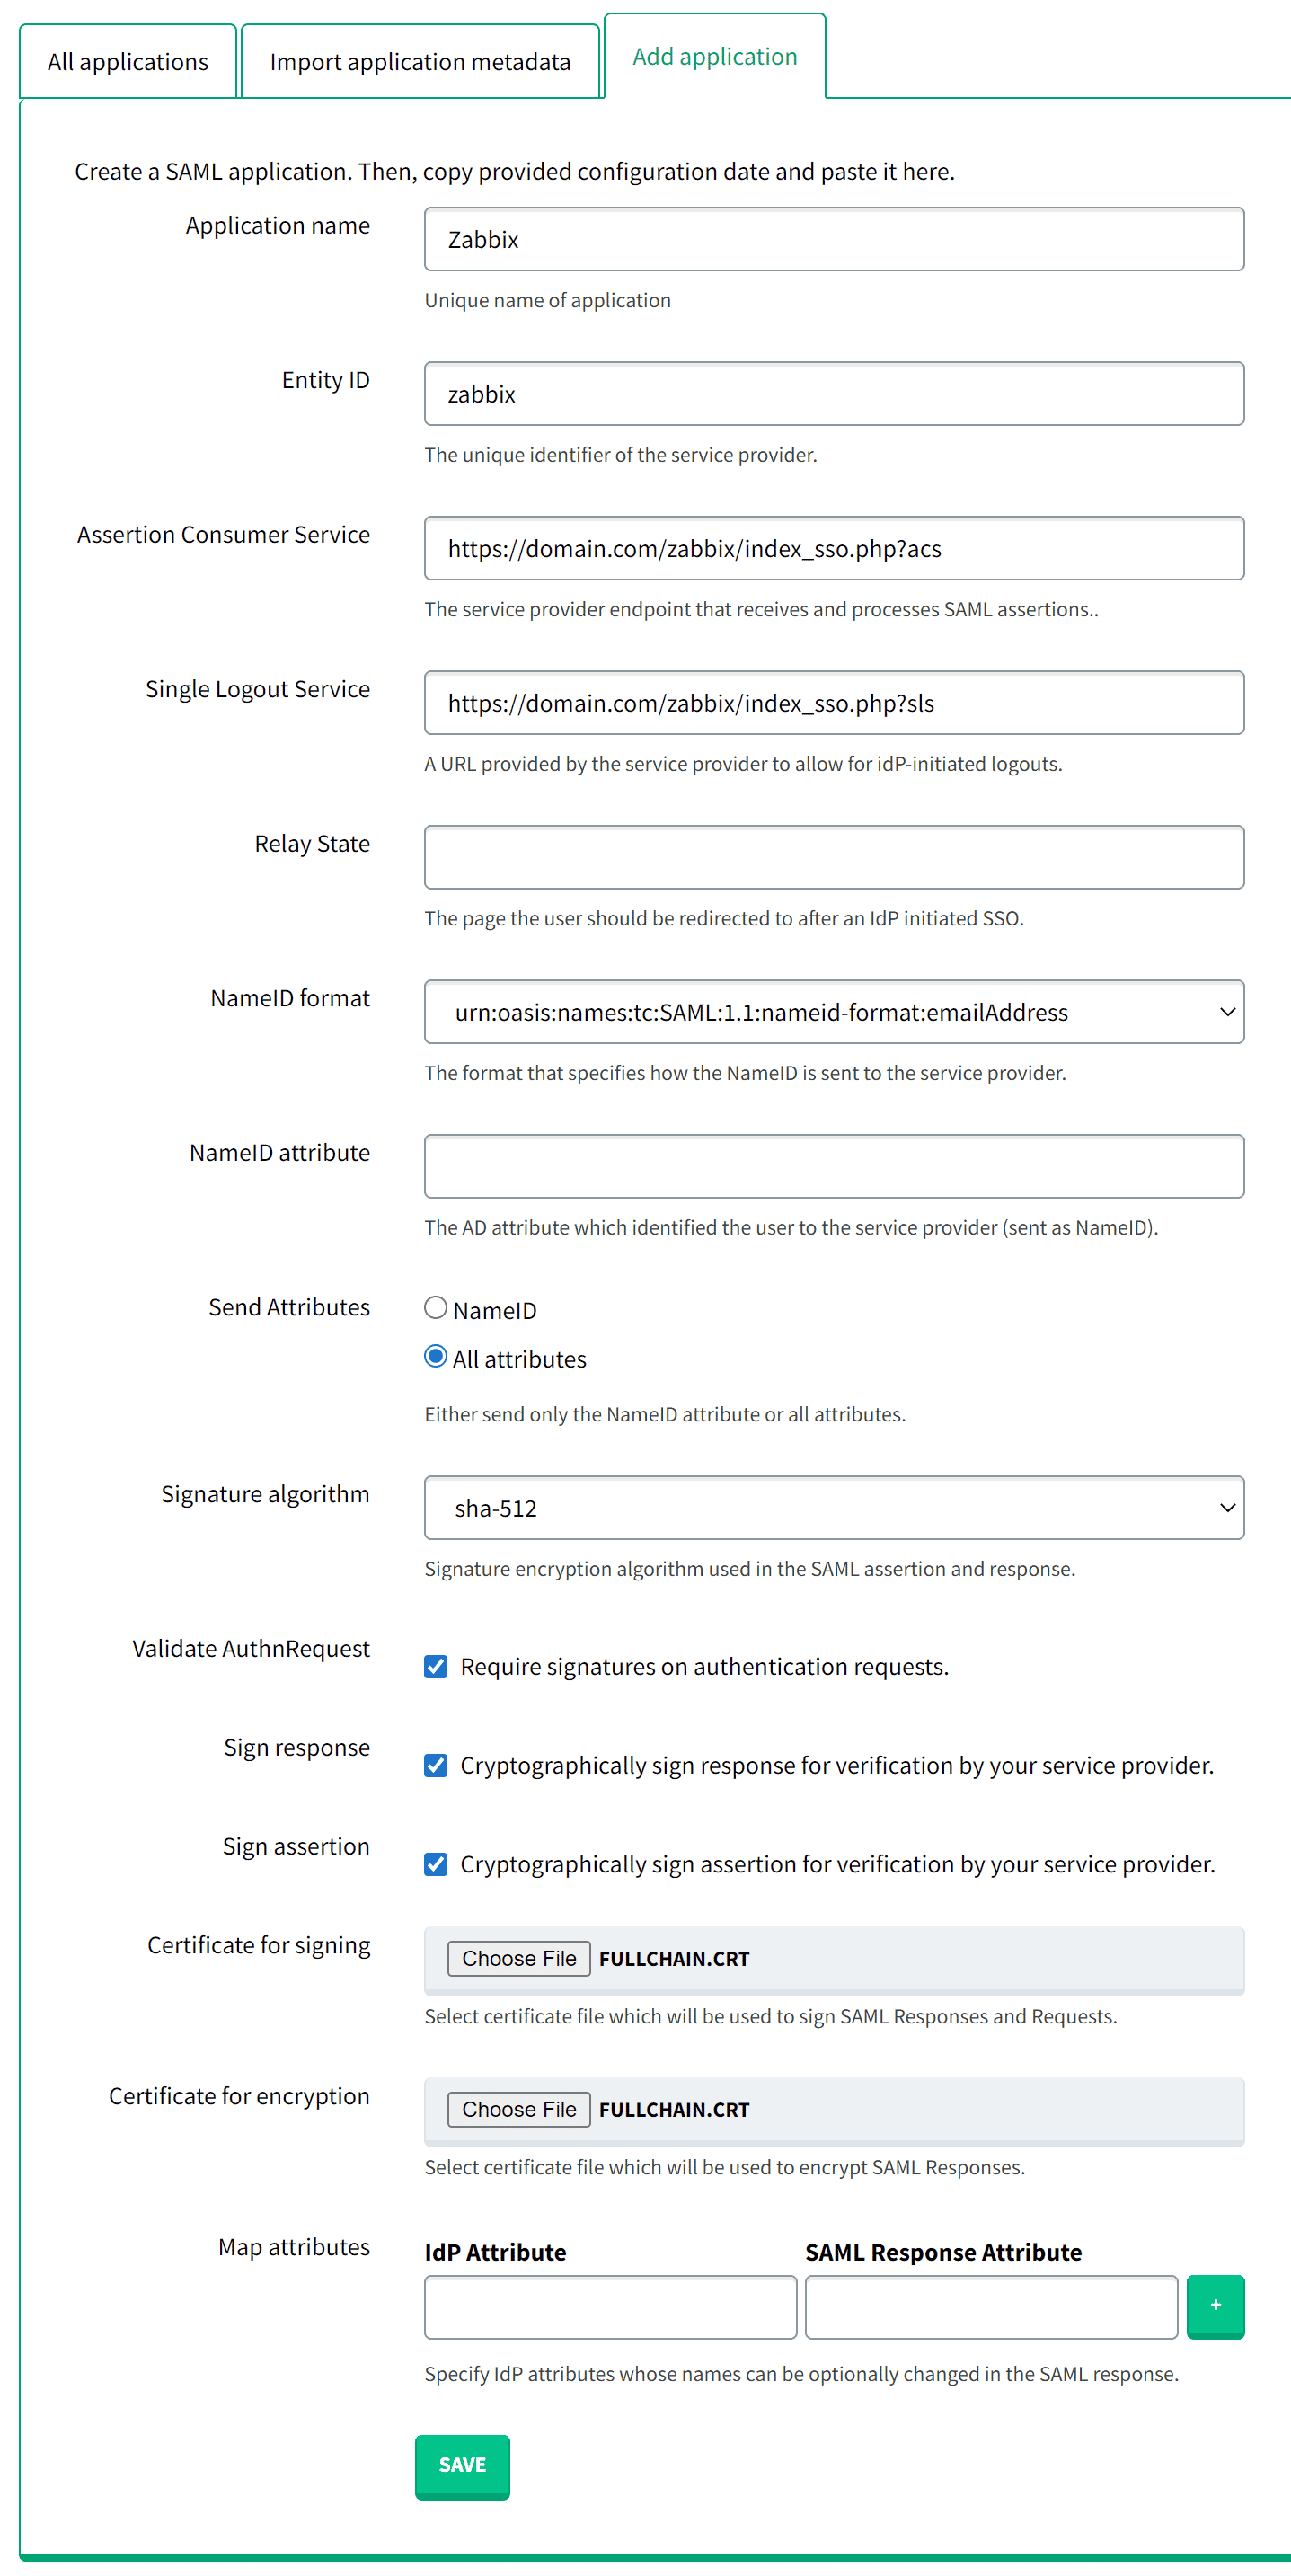
Rublon Access Gateway
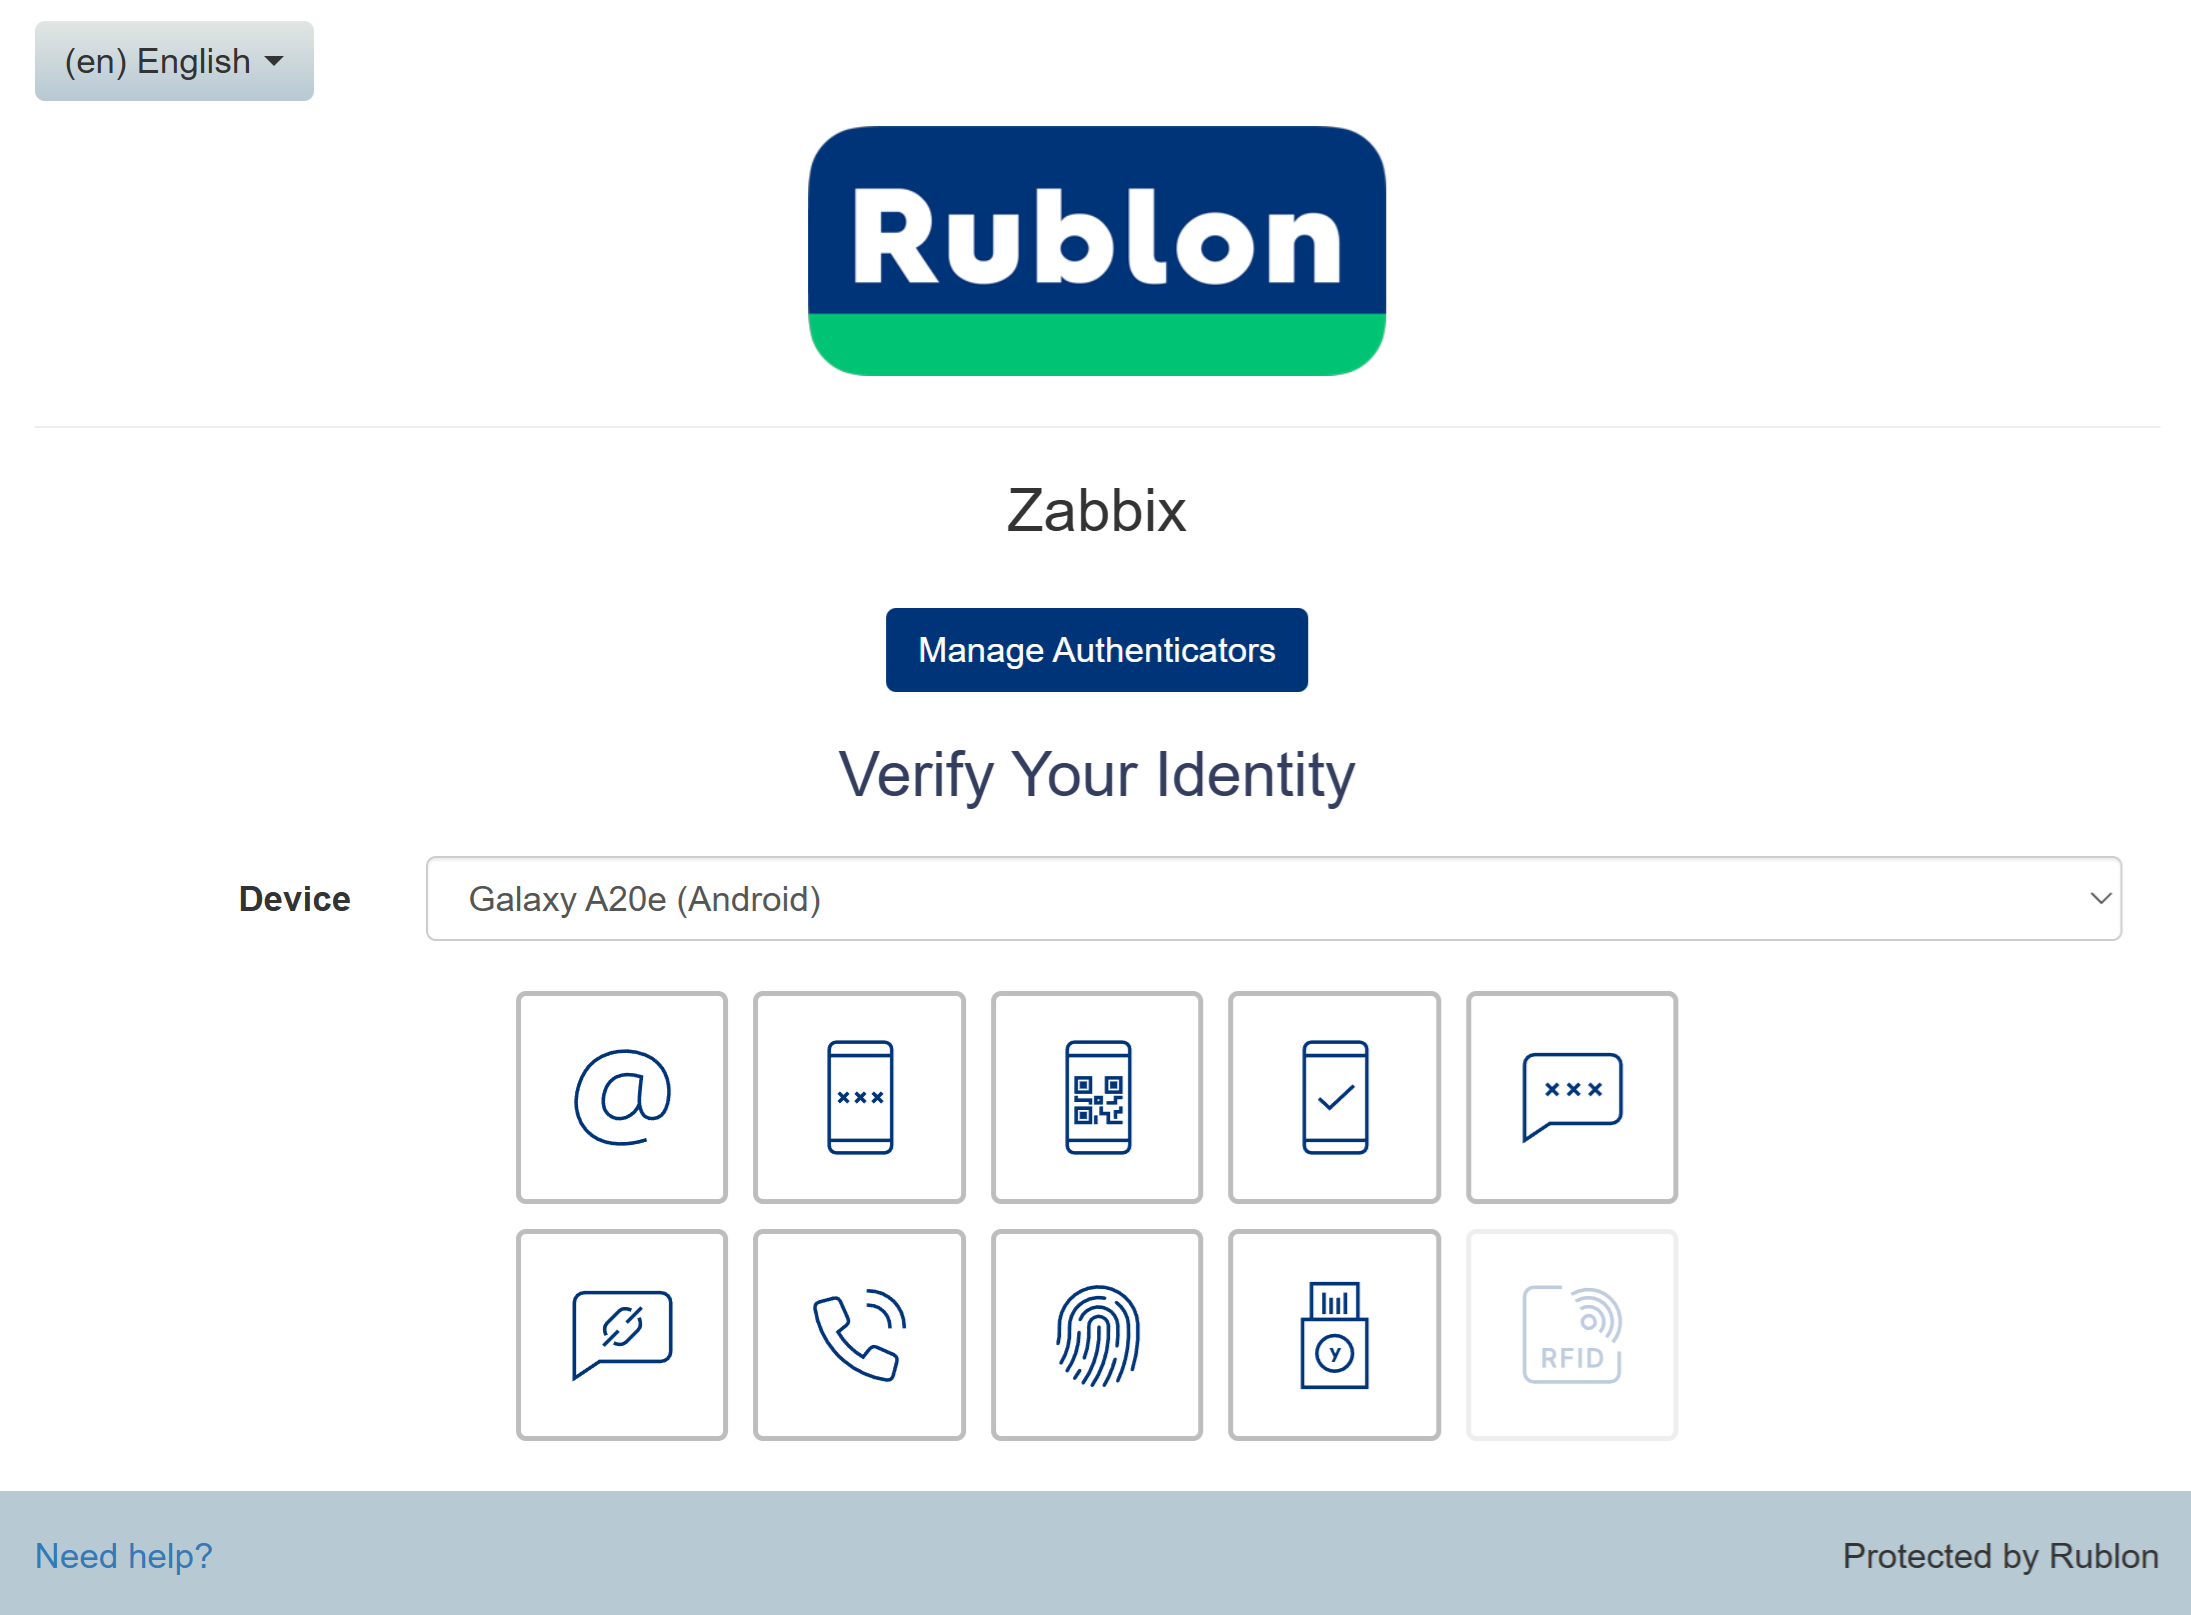
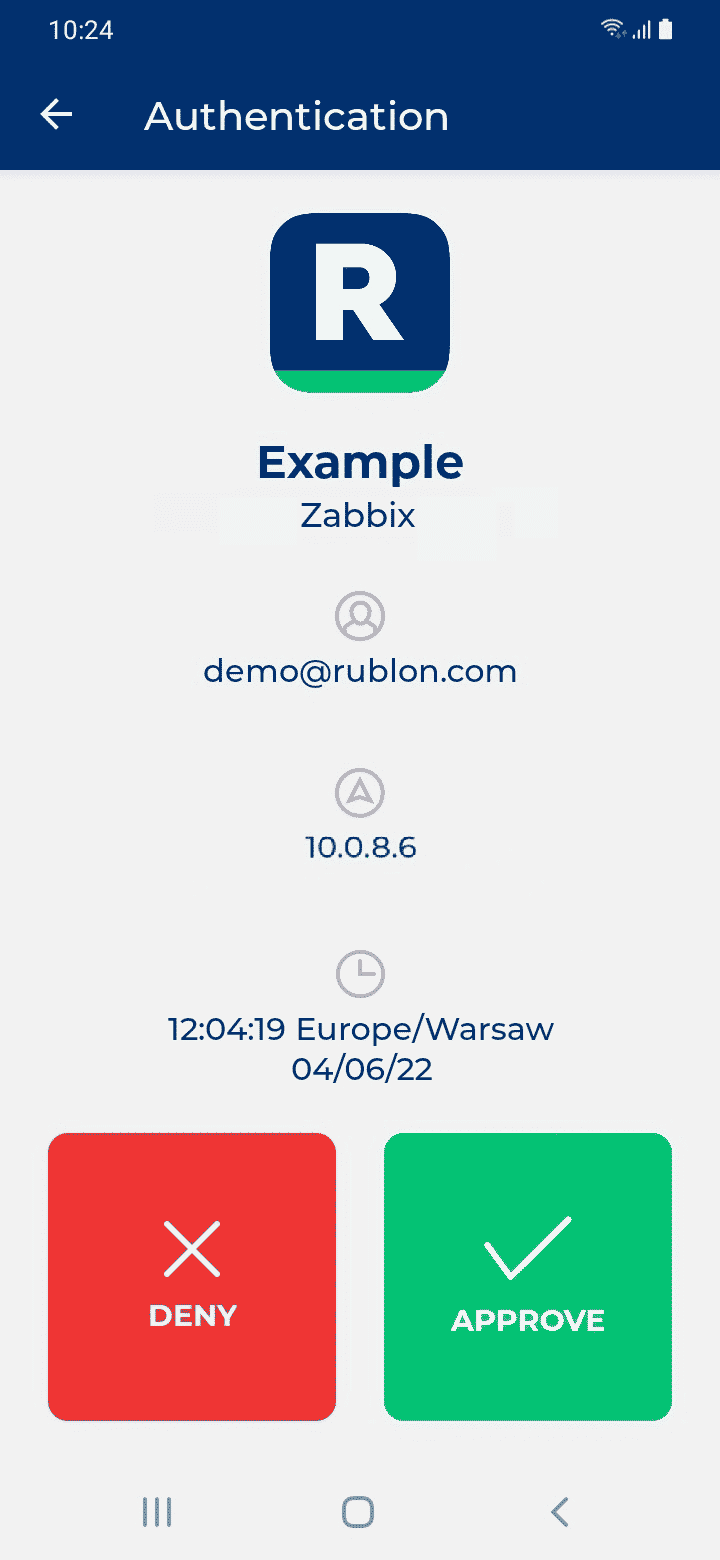
Test Your Zabbix Integration


Note
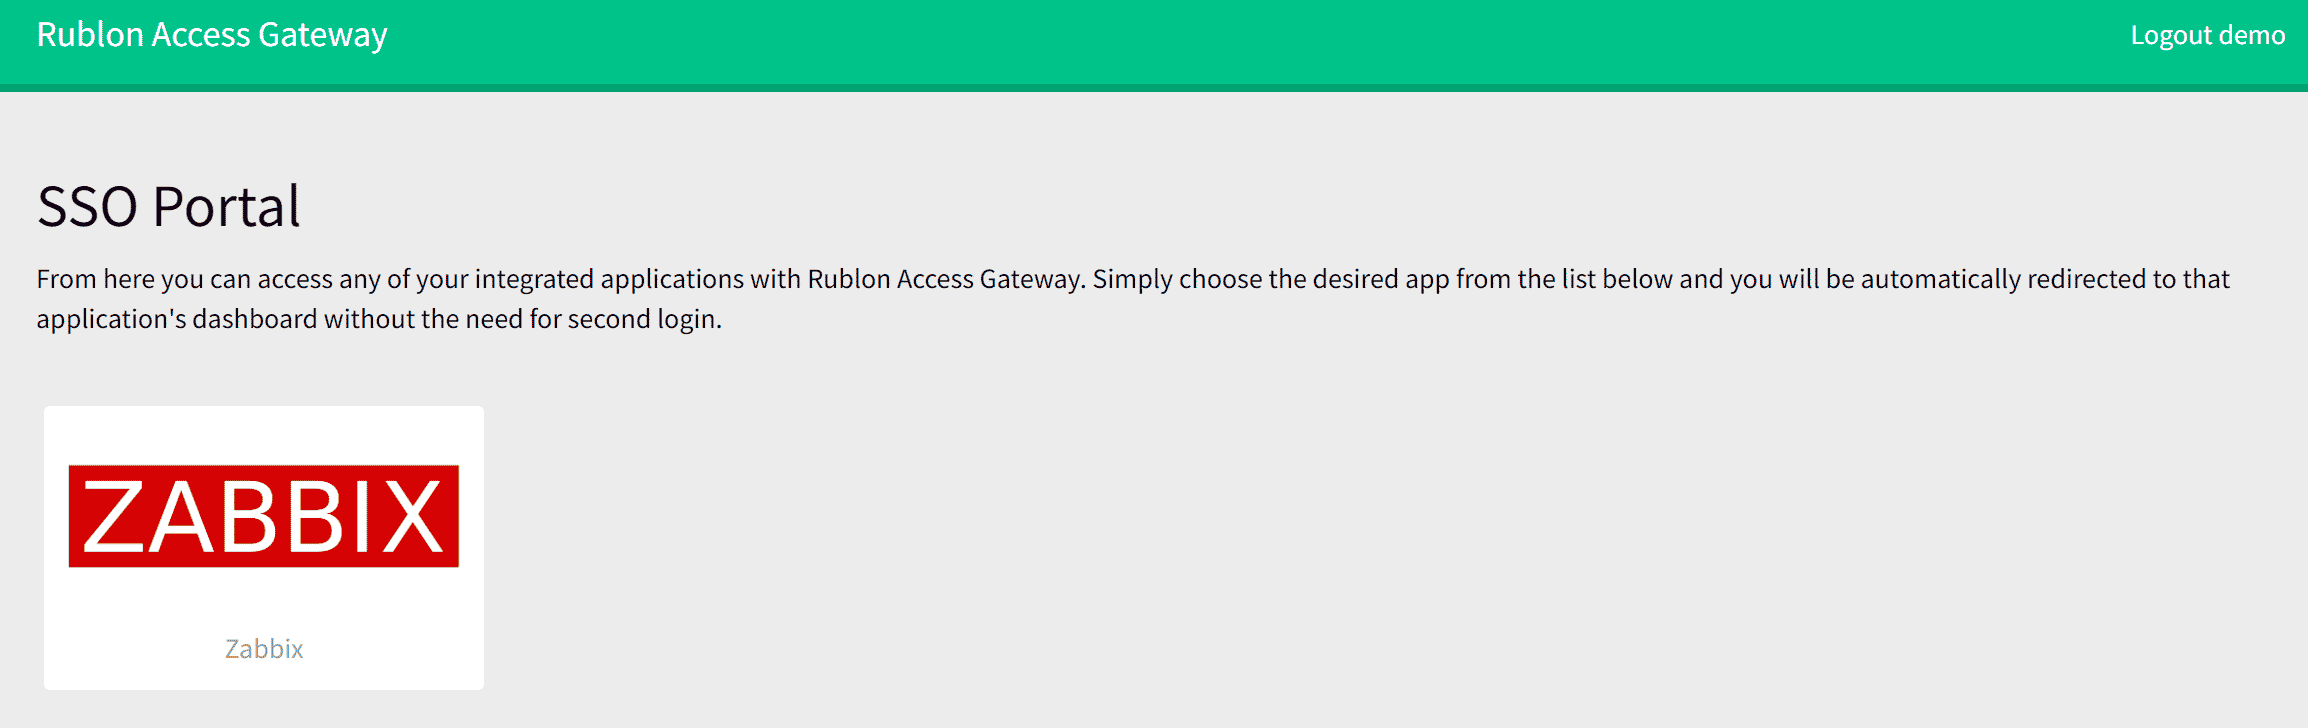
Test Your Zabbix Login via the Rublon SSO Portal